Other Crafts
Description
This section is from the book "Everybody's Handicraft Handbook", by Progress Press. Also available from Amazon: Everybody's Handicraft Handbook.
Other Crafts
There are many forms of craft work not covered in this manual. It is impossible to list them all. but a few of the more popular are described briefly below.
Shells
Shells found on any beach can l>e used to make figurines. They should be cleaned first with soap and water. Heads are made by painting the mouth, nose and eyes on the outside with the hinge end down. Another shell forms the body. The two can be cemented together with the edge of one overlapping the outer surface of the other. Rubber cement or a quick setting glue can be used. Pipe cleaners provide arms and legs with small shells attached for hands and feet. A variety of fantastic animals and birds can also be made in this manner (fig. 277).
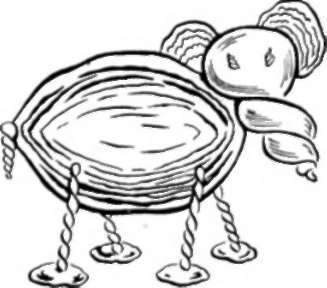
Figure 277.
Nuts
Cross sections of walnuts make decorative buttons or may be laced together with thin strips of leather to make a belt (fig. 278).
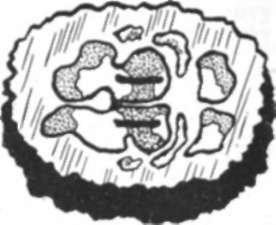
Figure 278.
They should be cut across the grain of the nut with a coping saw and shellacked or waxed after the kernels have been removed.
Peach pits and the stones of other fruits can be carved with an ordinary pocket knife into a variety of human and animal shapes. They should be washed and dried before carving (fig. 279).
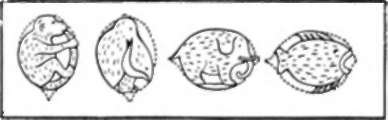
Figure 279.
Cocoanut shells may be made into cups, small lamp shades, or holders for balls of twine. Faces or designs can be either painted or carved on the outside. Peanuts and the shells of other small nuts can be glued with pipe cleaners to form many amusing figurines.
Coins
Antique coins make attractive jewelry. Some countries have no laws against defacing coins, but this should be investigated before starting. Drilled coins can be strung together to make bracelets or necklaces. Rings are formed by tapping the rim of a coin, turning it frequently, until it is compressed to the right diameter. The hammering will also make it thicker. The center is then drilled out and the ring filed and polished.
Semiprecious stones or pebbles with unusual markings can be found in some localities. A thin coin about the size of a dime will make a setting for one of these if its center is cut out in a clover leaf pattern and the stone wedged firmly between the prongs thus formed (fig. 280). The cutting is done by drilling a round hole in the coin and filing out the indentations. The mounted stone may then be soldered to a ring of the type described above.
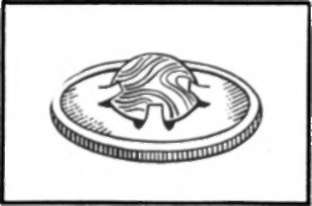
Figure 280.
Cork
Cork from bottle caps provides materials for mats, coasters and similar articles. The small discs inside the caps are glued to a piece of canvas or other cloth until they cover it completely. They may be cut into squares, triangles or other geometrical shapes and fitted together to form a variety of patterns.
Woodburning
There are several methods of burning designs and monograms in wood. An electric needle, made for this purpose, is the best. A nail or heavy wire set in a wood handle and heated in an open flame will also do. Focusing the sun's rays by means of a magnifying glass will burn wood, but the action of the glass is difficult to control.
Bookbinding
Magazines and paper bound books will be more attractive and durable if they are bound in stiff cloth covers. A good quality of paste, a piece of linen or other cloth for the cover, a strip of buckram, some paper and a sheet of cardboard about 1/16 inch thick are the materials needed.
First, the old cover of the book is cut off with a razor blade, care being taken not to remove the threads that stitch the pages together. Cut a strip of buckram the exact length of the book and about \l/2 inches wider than the book's thickness. Cover the back of the book with paste and set it on the center of the strip of buckram (fig. 281). The buckram will be flush at top and bottom, and will extend about inch beyond the book at each side.
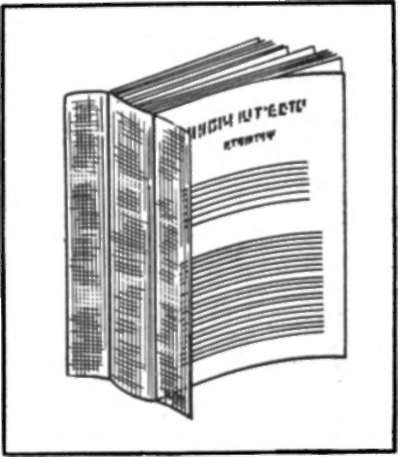
Figure 281.
Now prepare the new binder in the manner shown (fig. 282). The cardboard for front and back covers should be about 1/8 inch longer and wider than the book itself. The strip of paper between them is the same width as the back of the book. A space of 1/4 inch is allowed between its edges and the cardboard panels to insure easy opening and closing
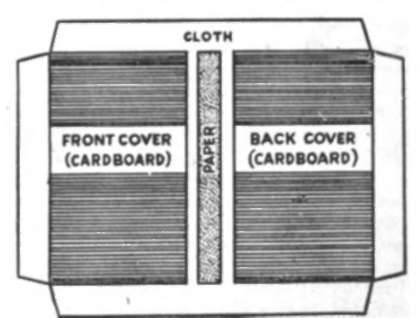
Figure 282.
Paste the cardboards and paper to the cloth which has been selected for the binding. Leave a 1 inch margin of cloth on all four sides and cut out the corners as shown. Fold over the flaps and paste them down. Place the binder under weights until the paste is dry.
The book is now fastened in the binder. Spread paste on the buckram flaps which extend beyond the back of the book. Do not paste the back itself. Place the book in the exact center of the paper strip which marks the middle of the binding. Press down the buckram flaps and hold them with weights until the paste is dry (fig. 283).
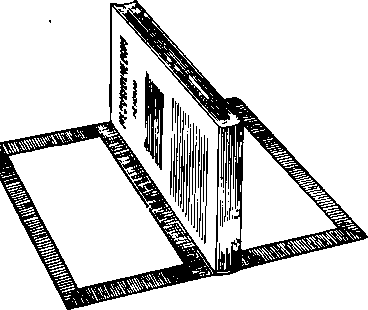
Figure 283.
The final step is to paste end papers on the inside of each cover to conceal the buckram and the edges of the cloth. Cut two pieces of paper the same length as the book and twice its width. Take one of these, fold it and paste one half of it over the inside of the front cover. The other half is left free and forms the first page of the book. It is advisable, however, to run a narrow band of paste-down the inside edge of the free leaf next to the first page of the book itself. This will fasten them together and will conceal the buckram hinge.
Insert the Kick end paper in the same way and press the book under a heavy weight until the paste is dry. The spine will be neater if a pair of knitting needles or similar objects is placed as illustrated during the pressing (fig. 284). It is also advisable to put several sheets of scrap paper between the covers and the book during pressing to prevent the dampness of the paste from wrinkling the pages.
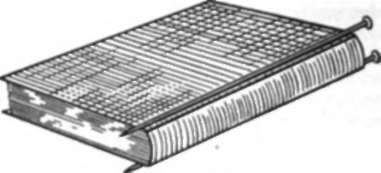
Figure 284.
Soap Carving
Any fresh cake of soap with a reasonably fine, even texture can be carved into reliefs or three dimensional figures. The only tool needed is a kitchen knife with a three inch pointed blade. Any lettering on the soap should be scraped off first. The design is then outlined lightly on the surface.
Next comes the cutting. Rough out the general shape of the figure before doing fine details. It is best to draw the knife toward you as in paring vegetables; the blade can be more easily controlled in a cut of this kind. A smooth, almost marblelike finish can be obtained by scraping the soap with the knife blade held at right angles to its surface.
Other Crafts
The following crafts may be mentioned briefly. Fly-tying is a popular and profitable pursuit for the fisherman; local feathers and fur can be used extensively. Fans can also be made from feathers by drilling the quills and lacing them together.
Paper is the only material required for lamp shades, decorations, and many ingenious small objects made simply by cutting, folding and gluing. Oiled paper stencils used with paint or crayons provide an easy means of decorating wood and cloth or producing greeting cards.
Glass can now be etched by means of a prepared compound which is harmless to skin or clothing. The glass is covered with a stencil and the etching cream spread on the exposed surface for 2 minutes. When washed off, the monogram or design will be found engraved on the glass.
The wings of butterflies can be used to decorate plastic covers of compacts or cigarette boxes. They should be dried and mounted with a very little liquid glue on a stiff base, which is then cemented to the under side of the plastic.
Basket weaving will produce not only baskets, but chair seats, mats, screens, and a variety of other objects. It requires no special equipment, and many improvised materials can be used such as roots, stems, bark, wood splints, and rushes.
Continue to:
My Books

