Hemstitching
Description
This section is from the book "The Cult Of The Needle", by Flora Klickmann. Also available from Amazon: The Cult Of The Needle.
Hemstitching
For all hemstitching a number of threads, depending upon the width of openwork liked, must be drawn from the material immediately under the edge of the hem.
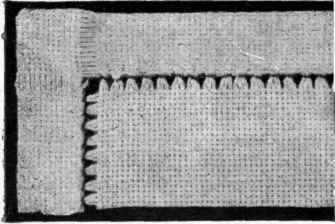
Fig. 1. - SIMPLE HEMSTITCHING.
In Fig. 1, which shows plain hemstitching, 4 threads only were drawn. Mark the depth of the hem required and draw out the 4 threads below the line where the edge of the hem is to be. Turn down the hem and tack it in place. With the embroidery cotton or linen thread, and an ordinary sewing needle, commence by fastening the thread to the end of the hem with a few stitches, at the left side, * slip the needle in from right to left under 3 of the threads, draw it out and put the needle upwards through the edge of the hem under the 2nd horizontal thread, * repeat. Some people work from right to left of the hem. In this case the working thread is held in a loop with the left thumb, while passing the needle under the fabric threads, and the needle brought out through the loop.
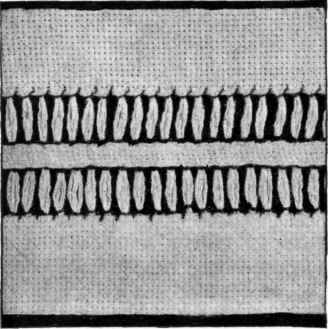
Fig. 8.- DOUBLE LADDER STITCH.
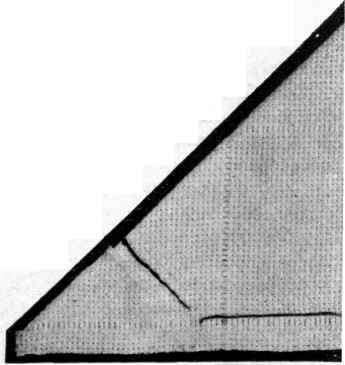
Fig. 2. - SHOWING HOW TO TURN A CORNER.
The black line along the bottom is merely the end of the cotton.
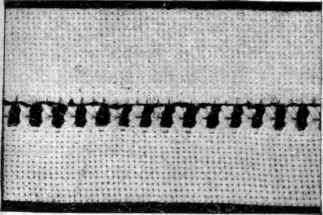
Fig. 8.- TWISTED OPENWORK BARS.
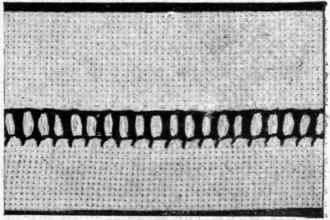
Fig. 4.- THE LADDER STITCH.
Figure 2 shows how to turn a corner for this plain hemstitching. You mark lines for the hem and draw the threads as before, then fold the material diagonally through the corner as in the illustration. This gives you a small triangle in the corner. Fold back the diagonal edge of the triangle to get the half of it and crease along this line. Now back-stitch along the creased line down to where you turn in the edge of the hem. Cut away the corner outside the seam, which you fold down flat, turn this-corner section inside out and you have a neat line on the wrong side of your hem going diagonally from the corner to the edge of the hem.
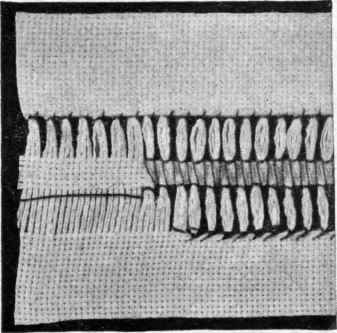
Fig. 9.- WRONG SIDE OF DOUBLE LADDER STITCH.
Figure 3 shows thishem with a row of stitching which twists the openwork bars. Proceed as before with the hem, but take an even number of threads with each stitch; in this case 4 were taken. Fasten the thread to the end of the openwork at the left, * insert the needle after the next 4th thread, and turning the point backwards to left again bring it up under the 3rd and 4th threads, over the 2nd and 1st, twist the needle round underneath this group and bring it up again after the 4th thread, * repeat.
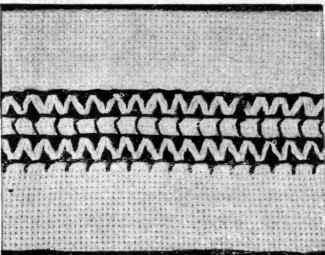
Fig. 6.- DOUBLE SERPENTINE STITCH.
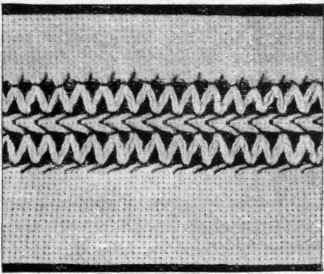
Fig. 7.- WRONG SIDE OF DOUBLE SERPENTINE STITCH.
Figure 4 shows the hemstitching worked at both sides of the openwork. This is known as the ladder-stitch and is worked the same at both sides; instead of putting the thread through the edge of the hem at the other side you put it under the 2nd horizontal thread in the edge of the material.
Figure5. - The serpentine stitch, for which a greater number of theads are drawn, eight being taken out for the sample. An even number of threads is necessary. Hemstitch with 4 threads, then at the other side hemstitch in the same way, but take the last half of the 1st group with the 1st half of the 2nd, and so on.
Figure 6. - The double serpentine stitch. Here 2 groups of thread are drawn, leaving a plain strip of material between them. Draw 8 threads, leave 4, draw 8. Hemstitch the top row and the lower edge, then hemstitch at the sides next to the plain strip, but instead of putting the needle through the material take a stitch at each side alternately.
Figure 7 shows the wrong side of this hem.
Figure 8. - These are plain bars worked as in Fig. 4, but with a plain strip as in No. 7, which is worked in the same way.
Figure 9 shows the wrong side of Fig. 8.
Continue to:
My Books

