Another Side Chair
Description
This section is from the book "Mission Furniture: How To Make It", by Henry Haven Windsor. Also available from Amazon: Mission Furniture: How to Make It.
Another Side Chair
 Side Chair of Dining-Room Set
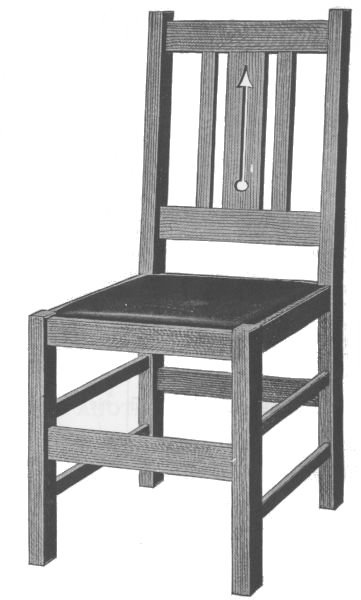
A companion piece to the chair with arms and the sideboard is the side chair illustrated herewith. It should be made of the same kind of wood and finished to correspond with the armchair. Order the following stock list:
- 2 front posts, 1-1/2 by 1-1/2 by 18-1/2 in., S-4-S.
- 1 piece for back posts, 1-1/2 by 5-1/2 by 38-1/2 in., S-2-S.
- 4 seat rails, 1 by 2 by 17 in., S-4-S.
- 4 lower side rails, 5/8 by 1-1/4 by 17 in., S-4-S.
- 2 lower front and back rails, 5/8 by 2-1/2 by 17 in., S-4-S.
- 1 back rail, 3/4 by 2-1/4 by 17 in., S-4-S.
- 1 back rail, 3/4 by 2 by 17 in., S-4-S.
- 1 slat, 3/8 by 3 by 13-1/2 in., S-4-S.
- 2 slats, 3/8 by 1-1/2 by 13-1/2 in., S-4-S.
Square up the front posts to length. From the single piece specified cut out the back posts, giving them the amount of slant indicated in the drawing. Set these four posts upright in the positions they are to occupy relative to one another in the finished piece, and mark off, as with penciled circles, the approximate locations of mortises. After this, lay them on the bench side by side, even the lower ends and locate accurately the ends of the mortises. Gauge their sides.
Saw the rails to length and lay out the shoulder lines and the cheeks of the tenons and cut them. Plan to house the ends of the slats in the back rails.
While the drawing shows a chair in which the front and back are of equal width, the amateur may make the back narrower if he so desires. A measurement of a common chair will give the proportions.
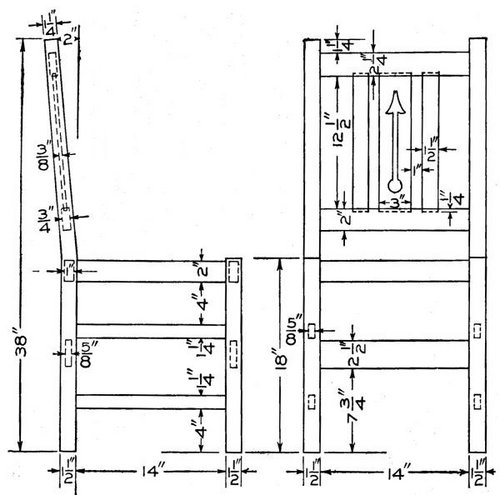 Detail of the Side Chair
Place the front and the back in the clamps and after the glue has had time to harden, assemble the remaining parts. Thoroughly scrape and sandpaper all the parts, carefully removing any surplus glue. Wood finish will not "take hold" where any glue has been allowed to remain.
The seat may be given the same treatment as suggested for the armchair. This should not be done, however, until the finish has been applied.
A simple finish is obtained by the application of a coat of paste filler of a soft brown color, if oak has been used. Apply and clean this off in the manner directed by the manufacturers and after it has had 24 hours in which to harden, sand it lightly with No. 00 paper. Over this apply a thin coat of shellac. Allow this to harden, then sandpaper lightly with fine paper. Upon the shellac apply several coats of some good rubbing wax. Follow the directions that are to be found upon the cans, being careful not to apply too much at a time. If too much wax is applied, it stays in the small pores of the wood and produces an ugly chalk-like appearance.
Continue to:
My Books

