The Garden - How To Grow Violas And Pansies
Description
This section is from "Every Woman's Encyclopaedia". Also available from Amazon: Every Woman's Encyclopaedia.
The Garden - How To Grow Violas And Pansies
Pansies and Violas from Seed and Cuttings-culture Out of Doors-colour Schemes for Bedding' out-greenhouse Cultivation
Pansies And Violas Froms Eedp0
In order to obtain a good stock of mixed pansies. such as would be effective for filling a bed or edging a border, a packet of the best fancy pansy seed should be purchased. Violas are supplied in separate colours, and the best seed can usually be relied upon to come true to name. Cheap seed should be avoided, for choice varieties do not seed freely, and the best seed is, therefore, not plentiful.
April and May are the most suitable months for sowing. The culture is simple, seed being sown in boxes in a cold frame or a cool greenhouse. The boxes may be covered with a sheet of glass. If the seed has been sown thinly, the seedlings can remain in their boxes until June or July, when they should be transplanted into a bed in the open, or into a cold frame, in which they can remain until the spring.
In climates which are fairly free from damp cold, the young plants can be put out in their flowering quarters in September.
The soil prepared for planting, both in nursery beds and subsequently, should be ordinary good garden soil enriched with old manure or leaf-mould. Put the seedlings in three or four inches apart, and shade them from bright sunshine at first, also give plenty of water.
Growing from Cuttings
The time for taking cuttings-whether in late summer or early autumn-will depend upon the condition of the plants, as if only sappy, hollow-stemmed growths are produced-as may chiefly be the case while the plants are still flowering freely-these are useless. The growths for cuttings should be slender, short-jointed, and quite solid in the stem. Remove them from the plants with a knife, but if any pieces appear with small root-fibres attached, they can be inserted as they stand.
For a cold frame in gardens, in the south of England, a position may be chosen which faces north or west; in the northern counties a southerly position is favourable. The
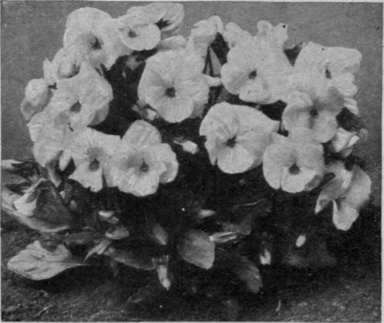
A well'grown plant of violas. Violas form a charming groundwork to other spring flowers if taste be exercised in choosing colours that harmonise. As they have shallow roots they do not encroach unduly on space or nourishment
Copyright. Sutton & Sons frame, if not already existent, need not be more than an enclosure of four boards, nine inches or so in width, placed over the cutting bed, with lengths of wood fastened at the sides upon which to rest the sash and slide it up and down. If the front of the frame is sunk three inches or so into the soil, a gentle slope for the sash will be obtained.
Preparing The Frames
Ground which is free and open will require little beyond digging over, incorporating leaf-mould at the same time. Coal ashes placed on the top of the drainage, will make an excellent foundation. Heavy clay should not be allowed to come within a foot's distance of the plants, and if the subsoil is clayey in texture, it must be well broken up with a fork.
In making up the soil ready for planting, the texture of the top soil will be improved by passing through an inch sieve. Old potting soil will serve the purpose very well. The compost must be made up to within six inches of the glass, and be raked until it is smooth and even, removing any rough stones, etc., which come to the surface. Before the final raking, the surface should be covered with sharp sand, and, after raking, should be made firm by pressing down with boards.
Attach a line of string to two pegs, and stretch it across the frame close to the back wall, putting the cuttings in against it. Have a small board ready for kneeling upon in the frame, and one on which to rest the feet. If the weather is dry, the frame may have to be watered, but in this case do not begin operations while the ground is sticky.
Making The Cuttings
Now proceed to make the cuttings, keeping them shaded the while. The cuts should be horizontal, and should be made immediately below a joint; the reason being that at this point a layer of cells called cambium is present, from which arises the new growth.
No hollow-jointed cuttings should be admitted, as .these will not "callus" properly-i.e., the cut cambium will fail to renew its growth. The lower leaves must be quickly trimmed away without wounding the stem, and the cuttings will then be inserted firmly up to their lowest leaves, but not beyond. The holes are made with a wooden dibber. A six-inch portion of a flower-stick, bluntly pointed, will serve the purpose. Be very careful that the depth of the hole corresponds with the length of the cutting, as if a cutting is "hung" - i.e., if it does not rest firmly on the soil-it will probably decay off. When the first line of cuttings has been put in, 2 1/2 inches apart, shift the line two inches farther down, and put in the next, alternating the cuttings with those of the previous line, and labelling each variety as it comes to an end.
After-Treatment
Give a good sprinkling of water through a fine-rosed can, put on the light, which, if necessary, should first have been cleaned, and lay a mat over the glass, or keep it otherwise shaded.
If the weather is very warm, it will be necessary to water the cuttings from time to time, otherwise they should be kept on the dry side till rooted. After ten days or so, it may be good to raise the sash slightly, such matters chiefly depending on the state of the weather.
As soon as the cuttings show by their top growth that they are rooted, take away the shading, and give more air, removing the lights altogether on fine days.
If the plants are to remain in the frames until spring, the lights must be kept on during winter, but they may be lifted partly or entirely in mild weather.
Cuttings and Divisions Out of Doors
It is quite possible, under favourable conditions, to strike the cuttings out of doors, proceeding in just the same way as above, only omitting the frame-lights. A border should be chosen-at the foot of a wall if convenient-which faces west or north-west.
Another way of increasing the plants consists in cutting back the straggling growth after flowering, pulling the plants to pieces, and planting them in nursery beds, or where they are to stand if the flower-beds are ready.
Colour Schemes
The possibilities of the pansy and viola as a bedding plant are very great indeed. Both pansies and violas make a charming groundwork to roses, and their shallow roots need not encroach on the roses' root-room and nourishment. The old-fashioned show pansy will also make fine masses if planted towards the front of an herbaceous border.
Violas look delightful as a groundwork to other spring flowers, as, for instance, where white or pale yellow violas are arranged with rose-pink May tulips, pale yellow violas and cream-coloured violas with pale blue Spanish iris, or mauve violas with yellow iris. Cream or yellow violas are charming if seen in combination with deep bronze wallflowers, and mauve violas with the palest primrose wallflower. Canterbury bells can also be planted with violas with excellent results, and if an edging of yellow alyssum or purple aubretia already exists in the border, it will serve to enhance the earlier effect.
Very beautiful results can also be had by planting a bed entirely composed of violas. A plan should first be made out, arranging the plants in masses, and breaking the edge with curved lines. If pure clear colours only are used, it will be found that the various shades of purple, lavender, white, and yellow will give the most beautiful and harmonious effects.
Bedding-Out The Plants
Lift the plants from their nursery quarters without breaking the ball of roots, and put them in six to nine inches apart, according to their size. The beds will previously have been prepared by digging, leaf-mould or old manure being incorporated at the same time. Make good deep holes with the trowel, and put in the plants firmly, pressing the soil round with the handle of the trowel. If green or brown fly is noticed on any plant, the specimen should be dipped into a pail of soft-soap and water. Give a good soaking of water at the time of planting, and whenever necessary afterwards.
Newly planted violas are often attacked by slugs, etc. To militate against this, the ground may be dressed with newly slaked lime shortly before planting. Soot, also, may be sprinkled among the plants, as it is distasteful to slugs, and acts as a good stimulant to plant growth.
About the month of June, the violas should receive a top-dressing of leaf-mould or old manure, spread over the surface of the soil, in order to provide a cool and moist condition, as well as to give additional nourishment, during the strain of summer weather. Straggling growth will thus be prevented, and a fresh lease of life altogether be encouraged. All dead flowers should be picked off the plants, so as to prevent their shortening the flowering season by ripening seed. The surface of the gound should be kept stirred with a hoe, and weeded whenever necessary.
Greenhouse Culture
Pansies and violas may be grown very easily, and with good effect, for conservatory decoration in spring. Rooted cuttings should be lifted in October, and potted up, putting either single plants in a 4-inch or three plants in a 5-inch pot. Put the plants in a cold frame, plunging them into ashes or fibre for choice, in which case they will require little or no watering.
When January comes, the pots should be brought into a cool greenhouse, where in early spring they will begin to bloom freely.
Continue to:
My Books

