Constructive Processes: Stitches. Part 4
Description
This section is from the book "Clothing For Women: Selection, Design, Construction", by Laura I. Baldt. Also available from Amazon: Clothing For Women: Selection, Design, Construction.
Constructive Processes: Stitches. Part 4
Overhanding
Form: Slanting stitch on the wrong side, straight stitch on the right side.
Use: To make flat, strong, but almost invisible seams in underclothing and bed linen, hemming table linens and sewing on lace, and patching. It is sometimes done on the right side, when finishing the ends of hems or bands, or pillow cases.

Fig. 106. - Combination stitch, right and wrong sides.
To make: Crease a fold in raw edges. Baste, having folded edges together, or two selvedges together. Hold cloth between the first finger and thumb, against the cushion of the first finger; hold in place with thumb and second finger. Draw needle through the edge of the upper thickness of the cloth, leave a short end of thread; then put needle through two thicknesses of cloth, and sew over the end of thread, pointing the needle toward the chest. This gives the proper direction to the stitch. Take stitches that are not deep; do not draw them tight, nor crowd them (Fig. 107).
To join: Let the end of the old thread come out through the under thickness of cloth. Draw the new through the upper thickness. Let short ends extend, over which the overhanding can be done.
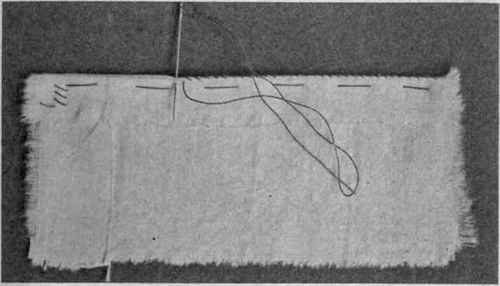
Fig. 107. - Overhanding.
To fasten: Turn the work and overhand over the last few stitches taken.
Overcasting
Form: Loose, diagonal stitch taken over the raw edges of cloth to keep them from ravelling.
To make: First trim the edges evenly. Use a knot, but in double seams, conceal it between the edges; in a single seam which will be pressed open, it can be hidden on the under side of the seam. Hold the cloth over the first finger of the left hand, using the second finger to draw the material through and the thumb to hold it in position. Point the needle toward the left shoulder, bringing it through from under to upper side, and working from right to left. The stitches should be regular in size, not drawn tight, and are usually twice as far apart as they are deep. In turning corners, take two stitches through same hole to form a V. If gored seams are being overcast, begin at the bottom so as not to work against the ends of threads at the edges (Fig. 108).
To fasten: Two small stitches on under side and second stitch knotted.
To join: Fasten and begin as at first.
Hemming
A hem is a finish for the edges of garments, etc., secured by making two folds at the edge, narrow or wide as need may be. The first turn for a narrow hem, may be one-eighth inch or less; for wider hems, usually one-quarter inch, rarely more. The width of narrow hems in turning, may be gauged by the eye, but wider hems must be measured, pricked in, on undergarments, turned on the pricks and creased. Hems on outergarments may be measured and creased at end of marker, or marked with pins or tailor's chalk. In measuring, use a marker made of cardboard, with carefully measured spaces. Flannel necessitates the basting of the first turn, as otherwise it will not hold (Fig. 109).
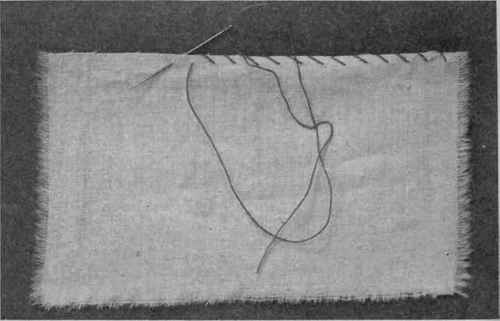
FIG. 108. - Overcasting.
Continue to:
My Books

