Chapter V How To Make Bloomers. Part 4
Description
This section is from the book "A Girl's Problems In Home Economics", by Mabel B. Trilling. Also available from Amazon: A Girl's Problems in Home Economics.
Chapter V How To Make Bloomers. Part 4
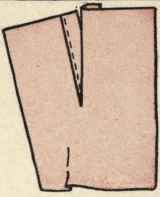
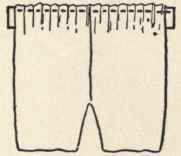
You have already learned how to make a hem and Fig. 53 shows you how to leave an opening to insert the elastic. How would you finish the lines of stitching in order to make them strong?
A second way of finishing the bloomers at the top is with a belt and an opening at the side, called a placket. Sometimes there is a placket on each side and sometimes only on the left side. You must decide which finish is better for the top of your bloomers.
Continuous Placket. - A placket that is strong and simply made is called the continuous or bound placket. Both of these names describe the placket because one continuous piece of cloth is used to bind the placket opening.
1. How can you cut the placket opening so that it is perfectly straight? There is a suggestion on page 26 that will help you.
2. The strip for binding the placket should be cut lengthwise of the material. Can you give reasons for this?
3. The placket piece is put on in exactly the same way as the straight binding is put around the neck of the kimono. If you have forgotten how this is done read the directions and look at the picture on page 49.
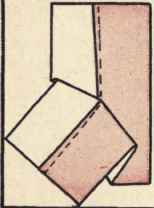
4. Which sides of the placket strip and the bloomers should be placed together for the first seam? Remember that the last stitching should be done with the right side up. The orange color in the pictures shows the right side of the cloth.
Fig. 53.

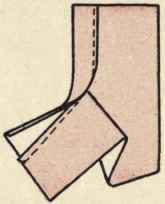
5. Notice in the first picture of Fig. 54 how the seam tapers at the bottom of the opening. Can you see why this is necessary? The basting stitches should be very small around the bottom of the opening. Why?
6. The right side of the finished placket is shown in the third part of Fig. 54. Notice that one side of the placket is folded back against the garment. What would happen if you forgot to do this when the garment is put into the belt?
Fig. 54.
Inspection of Work on the Plackets. - 1. Be sure that you have your work criticized frequently so that you will make a good placket.
2. At what stages in your work do you think it will be best to have your work criticized?
Do You Make Speed in Your Work? - 1. How long does it take you to do your work in comparison with the other girls in the class? Why are you slower or faster than the other girls?
2. Report at the end of the lesson how much you have accomplished. Try this for the next three lessons.
3. Learn when to baste and when not to baste. When is it a saving of time to baste? When is it a waste of time to baste? A Problem to Solve: Putting on the Waistband. - If the top of your bloomers fitted tightly at the waist there would be no new problem because the band is put on exactly like a binding. However, the top of the bloomers has fullness that must be fitted into the band. Your problem is to find out how to do this correctly.
Preparing the Band. - 1. Which way of the cloth will you cut the band? Remember that it is similar to the bound placket and the straight binding around the neck of the kimono.
2. What will be a good width for your band? Examine your own clothing to help you to decide and remember the band is to be folded before it is finished.
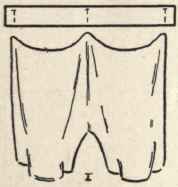
3. How will you determine the correct length for your waistband? Add enough to allow for turning in at the ends and for the lapping of the plackets. If you plan to have a placket opening on both sides you should find out whether the front or back band should be longer. Making the Top of the Bloomers Fit the Band. - 1. The first part of Fig. 55 shows how to mark the band and the top of the bloomers in sections so that they correspond with each other. This division is generally made in halves or quarters. Why will it be better to gather the top of the bloomers in sections rather than 7 all the way around?
Fig. 55.

2. Notice the little ends that are left to turn in on the ends of the bands. Why is this necessary?
3. The gathering stitch is used for gathering up the fullness and the directions for this stitch are given below.
4. After gathering, the bloomers are basted and then stitched to the band as shown in the second picture of Fig. 55. Be sure that the gathers are distributed evenly. Finishing the Problem. - 1. What will you do with the extra length that you allowed on the ends of the band?
2. Folding the band and stitching it in place is exactly the same as on the placket or on the band around the neck of the kimono.
3. Have you noticed in the picture how the stitching continues around the ends of the band? How will you make the end of the line of stitching secure? Directions for Gathering. - 1. Use a thread with a knot at the end.
2. The thread should be a few inches longer than the section to be gathered.
3. Make the line of gathering about one-quarter of an inch from the edge of the cloth.
Fig. 56.
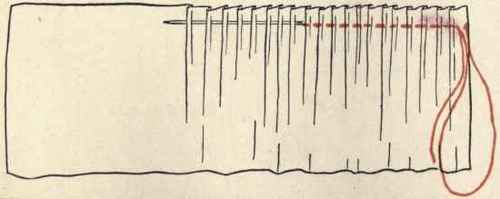
4. In thin or loosely woven material it is a good plan to begin with a small back stitch to prevent the knot from slipping through.
Continue to:
My Books

