Making Buttonholes
Description
This section is from the book "School Sewing Based On Home Problems", by Ida Robinson Burton, Myron G. Burton. Also available from Amazon: School Sewing Based On Home Problems.
Making Buttonholes
Paragraph 136. A buttonhole is a slit made in at least two thicknesses of material finished with the buttonhole stitch, to receive a button. The hems of thin material are sometimes interlined to give them more body before working buttonholes in them. The two thick-nesses of heavy material are often basted together and two parallel rows of machine stitching or running stitches are made around the place where the buttonhole is to be. The buttonhole is cut inside the stitching. Lace may be strengthened by basting a piece of lawn under the place where the buttonhole is to be and trimming it off close to the buttonhole after it is worked. Dried glue if moistened and rubbed on both sides of wiry material in the place designed for the button-hole and allowed to dry again will enable one to cut and make a much neater buttonhole on this sort of material.
Placing the Buttonhole.
Buttonholes are usually placed about 1/4" from the edge of the material, the distance apart depending upon the strain, the kind of buttons used, and the prevailing style. Where there is much strain on them they should be cut at right angles to the edge of the material, but they may be cut parallel with the edge in the pleat of a tailored shirt waist or the placket of a sleeve, or any place where there is little strain. The buttonholes are generally placed on the right-hand side of the opening in ladies' garments.
There are two kinds of buttonholes, the light buttonhole (used in light weight material) and the heavy buttonhole (used in heavier material like coats and suits, and on the bands of children's garments, or where there is likely to be considerable strain). The light button-hole is simply overcast and worked with the purling or buttonhole stitch. The heavy buttonhole is stranded, overcast and worked with the buttonhole stitch. Directions are given here for the heavy button-hole only, because the steps in the light buttonhole are the same omitting the stranding.
In making the buttonhole the first thing to consider is cutting it-It may be cut with buttonhole scissors, or with ordinary scissors. A buttonhole should be cut on a thread of the cloth to avoid raveling and unevenness on the edge. Accurate measurements should be made before cutting each buttonhole, to make sure they are all equally distant from the edge. The buttonhole should be cut large enough to receive the button for which it is intended. By cutting one button-hole at a time, and working it before cutting another, raveling of the raw edges may be avoided.
To Cut a Buttonhole With Buttonhole Scissors.
Set the buttonhole scissors and make a trial cut on a separate piece of material; test it with one of the buttons which you intend to use, reset the scissors if necessary. When the scissors are properly set, cut a buttonhole carefully on the thread; keep the buttonhole scissors set in the same position until all the other buttonholes are cut.
To Cut a Buttonhole With Ordinary Scissors.
When the buttonhole is to be placed across a hem, measure the diameter of the button and, using a pin to mark the front end, place a second pin to indicate where the back end of the buttonhole should be, then fold the hem lengthwise and cut a small slit (crosswise) in which to insert the point of the scissors; open the hem and cut on the thread first to one pin, then to the other. When the button-hole is to be placed vertically on the hem, mark the ends with a pin, fold the hem crosswise and cut to the pins as already explained.

Figure 40.
Stranding the Buttonhole.
Buttonholes are stranded by taking two long running stitches over each other as close to the edge as possible (beginning at the back end and lower edge); two short backstitches should be taken at each end of the buttonhole as in No. 1, Figure 40. As the stranding process adds considerable difficulty it is often omitted.
Overcasting the Buttonhole.
After stranding the buttonhole, begin at the lower edge of the back end and overcast the edges, making very shallow stitches (about three threads deep, just covering the strands) about 1/4" apart. See No. 2, Figure 40. When the buttonhole is overcasted you are then ready to finish it with the regular buttonhole stitch. You should continue this work without breaking the thread used in overcasting.
To Work the Buttonhole.
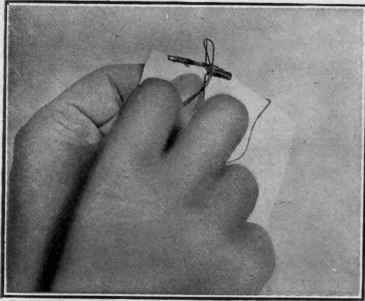
Figure 41.

Figure 42.
To make this stitch, hold the raw edge of the buttonhole over the forefinger of the left hand, insert the point of the needle through the buttonhole (at the back end) bringing the point through toward you four or five threads below the edge of the buttonhole. From right to left bring the doubled thread from the eye of the needle around the point of the needle as shown in Figure 41; draw the needle through, forming a purling stitch on the edge of the buttonhole as shown in Figure 42. Working from right to left, take the next stitch in the same manner, making it the same depth and very close to the first stitch. Continue across the buttonhole. When you come to the front end of the buttonhole, it may be fanned by flaring the stitches as shown in No. 3, Figure 40, taking about seven stitches to form the fan (if desired a barred or straight end may be made as shown in No. 4, Figure 40); continue the work on the other edge. The back end may be either barred or fanned like the front end. Fasten the thread by slipping the needle through the first purling stitch, carrying it under two or three buttonhole stitches. When working the button-hole it is difficult to introduce a new thread, so care should be taken to have the thread long enough (about 27") to work the entire button-hole. However, if the thread breaks or is too short, fasten the new thread as in beginning to work a buttonhole, bring the needle up through the last purling stitch and continue to work the buttonhole.
To Bar the End of a Buttonhole.
The back end of a buttonhole is often finished with a bar as shown in No. 5, Figure 40. To do this, when you have finished working the second edge of the buttonhole, slip the needle through the first purling stitch, drawing it up close to the last stitch, then slipping the needle under the edge of the buttonhole, bring it out close to the bottom of the first stitch. Insert it at the bottom of the last stitch and sew over the end of the buttonhole three or four times. Work over these threads (with the buttonhole or loop stitch), catching the needle in the material and turning the purl toward the buttonhole. Fasten the thread with two or three running stitches on the wrong side.
The buttonhole with the bar at each end is frequently used in vertical buttonholes. They are sometimes finished with a fan at each end as shown in No. 6, Figure 40. No. 7 shows a heavy button-hole.
Continue to:
My Books

