Pillow Case
Description
This section is from the book "School Sewing Based On Home Problems", by Ida Robinson Burton, Myron G. Burton. Also available from Amazon: School Sewing Based On Home Problems.
Pillow Case
Materials
Muslin (Chap. I, Par. 27).
1 yard muslin, width desired for length of pillow case, or
1 yard pillow tubing.
Thread No. 70.
Needle No. 8.
Embroidery cotton.
Padding cotton.
Embroidery needle.
Introductory Statement
Pillow cases are counted among the household necessities. They not only preserve the life of the pillows by protecting them from wear, but also make it possible for the head to have a clean place on which to rest, for they can be changed as frequently as necessary.
Pillow cases may be made from unbleached muslin, the muslin being formed into a bag-like case, with a seam at one end and side and a hem at the open end. Cheap, white muslin may be used in the same manner. The better grades of muslin are woven into pillow tubing of different widths. Linen is also used in making fine pillow cases; for pillow cases on which fine handwork is to be done, linen is especially desirable.
While pillow cases may be made with a machine hem, the pillow case shown in this lesson is an example of one of the attractive ways; in which they may be ornamented with handwork.
References:
The Furnishing of a Modest Home, Daniels. Atkinsoi:, Mertzer & Grover. Some Principles of Every-day Art, L. F. Day. Scribner.
Suggestions For Optional Modification

Embroidered Pillow Case
No. 1. The end of this pillow case is finished with a fancy scalloped edge. The embroidered design is worked with the satin stitch.
Fancy Pillow Case
No. 2. Coronation braid may be combined with crocheting stitches to form a band of insertion; this makes very attractive trimming for a pillow case. The monogram placed above the insertion is embroidered with the satin stitch.
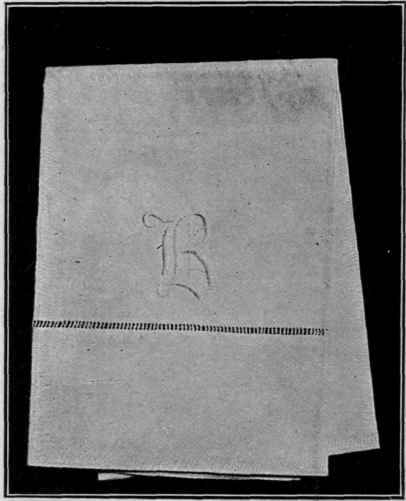
Fancy Pillow Case
No. 3. The end of this pillow case is finished with narrow crocheted edging. The monogram placed above it is worked the same as in No. 2.
Fancy Pillow Case
No. 4. The crocheted insertion set above the hem of this pillow case was made on a hair pin; it is called hair pin lace. The lower edge of the hem is finished with a crocheted scallop.
Working Directions For Pillow Case
Preparing Material
Straighten the ends of the material (Chap. II, Par. 102).
Joining Seams
If a straight piece of muslin is used for the pillow case it will be necessary to join it on one side as well as the bottom,. The most desirable way to join the side of the pillow case is to lay the two selvage edges together evenly, baste, and stitch them with a 1/4" seam, or turn the selvages back about 1/4" and overhand a seam. The bottom of the pillow case should be finished with an overcast seam, or stitched on the sewing machine. Fold the material in the middle making the selvage edges exactly even (to form the side seam), stitch the side and the bottom making it a 1/4" seam; overcast the raw edges at the bottom. These edges may be joined by hand if desired. To do this, turn the edges back 1/4" on wrong side of the material and make an overhand seam (Chap. II, Par. 110). Overcast the edges in the same manner as for the stitched seam.
If pillow tubing is used, make a 1/4" seam at the bottom only. Stitch with the sewing machine, or overhand as suggested above. Overcast the raw edges.
Finishing The Open End
The open end is finished with a hem from 2" to 3 1/2" wide. This hem may vary in width to suit personal taste. It may be stitched on the sewing machine or hemmed by hand. The pillow case shown in the illustration is finished with a double hemstitched hem. To make this hem, measure up twice the width desired for the hem plus 1/4" for the first turning; draw a thread. Draw three or four more threads toward the center of the pillow case, fold and baste the hem in place even with the edge of the drawn thread (Chap. II, Par. 103); double hemstitch in place (Chap. II, Par. 116).
To Set In Insertion (If Desired)
It may be desirable to trim the pillow case above the hem with a band of crocheted insertion or with tatting. To do this, after straightening the edge of the material on the end of the pillow case and sewing up the side seam, cut a strip off the end twice as wide as the width desired for the hem, plus 1/2" for under turnings. On the piece cut off turn under the raw edges 1/4" toward the wrong side, fold these edges together evenly and baste with even basting. Make a narrow hem on the open end of the pillow case, turning it to the wrong side. Join the insertion at the end if necessary and overhand one edge to the end of the pillow case (Chap. II, Par. 112). The part cut off is to be set onto the insertion. Be careful to keep the seam of this piece even with the side seam of the pillow case; overhand the lace to the basted edge of this strip. Remove bastings.
The Initial
The initial used on the pillow case should be rather large; that is, from 2" to 2 1/2" long. It is placed about 1/2 "to 1" above the hem, in the center of the pillow case. You may use a commercial pattern, or, you may design your own letter. If a commercial pattern is used, place it rough side down, on the desired position and press it with a hot iron. Remove the pattern and work the initial. If you use your own design, transfer it with carbon paper. Use carbon paper a tritle larger than the initial; place it carbon side down on the pillow case, place the initial over it, pin in several places to keep it from slipping; with lead pencil trace around the initial. Remove the pattern and carbon paper and work the design.
To work the initial, pad it, rounding it slightly in the center, and work it with the satin stitch (Chap. II, Par. 131).

Continue to:
My Books

