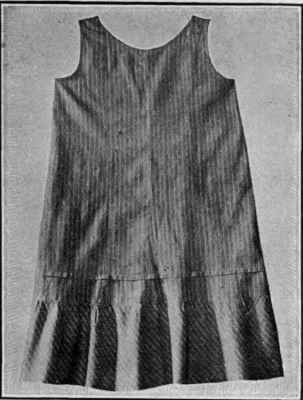
Ruffled Petticoat
Description
This section is from the book "School Sewing Based On Home Problems", by Ida Robinson Burton, Myron G. Burton. Also available from Amazon: School Sewing Based On Home Problems.
Ruffled Petticoat

Materials
Long Cloth (Chap. I, Par. 24).
1 piece of long cloth twice the length of the skirt, plus the width of the hem.
About 2 1/4 yards embroidery (amount will depend on fullness of ruffle and width of skirt.
Lace (about 2 yards) for bottom of skirt.
Thread No. 80.
Pattern for 3 or 5 gored skirt (commercial or drafted pattern).
Introductory Statement
While plain petticoats are necessary for everyday wear, the summer dress, party dress, or silk gown calls for a trimmed underskirt. The body of this skirt may be made of white percale, nainsook, long cloth or cambric.
The style of the ruffled petticoat, the same as the plain, varies according to the style of the outside skirt. Wide petticoats with full ruffles come into use with the fuller dress skirts, while narrow petticoats with scant ruffles are desirable with the narrower dress skirts.
The ruffle on the skirt may be made of rows of lace and insertion sewed together by hand, or lapped slightly and stitched on the machine and finished with a lace edge; or it may be made with lawn or fine cotton material trimmed with a lace edge, or one or more rows of lace insertion, depending on the desired width of the ruffle.
The petticoat presented in this lesson is trimmed with embroidery flouncing, care should be taken to select embroidery with a firm edge, otherwise it will not wear well.
References:
Textiles, Woolman and McGowan. Macmillan Co. Goodwin's Course in Sewing. Beattys Co., N. Y.
Suggestions For Optional Modification

No. 1. Fancy Petticoat
No. 2. Child's Petticoat.
Fancy Petticoat
No. 1. This petticoat is finished with an under ruffle edged with lace. The top ruffle of the skirt is made by joining rows of lace insertion with strips of lawn. The easiest way to do this is to stitch the lace in rows equally distant from each other on a strip of lawn or nainsook the width desired for the ruffle. The lawn is then cut out under the insertion and the edges are turned back and stitched in a narrow hem.
While a band or fitted top is preferable in a petticoat, a draw string is sometimes used to make a skirt adjustable to different sized waists. This skirt is provided with such a draw string.
Child's Petticoat
No. 2. The upper part of this skirt may be made by using a waist pattern which fits the child. The armholes and neck are faced with bias strips of the same material. The bias ruffle is set on with a bias band of the material. The ruffle is hemmed with the sewing machine. A child's skirt should have tucks so placed that they may be let out to provide the length which is needed as the child grows.
Working Directions For Ruffled Petticoat
Preparing Material
Shrink the material.
Cutting Out The Skirt
You may use a three or five gored skirt pattern drafted according to directions in Chap. IV, or, if desired, you may use a commercial pattern. If a commercial pattern is used, study carefully the guide chart and directions which accompany it. If you use a drafted pattern, place the center front of the front gore on a lengthwise fold of the material. The other pieces may be cut two at once, as a rule. You should be careful to have the straight edges of the pattern parallel with the warp threads of the goods. Any notches which indicate the places where the seams are to be joined should be cut very small, or marked with a pencil.
Joining Seams
This skirt should be joined with felled seams. Pin and baste the gores together, matching them according to the notches; keep them even at the top, leave an opening 10" or 12" from the top of the back seam for the placket opening. Try on the skirt, make the necessary alterations, mark them with pins placed close together lengthwise. NOTE: Be careful that the seams over the hips do not slant forward or backward at the top; see that the skirt hangs straight down the front, if it falls forward at the bottom, raise the skirt at the back waist line, be careful not to make the skirt too tight around the hips; sit down and see that it fits easily around the hips when seated. Remove the skirt and rebaste, finish the seams. Finish the placket opening with a bound placket (Chap. II, Par. 161) or an extension placket (Chap. II, Par. 162).
Finishing The Top
As the material in this skirt is not heavy, a band is used to finish it at the top. For the band, tear off, or cut a strip of material 2 1/2" wide and 2" longer than the waist measure. Turn in one raw edge; put on the skirt; place the center of the band on the center front of the skirt, the folded edge overlapping the top edge of the skirt. Pin the band in position, turning in the ends even with the back opening. (The skirt should be made even around the bottom while you have it on). Remove the skirt and baste on the edge of the band, fold the other edge of the band over to the wrong side exactly opposite the edge on the right side, pin, baste and stitch all round the edges of the band.
Sew one hook and eye on the ends of the belt and three snaps on the placket (Chap. II, Par. 133).
Finishing The Bottom Of The Skirt
Make a narrow hem in the bottom of the skirt and overhand narrow lace on the edge, joining the ends of the lace as in Chap. II, Par. 148 or, if desired, a narrow embroidery may be sewed on the edge with a lapped seam (Chap. II, Par. 139). Join ends of embroidery with a felled seam.
The Ruffle
Join embroidery with a felled seam (stitched or hemmed). Di-vide the ruffle in four parts, marking each part with a pin; gather each part. Divide the skirt in four parts, place it over the end of an ironing board (if possible); pin the quarters of the ruffle to the corresponding quarters of the skirt; adjust the gathers, baste the ruffle on the skirt, making the bottom of the scallops of the embroidery even with the bottom of the skirt. Baste bias tape smoothly over the gathered edge of the ruffle making one edge even with the gathering threads. Join the bias tape (Chap. II, Par. 144) and stitch it on both edges.

Continue to:
My Books

