


Preliminary Lessons
Description
This section is from the book "Manual Training - Cardboard Construction", by J. H. Trybom. Also available from Amazon: Cardboard Construction.
Preliminary Lessons
In large classes it will be found advisable to introduce the work with a few preliminary lessons. The following are suggested:
1st | lesson. | The use of rule as a measuring instrument. |
2d | " | The use of rule for drawing lines. |
3d | " | The use of rule for drawing lines of definite lengths. |
4th | " | Use of triangle. |
5th | " | Use of scissors. |
6th | " | On the different lines. |
The time given to the preparatory lessons would be determined by the amount of time given to manual training. If two periods of one hour each are given to the work, it would be well to give one period to each of the lessons. If only one period a week is given, these lessons must be gone through more rapidly.
Lesson I. Use Of Rule For Measuring
Instrument: rule.
Draw an oblong on the blackboard about 36" X 3", representing the rule.
Divide into twelve equal spaces and write figures as on the rule.
Show to class that these distances represent inches.
Have some of the pupils come to the blackboard to point out distances in inches asked for by the teacher.
Explain the sign for inches, two dots, and the sign for feet, one dot.
Have the class show on their rules distances asked for by the teacher.
Call attention to the lines on the rule indicating ½", these being the longest lines between the inch marks.
Complete the rule on the blackboard by putting on these lines.
Have individual pupils point out upon the blackboard distances involving the ½" fraction, the class being asked to show the same distances on their own rules.
Have the class find the dimensions of objects, as books, the top of the desk, etc.
Teach the dimensions, length, width, and thickness.
Lesson II. Use Of Rule For Drawing Lines
Instruments: pencil, rule.
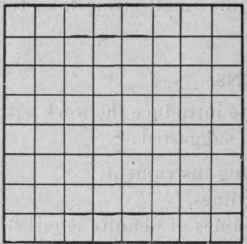
Give the class pieces of paper about 6" square.
Show pupils how to hold rule when drawing lines.
Direct the pupils to measure 1" from the top on the right and left edges and draw to a horizontal line connecting these points.
Continue drawing horizontal lines 1" apart to the bottom of the paper, dictating each step.
Draw the vertical lines 1" apart.
Lesson III. Drawing Lines Of Given Length
Instruments: pencil, rule.
Draw a horizontal line 1" from the top, and a vertical line 1" from the left side of paper.
Measure off ½" spaces on the vertical line, beginning at the intersection point.
At the right edge of paper measure ½" spaces below the horizontal line.
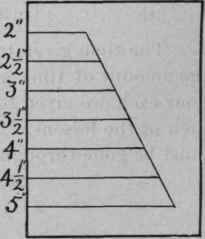
Write opposite the dots at the left side the required lengths of the lines to be drawn, making each line ½" shorter than the one preceding it. If accurately done, a line drawn through the ends of these lines should be straight.
Lesson IV. Use Of Triangle
Instruments: pencil, rule, triangle.
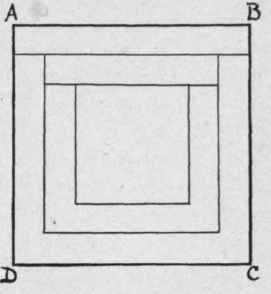
Draw horizontal line AB 6" long.
Place the triangle so that one of the short sides coincides with AB with the right angle at B, draw the line BO.
In the same way draw the line AD with the triangle.
Measure off 6" on these perpendiculars from B and A respectively, draw the line DC.
Draw horizontal line 1" below AB, and construct a concentric square, using triangle as before.
Lesson V. Use Of Scissors
Instruments: pencil, rule, triangle, and scissors.
The squares drawn in the previous lesson may be cut out in this one.
Show how to hold scissors.
It is not a good plan to draw a number of lines on a piece of paper and then ask the class to cut on them. This method will have a tendency to make the pupils careless in the following exercises. Give them something definite to cut out as suggested above. The success they may have in the future does not so much depend upon the amount of cutting they have had as upon the character of their previous work. It is better preparation to have cut carefully on one single line than to have carelessly used the scissors on a hundred. The teacher will have to remind the pupils repeatedly to cut slowly during the earlier lessons.
Lesson VI. On The Different Lines
As there are four different lines used in the following drawings, it seems best to concentrate the attention of the pupils during one lesson on the character and use of these lines. The teacher may make a drawing on the blackboard in which the typical use of each line, except the folding line, is shown, and explain reason for having so many different lines. Then the class may draw the lines on paper.
Note. This lesson had better be postponed until after the first model is made. Then the pupils will know the length of one-half inch. For the extension lines it will be sufficient at this stage to ask the pupils to make short dashes.
Continue to:


My Books

