Chapter V. Projects For Limited Hand And Eye Coordination. Crayon Etching On Oaktag
Description
This section is from the book "Handcrafts For The Homebound Handicapped", by Mildred Kroll Rich. Also available from Amazon: Handcrafts For The Homebound Handicapped.
Chapter V. Projects For Limited Hand And Eye Coordination. Crayon Etching On Oaktag
Materials And Supplies
8" x 10" sheet of oaktag paper tablespoon flour or talcum powder set of drawing crayons medium blue tempera paint
Tools
1/2" paint brush bobby pin
Design and color enter into making a crayon etching on oaktag. Each picture is different because there is no tracing in the procedure. A pupil can make several in an afternoon, then keep only those he likes. If they are good they can be framed and thus add to the beauty.
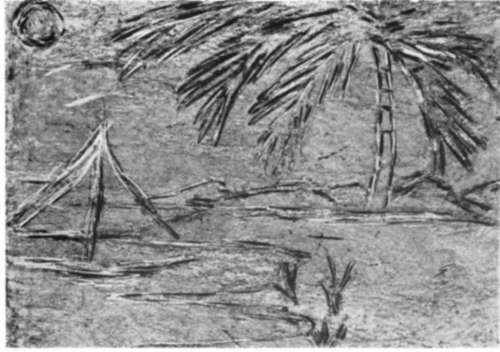
Figure 43. Crayon Etching on Oaktag.
Procedure
1. ;Cover the complete surface of the oaktag with heavy crayon marks in red, yellow, orange, green, and brown. Change the colors at will. It does not matter if they go on top of each other. The thicker the crayon marks are applied, the better the final result will be. The shape or size of the stroke makes no difference. The entire surface of the oaktag must be covered.
2. ;Dust the crayon marks with flour or talcum powder. Talcum powder is simple to use because it can be shaken out of the container gently. The oaktag should look as though it were covered with a light coating of snow. Paint the complete surface of the oaktag with blue tempera paint so that no crayon marks show.
3. ;With the round end of the bobby pin, scratch your design before the paint is completely dry. Woodland and mountain scenes appear most natural with this method. However, experiment with other designs. Have a picture in mind before you begin, or make a rough sketch of one first or select one that you like to copy.
Continue to:
My Books

