Laying The Track
Description
This section is from the book "The Scientific American Boy", by A. Russell Bond. Also available from Amazon: The Scientific American Boy.
Laying The Track
From the bottom of the inclined trestleway we continued the track down the slope to the river; but for the sake of economy, instead of using 2 x 4-inch scantlings for the rails, we bought a number of 2-inch planks at Lumberville , and had them sawed up into strips 2 inches wide. These 2-inch square rails were fastened together with slabs nailed on at frequent intervals. To maintain the proper gauge the car was rolled over each pair of rails, which were nailed first at the ends and center. To anchor the track we drove short posts into the ground so that their upper ends lay flush with the surface. A post was provided under each joint and one under the center of each rail, and then the slab ties were nailed securely to these posts. In imitation of a full-sized railway, we made it a point to "break joints" on our track; that is, to make the end of one rail come in line with the center of the opposite rail, as shown in Fig. 302. Our track was continued across the pontoon bridge and ran around the west shore of Kite Island. The track was straight as far as the shore of Kite Island, whence, by an easy curve, it was carried around to the log cabin.
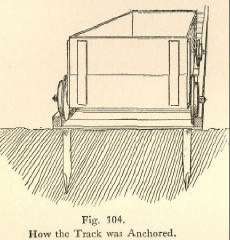
Fig. 304. How the Track was Anchored.
Continue to:
My Books

