Repousse Work
Description
This section is from the book "How To Make Common Things. For Boys", by John A. Bower. Also available from Amazon: How to Make Common Things.
Repousse Work
This is a metal work, of quite another kind ; and instead of working with strips of metal, and that metal iron, you work by embossing your design in metal, which is generally sheet-brass, sometimes sheet-copper.
First, you make your design in ink on paper; then procure a sheet of soft brass, known as " French metal" Paste your design flat on to the brass. Now your object is to produce this same design in relief on the thin metal. For this purpose you require not only a soft bed on which to work the metal, but the tools to do the embossing. These tools are called chasers, which are short iron punches, used with a flat-faced hammer. The block upon which the brass is laid is of pitch, something of the consistency of shoemaker's wax. A layer of this is placed on a block of wood; then the sheet of metal, on which the figure is then traced with the steel point; then the design is punched into relief; the most prominent parts having to be punched into highest relief. Remember, while you are working at this, the finished design will be the reverse of its appearance to you. Having thoroughly traced the design, and the details, the block is laid on a sandbag, and this placed on the bench, so that blows are deadened, and the tapping does not make the noise it otherwise would. In the first attempt, take a piece of brass, and indent a continuous straight line; then a simple design of straight lines, in which the relief is small, like Fig. 123. Next take a few simple curves, as in Fig. 124. Practise these straight lines and curves till you can do them fairly well, then start on something more elaborate. Suppose you take a piece for a shallow tray - a pin-tray say, - cut the metal into shape and size; if you have not the shears for this you can have it done for you where you buy the brass. For this you should pay about 1s. 3d. per pound. Let the design be a simple one, some geometrical pattern, as in Fig. 125. Make the design on paper; paste it on the sheet of metal.
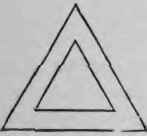
Fig. 123. - Exercise in Straight lines.
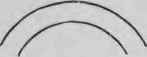
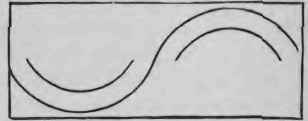
Fig. 121. - Exercise in curves and straight lines.
Then with your tracer and hammer, do the ring at the edge; then the inner ring; then deepen the broad indented line for the design; or if you wish the design sunk, and surface generally raised, you must punch all the other part up. In the punches, you have some for broad surfaces, others for fine lines; you must select that best suited for your purpose. The punches are sold in boxes, each containing a set of nine; the shape of the punching surfaces are shown in Fig. 126. The space between the design requires to be punched regularly all over to give it a roughened appearance; this must be done from the right side at finishing. Sometimes it is necessary to see how the work is progressing, therefore the pitch has to be removed. This is done by the flame of the blow-lamp, which melts the pitch so that it can readily be removed. In the simple designs this is not so much needed; but in the more elaborate this frequently has to be done. Try three or four simple designs first.
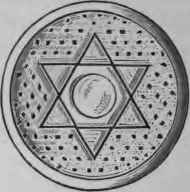
Fig. 125. - Simple design for a Pin-tray.

Fro. 126. - Embossing end of punches.
In your next stage take a design where the relief is not all the same depth; such as a leaf (Fig. 127), or a flower and leaf, and then follow this with a wreath of leaves, which may be worked in the centre, or round the border. First, in each case, with the tracer get the full outline, then the curves of the leaves, then get a rounded channel from the various veins of the leaves, then deepest of all between these and the mid-ribs. This is best accomplished by taking nature for your guide. Get a series of well-developed leaves, to lie before you on a sheet of white paper. Place these in an easy natural position, not flattened or cramped at all; then do your best to imitate them in your metal, having the right side up for the delicate chasing and finishing. You will find this requires about the same patience as wood-carving. In the cases where we have supposed the metal is to be made into trays, turn up the edges after the designs are finished. Take care that they are turned up at the same angle all round. This can be managed by hammering the edge to a piece of wood.
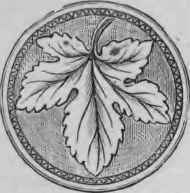
Fig. 127. - Simple design for a tray with embossed leaf.
The hammer for this purpose has a broad, smooth face, so there is no fear of irregularly marking the metal if carefully worked. You can next take a design in fruit and leaves, in which the fruit will require the highest relief, as Fig. 128, and the surface at the same time requires to be nicely rounded, so that the tools must be used very carefully indeed to produce this effect. Then a stage higher you can take the head of an animal. Throw the most prominent parts in the greatest relief; be careful about the eyes and mouth, and the various markings of the face, all of which go to make up expression. Then you can go on to portraits and figures, according to their difficulty and your own proficiency. Books of suggestive designs for this class of work are sold for the purpose of guiding amateurs in the selection of subjects. From the smaller you can go to larger pieces of work, according to taste and ability. You may experience another difficulty, for it sometimes happens that from continual punching and tapping the metal becomes brittle; this you can tell as your work progresses. Should it do so, it must be annealled. 'This is accomplished by putting the brass in a clear coal fire till it becomes red-hot; then take it out and allow it to cool gradually. If your work is long and tedious, this, however, may have to be repeated.
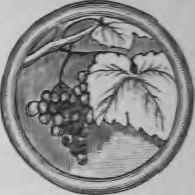
Fig. 128. - Exercise in fruit and leaves.
Continue to:
My Books

