Lesson XVIII. Sandpapering
Description
This section is from the "Elementary Turning" book, by Frank Henry Selden. Also available from Amazon: Elementary Turning.
Lesson XVIII. Sandpapering
For the work in turning, several grades of sandpaper are required. For smoothing the exercises given in Lessons 17 to 25, No. 1/2 or No. 0 should be used. To produce a very fine finish, use coarse paper at first, and then each finer grade in order, until the required finish has been obtained. No. 00 should produce a finish fine enough for any school work. The sheet of sandpaper should be torn by using the saw the same as in tearing sandpaper in joinery. Usually, it is best to begin by using pieces but one-eighth of a sheet in size. After some practice in using small pieces, the one-fourth-of-a-sheet pieces may be used. Usually the paper should be folded double. Move
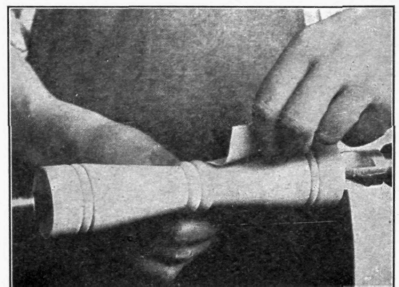
Fig. 62. Sandpapering.
the rest out of the way, or remove it entirely before beginning to use the sandpaper.
Hold the paper in both hands, as shown in Fig. 62, always keeping the paper moving from end to end, over the part being smoothed, so as to avoid scratching the. surface of the work. The less the paper is moved about, providing it does not scratch the work, the better.
In using a fine grade of sandpaper, you can hold it beneath the work, as shown in Fig. 63. This admits of a better view of the piece. It is not a good plan to use very coarse paper in this manner, as the dust from the wood gathers on the surface of the paper and hinders the flint from cutting. In using the finer grades, the dust is sometimes an advantage, as it causes the sandpaper to cut slower and smoother. In any use of sandpaper, be careful not to throw any more of the dust into the air than is really necessary.
In sandpapering beads, the edge of the folded paper is used, as shown in Fig. 64. As often as the edge becomes worn out, another fold is made. Each
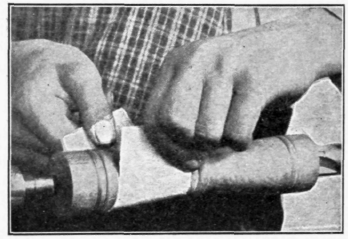
Fig. 63. Sandpapering.
time a new fold is made, it should be near the worn one, so that the paper will be used evenly.
In working around beads or curves of any sort, the sandpaper should be given a twistlike motion, in order to preserve the shape of the curve. Sharp edges or deep V-shaped cuts are neither easily sand-papered nor finished, and should, therefore, be avoided as much as possible. The design should be arranged so as to avoid such places.
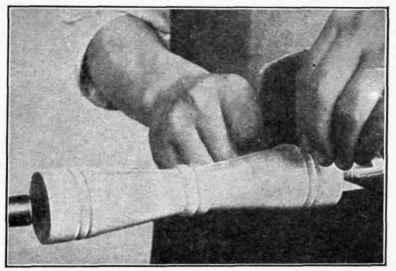
Fig. 64. Sandpapering Beads.
Continue to:
My Books

