How To Make A Bench
Description
This section is from the book "Carpentry For Beginners - Things To Make", by John D. Adams. Also available from Amazon: Make Magazine.
How To Make A Bench
In making this bench our object ought to be to make something good enough to use indoors - perhaps in the workshop or maybe in the attic where the wireless outfit is.
While the drawing shows the foot rail fastened in with a key and tenon, it should be understood that this may be omitted if desired, in which case the rail will be held in place by two nails driven into it through each end board.
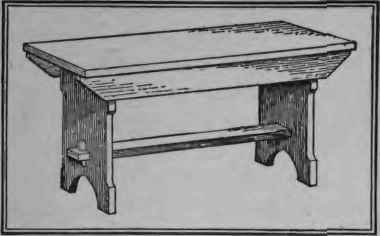
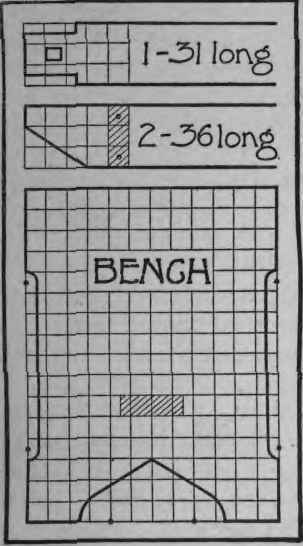
The material is all one-inch dressed lumber. The working drawing clearly shows how to mark out the end pieces. By examining this you will find that you will have to make six different curves with the compasses. This, however, is a very simple matter as the sizes and center points are all indicated on the drawing, and as soon as the curves are drawn it is only necessary to join them up with pencil and ruler, and the outline is finished- Saw out the little side curves with the fret saw and those at the bottom with the key-hole saw. Wrap a piece of sandpaper around something round and finish each curve smoothly. Next saw off the ends of the top squarely, and cut the two side pieces the same length, sawing off the lower corners as shown. Nail the top to these, carefully placing them just far enough apart so that the ends will fit in snugly between. The ends will now be fastened by nailing down through the top and in through the side pieces, after which it only remains to place the foot rail.
Continue to:
My Books

