How To Make A Blacking Stand
Description
This section is from the book "Carpentry For Beginners - Things To Make", by John D. Adams. Also available from Amazon: Make Magazine.
How To Make A Blacking Stand
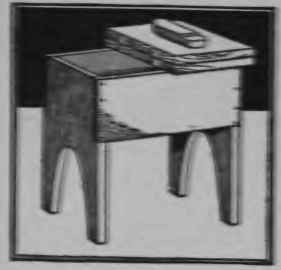
Blacking one's shoes is no trouble at all when by merely lifting a lid you can find everything right at hand-brushes polish and all-including a block to keep your foot from slipping. This is exactly what the blacking stand illustrated provides.
The working draw-ing dearly shows the Method of laying out the end boards. These and all of the other pieces are made of inch number after it has been dressed smooth. On the center line of each end mark a point five inches from the bottom, and, with the sharp point of the compasses placed there draw a six-inch circle, after which draw a line from each side of this circle down to a point on the bottom line an inch and a half from the outside corner. Saw out the piece in between, using the regular saw on the straight part and the keyhole saw on the curves. Finish the edges smooth and saw out a strip at each side near the top so that the side pieces will fit in. The other pieces are of the sizes noted in the drawing and require nothing further than trimming up true and square with smooth flat ends.
In putting together, first nail the sides to the ends, and then fit in the bottom, nailing it in place through the sides and ends. Next nail on one-half of the top, and then hinge the other half to it, after which it only requires the addition of the foot block to complete the stand ready for staining.
The most desirable hinges for this purpose are the kind know as butt hinges. A pair of these will be necessary, and the width should be about equal to the thickness of the top boards. In order that there will not be a space between the two halves of the top, the wood should be cut away, so as to let the hinges fit in • even.
Continue to:
My Books

