Chiselling Away Waste
Description
This section is from the book "Woodwork Joints", by William Fairham. Also available from Amazon: Woodwork joints.
Chiselling Away Waste
Fix your wood firmly in any suitable manner, vice or otherwise, and, holdingyour chisel tilted as at Fig. 90 , pare away the blacked portion 1; then pare away the blacked portion 2; after which hold the chisel flat and by gradual operations pare away the dotted lines 3, until you come down to the gauge line; then repeat the method of cutting on the opposite side of the wood. If any difficulty be experienced by chipped or ragged edges whilst chiselling, it can easily be overcome by chiselling alternately from the outside of the wood, so that the finish of the chisel cut takes place in the centre of the work. Some prefer to chisel away the waste by placing the wood on its edge and using the chisel vertically instead of horizontally. The same methods (1, 2 and 3) hold good in this case.
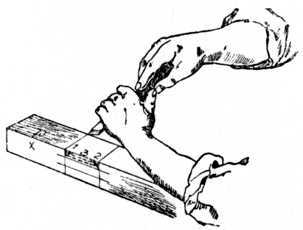 Fig. 90. - Chiselling away Waste.
Joints Other than at 90°.- The two pieces forming a bridle joint are not always at right angles, as at Fig. 81 ; in many instances it is necessary that the joint be at other than 90 degrees. The work, however, is treated in a similar manner, with the exception that an adjustable joiner's bevel is used instead of a trysquare to mark out the shoulder lines, and that a change of direction in the grain of the wood will occur when chiselling out the work. Fig. 91 indicates the change in the grain of the wood, and the adjustable joiner's bevel is also shown.
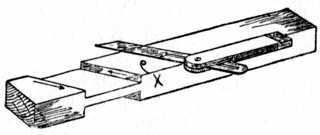 Fig. 91. - Bridle Joint at Angle other than Right Angle.
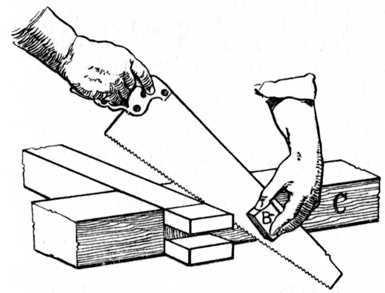 Fig. 92. - Sawing off Waste from Bridle Joint. (See reference onpage 39.)
Continue to:
My Books

