Clay Modelling And Pottery. Part 8
Description
This section is from the book "Arts And Crafts In The Elementary School", by Joan Dean. Also available from Amazon: Arts And Crafts In The Elementary School.
Clay Modelling And Pottery. Part 8
When the pot has been biscuited and decorated it will need to be glazed. Weigh out the ingredients of your glaze, mix them together, and add water until you have a liquid of a cream-like consistency. The consistency of glaze should vary a little according to the kind of glaze you are using. Transparent glazes are better if they are not too thick, but an opaque glaze often yields a better result if it is not too liquid. Brush the glaze mixture through a coarse sieve several times, and then through the fine sieve several times. Like slip, it will settle if left, so stir it frequently as you use it. Glaze can be poured on to a pot, or, if a large quantity is made, it can be dipped. In any case, the foot of the pot must be kept free of glaze, although glaze can be wiped away with a sponge if it gets there accidentally. Whether you are pouring or dipping, first glaze the inside, by pouring glaze into it up to the rim. This is most easily done from a jug. Tip the glaze out again, back into the bowl or jug, as quickly and neatly as you can. Try to avoid getting trickles down the outside, and if you do get some, wipe them away with a sponge before glazing the outside. To glaze the outside, take hold of the pot, or model, with the finger-tips of your left hand, if you are right-handed, holding it as near to the base as you can. Rotate your hand as far to the left as you can. Hold the work over a bowl and pour the glaze over it, slowly turning the pot as you do so. When your hand is fully turned in the other direction you should find that the work is fully glazed, except for about half an inch at the bottom, which is best left unglazed. Now stand the work to dry. This happens in a few minutes, and you can see the glaze covering lighten as the water is absorbed by the pot. Wipe away any glaze that has found its way on to the bottom of the pot, and smooth out any unevenness with a finger. You will find that this way of pouring glaze needs practice if it is to be done evenly, but it works very satisfactorily when you have acquired the knack. You can, in any case, always dab a bit of glaze on any patches you have missed, and if you make a mess of your first attempts at pouring glaze, you can always wash it all off, let the pot dry, and try again. Pots which cannot be held for glazing in this way can be stood over a basin and the glaze poured round them.
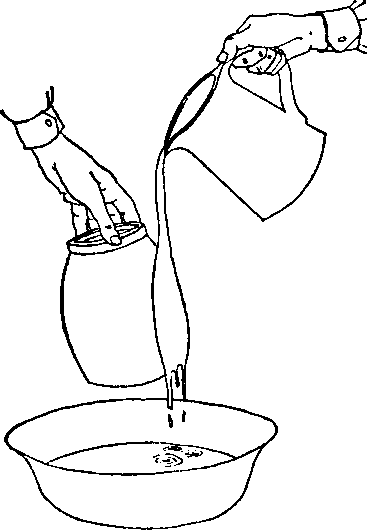
Pouring glaze white holding the pot
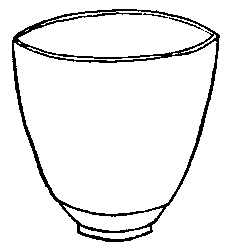
A bowl glazed and ready for the kiln. Notice the area at the bottom of the pot which is left unglazed.
Glazed ware must be carefully arranged in the kiln, so that no glazed surface is in contact with anything. With a glaze firing, there is no need to raise the temperature slowly, but cooling must be adequate, otherwise the glaze may crack.
My experience as a teacher of pottery has made me very much aware of the amount of time spent in rescuing work that has become broken or damaged, and in trying to diagnose why things have gone wrong. The following pieces of information may therefore prove useful:
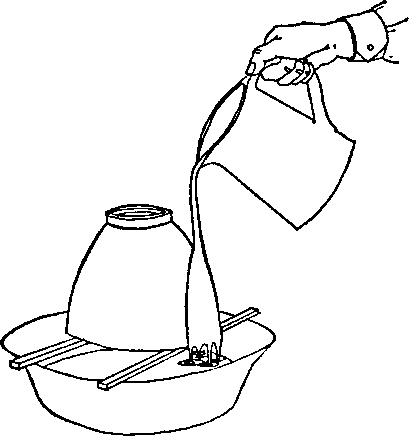
Glazing a pot which cannot be held in the hand.
1. There are two possible ways of repairing work which breaks before it is fired. It can be placed in a tin, wrapped in a damp cloth and kept there until the pieces are pliable again. They can then be stuck together with slip. If a repair is to be carried out in this way, it is essential that all the pieces concerned are in a similar state of dampness. Then contraction can take place at the same rate in all of them, and there is no danger of one pulling away from the others.
Another method of sticking broken pieces is to use gum arabic as an adhesive. This will hold them together quite satisfactorily.
2. Work which breaks in the kiln, or at the biscuit stage, is often past repair. Occasionally the pieces can be balanced so that they can be stuck with glaze. Minor repairs can also be carried out by the following method:
Powder some dry clay to a very fine dust, and fire the dust in a biscuit kiln. Mix this dust with waterglass to make a stiff putty-like substance. This can be used to stick pieces of pottery which are not too badly broken. Heads which have come away from the bodies of models are often successfully mended by this process. The mended work should be left to dry for some hours in a position where the pieces cannot slide apart, and then it should be fired again in a biscuit kiln before glazing.
3. Mistakes in applying glazes can usually be washed off, although stains are sometimes left. Mistakes in painting on designs can also be washed off, if they have been put on with paint which has been mixed with water. If the paint has been mixed with gum arabic, it is more final.
4. Unsuccessful glazing can sometimes be rescued by the addition of a further coat of glaze and a further firing.
5. Glaze which has run down in the kiln to form drips on the bottom of the pot, which prevent the pot standing upright, can be ground away with a grinding wheel. This is a tedious, and rather dangerous job, because of pieces of flying glaze. It is often simpler to stick something on to the bottom of the pot to correct its standing position.
6. In glazing, the glaze may "craze" or develop a crackled surface. This may be caused by a glaze which is too thick, or by an unsuitable combination of glaze and clay, or by underfiring. Many suppliers of clay supply also a transparent glaze to go with it, and by using such a combination of materials you will probably avoid crazing. Glaze sometimes blisters. This, again, is usually caused by unsatisfactory combinations of materials, and a review of the glaze recipe used can often put matters right.
Continue to:
My Books

