Huck Weaving
Description
This section is from the book "Handcrafts For The Homebound Handicapped", by Mildred Kroll Rich. Also available from Amazon: Handcrafts For The Homebound Handicapped.
Huck Weaving
Materials And Supplies
1 huck towel, or 1 yard of 17" width huck towelling
6 skeins 6 strand thread (2 black and 2 each of 2 shades same color) spool of size 40 sewing thread same color as towel
Tools
pair of scissors blunt tapestry needle size 18 ruler
Huck weaving, or as it is sometimes called huck darning or Swedish weaving, is one of the simplest types of weaving or embroidery. It owes its popularity to its colorful charm and the fact that one basic stitch is usedthe darning stitch. The instructions which follow are for the design on the towel in the lower right hand corner of the photograph. A blue towel was purchased and it was woven with black, orange, and yellow thread.
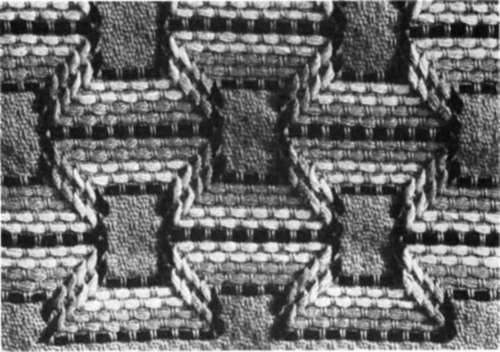
Figure 39. Working Detail of Huck Weaving.
Procedure
1. The huck weaving illustrated in the photograph was done on the wrong side of the fabric, the side where the prominent pairs of threads are in vertical position. The work is done by running the embroidery cotton under these pairs of threads, but not through to the back of the towel. If you have purchased a towel, the hemmed ends of it must be ripped and reversed, and the towel hemmed by hand on the other side. The length of the thread for this pattern each time must be 21/2 times the width of the towel, or about 40 inches for a 17" width towel. Thread the tapestry needle with the full six strands of black.
To place the design properly and have both sides of the design end the same, fold the towel lengthwise and mark the center pair of threads two inches up from the lower edge. If you have purchased a towel and there is a border woven in the towel as is shown in the center towel of the lower row in the photograph, ignore the border and commence an inch above it.
The pair of threads you have marked will be the fifth pair of the nine in black at the bottom row of the design at the center lower edge of the towel. Work from right to left and draw the thread through these nine center stitches. Measure half of the thread and allow the half without the needle to hang loosely. Half the design is worked at a time from right to left. The towel is then turned around, and the other half is embroidered with the thread that was allowed to hang loosely. In this way, since only half the length of thread is used at a time, snarling of the thread is avoided. Study the enlarged detail of this huck weaving pattern and follow the design accurately.
Row 1:This row consists of 9 stitches, one single stitch up directly above the 9th stitch, 4 across to the left beginning directly above the last stitch made, down one row for the single stitch, down another row and pick up the 9 stitches to the left again. Repeat this pattern to the end of the towel. At all times the pairs of threads must be picked up from right to left. To end the floss at the sides so that no thread will show on the back, jump over the pair of threads sewn and double back through three or four stitches. Cut the thread close to the towel.
Row 2:In orange, make 8 stitches above the 9, up one, and 5 stitches above the 4, down one, and repeat to the end of the row.
Row 3:In orange, make 7 stitches above the 8, up one, 6 stitches above the 5, down one, and repeat to the end of the row.
Row 4:In yellow make 6 stitches above the 7, up one, 7 stitches above the 6, down one, and repeat to the end of the row.
Row 5:In yellow, make 5 stitches above the 6, up one, 8 stitches above the 7, down one, and repeat to the end of the row.
Row 6:In black, make 4 stitches above the 5, up one, 9 stitches above the 8, down one, and repeat to the end of the row. Row 6 is a double row in that it is worked with black twice. The second time go through the 9 stitches made a few stitches off the center of the towel, go up one, 4 stitches across, down one, and repeat to the end of the row. This second time of the double row 6 is the same as row 1.
Row 7:Same as row 2 except use yellow.
Row 8:Same as row 3 except use yellow.
Row 9:Same as row 4 except use orange.
Row 10:Same as row 5 except use orange.
Row 11:Same as row 6.
Row 12:Same as row 2.
Row 13:Same as row 3.
Row 11:Same as row 4.
Row 15:Same as row 5.
Row 16:Same as row 6.
Row 17:Same as row 2 except use yellow.
Row 18:Same as row 3 except use yellow.
Row 19:Same as row 4 except use orange.
Row 20:Same as row 5 except use orange.
Row 21:Same as the first thread of row 6.
Note:It is important to change colors as directed in order to give the three dimensional effect of windows outlined in black. If you prefer two shades of any other color, simply substitute the lighter of the two colors for the yellow, and the darker one for the orange. Black for the outlining is most effective, but any dark color may be used.
2. Turn under a quarter of an inch first, then a full inch for the hem at both ends of the towel. Use the ruler to measure accurately and pin before sewing. The hemming stitch holds a folded edge in place. Only two threads of the material, and the same from the hem, should be picked up by the needle. Slant the stitches from one insertion to the next. Use size 40 thread the same color as the towel. See the detail of the hemming stitch below.
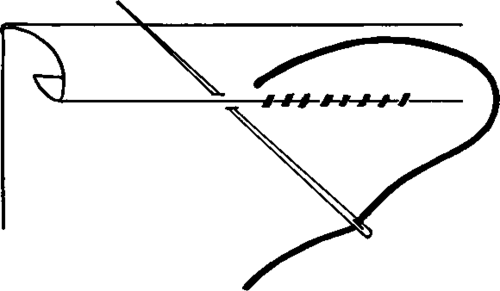
Figure 40. Hemming Stitch Detail for Huck Weaving.
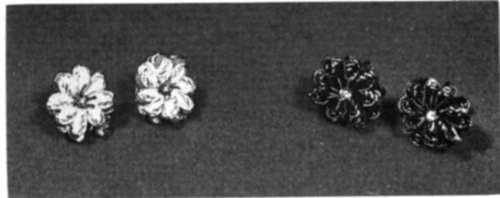
Figure 41. Rick Rack Earrings.
Continue to:
My Books

