II. Book Problems. Part 7
Description
This section is from the book "Paper and Cardboard Construction", by G. F. Buxton, F. L. Curran. Also available from Amazon: Paper and cardboard construction.
II. Book Problems. Part 7
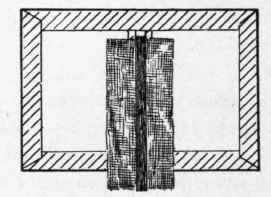
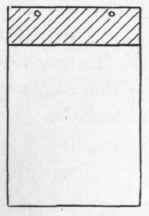
Cloth Board And Print Paper Glued To Binders' Cloth.
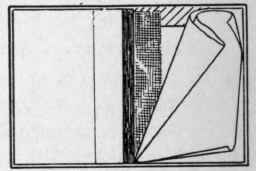
Laps Glued Over Edge Of Case And Sections Ready To Glue Into Case.
Sections Glued Into Case And Lining Paper Being Pasted Inside Of Covers.
Sections Sections Backing Folded Sewed Glued To Together Sections.
Backing Glued To Case - Lining Paper Pasted Inside Of Cover.
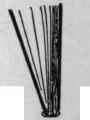
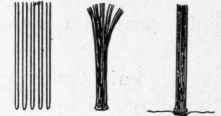
Finished Book With Back Rounded d. Glue strip of canvas backing, cut to 2 1/2"x6", against sewed edges and press the 1/4" strip of paper against the glue as it is forced thru the canvas. Allow to dry with paper attached as shown above. See third drawing in bottom row.
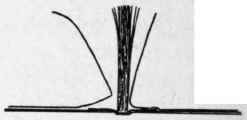
e. When dry (next day) glue these canvas projections to the inside of covers. Press firmly with one hand against a piece of scrap paper while holding the leaves of the book straight up from the covers. f. Insert a piece of scrap paper between covers and end sheets at both front and back of book, close the book, and put under pressure for a few minutes, or until next day. Be sure the back of the book is smoothly rounded.

Cloth Bound Book g. Cut two pieces of cover paper for lining, 5 3/4"x 7 3/4", or of such size as will fit properly, and paste against inside of cover and for a quarter of an inch up against the end leaves of book. Put under pressure of heavy books or into a letter press.
h. When dry, the outside of front cover may be decorated by a simple outline in water color.
Note: - Writing paper, drawing paper, or manila paper may be used in place of print paper, and any number of sections may be used, or several printed pamphlets may be sewed together. Economy of material and ease of manipulation will require that not over three or four sheets be put into a section and that not over five sections be used.
If hand screws or vises be available, the back of the book may be rounded with a hammer as shown in the illustration at the right of the lower row on page 50. This form can be suggested by working with the fingers. It provides a place for the sewing, and allows the covers to lie evenly.
It may seem desirable to start with a smaller book and make two books, or to omit the larger book altogether.
Medium tag board, 2 pieces, 9"x 12".
Glue.
Rule, scissors, pencil.

Steps In Making Pocket Paper File Book Problems.
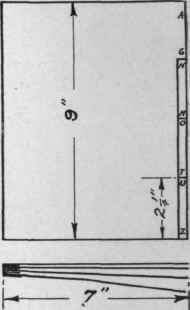
Directions: a. Cut 5 pieces of tag board, each 3 3/4"x 7 3/4".
b. Lay out and cut tabs, A, B, C, D, - as indicated in the small scale drawing on front cover at left on page 52. Each tab is to be made J" longer than the one above it.

Tag Board Paper Files c. Fold one piece for the cover as indicated in the lower drawing at the left, - I.
d. Fold the other three pieces as shown in the lower drawing,-2 and 3.
e. Glue folded part of No. 2 into No. 1; folded part of No. 3 to No. 2, and so on until all are glued together.
f. Fold the top piece around the others and glue.
Note: - Measuring, folding, and gluing must be accurately and carefully done or the edges of the finished file will not be even. The photograph shows the pocket paper file and also the next problem - the desk paper file.
Heavy tag board, 4 pieces, 9"x 12".
Glue.
Rule, pencil, scissors.
Directions: a. Cut 4 pieces 8 1/2"x 9".
b. Lay out and cut tabs in same manner as in number 411. Tabs are to be made §" wide and 2 1/4" long.
c. Fold each sheet 7" from tab edge.
The top sheet which is to fold around the others will require a second fold the same as in number 411.
d. Letter or number the tabs to be used for markers. One suggestion is given in the above drawing.
e. Glue together and put under a heavy pressure. Follow the same order as in number 411.
Desk Paper File.
A. End Opening Cover Strawboard, 2 pieces, 6"x 9". Binders' cloth, 2 pieces, 3"x 6". Heavy cover paper, 2 pieces, 6"x 9". Marble paper, 2 pieces, 6"x 9". Glue, paste, eyelets. Rule, pencil, scissors, eyelet punch, knife.
Strawboard 5"x 6 1/4" And 3/4"x 5" Binders' Cloth Under.
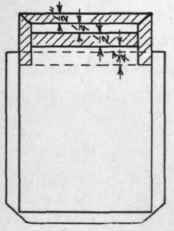
Binders Cloth Folds Glued Over Cover Paper Under.
Reverse Side With Cover Paper Pasted Down.
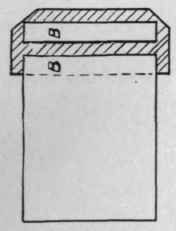
Directions for Front Cover: a. Cut one piece of strawboard 5"x 7" and cut strip from end 3/4"x 5". These two pieces are to be fastened to binders' cloth as shown in the first drawing.
b. Cut one piece of binders' cloth 2 1/2"x 6". This is to be used as a hinge for the front cover.
Continue to:
My Books

