Wiping A Plumber's Underhand Joint
Description
This section is from the book "Cassell's Cyclopaedia Of Mechanics", by Paul N. Hasluck. Also available from Amazon: Cassell's Cyclopaedia Of Mechanics.
Wiping A Plumber's Underhand Joint
The pipes having been dressed out straight, square the ends with a rasp. The burr should be cleaned out of the end of one pipe, and the outer arris cleaned off (see Fig. 1). Open the other pipe-end (Fig. 2) by means of a turnpin, so that the first pipe will enter as far as it is rasped off. Clean up with glasspaper and smear the pipes with a little whiting or chalk. Now mark the pipes at 6 in. from their ends by means of a gauge (Fig. 3). Paint the end of the pipe as far as the gauge mark with warm soil or smudge, and then with a shave-hook shave the pipes to a distance of l 3/4 in. from the end of the first (Fig. i),and l 1/2 in. from the end of the second (Fig. 2). Shave also the rasped parts of both pipes. They must now be rigidly secured in position by laying each pipe upon two bricks set on edge or upon two lengths of quartering and then holding them down by string as shown in Fig. 4. On the bench immediately beneath the pipes place a sheet of brown paper to catch the solder which falls in the process of wiping the joint. Smear the shaved parts of the pipes with tallow, which acts as a flux. Have conveniently near a pot of solder of the proper temperature, and then, with a ladle in one hand and a wiping-cloth in the other, commence to make the joint. The first stage is to pour on the metal and " tin " the joint, the second is to shape the joint, and the third and final stage to wipe it smooth. Pour the metal on to the shaved part and on about 2 in. of the soiled portions. Hold the cloth under the joint to catch the surplus solder. As the solder runs down the sides of the pipes it is caught by the cloth and pressed up against the bottom, thus helping to get up the heat and to tin the pipes. The joint should be formed quickly by wiping it with the cloth, which should be kept at the same curve all round the pipe, ana pressing the edges so as to get them clean. Fig. 5 illustrates the finished joint.
Fig. I.
Fig. 2.
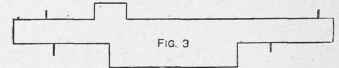
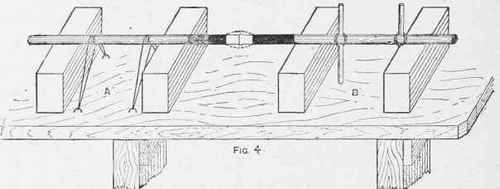

Fig. 5. Wiping a Plumber's Underhand Joint.
Continue to:
My Books

