Inlaid Patterns
Description
This section is from the book "How To Make Common Things. For Boys", by John A. Bower. Also available from Amazon: How to Make Common Things.
Inlaid Patterns
You can manage the inlaying of simple geometrical patterns, and find it even easier than carving. First, the patterns must be cut out into a hollow, not more however than from 1/16th to 1/8th of an inch. Cut it out holding the chisel upright in your left hand, then use force with the right hand. Having cut out the pattern, clear away the wood, and keep the hollow a uniform level. Then cut strips of darker wood, of the exact width, to fill up these hollows.Put them in, using very thin glue for the purpose, and when quite dry rub down smooth with glass-paper. This kind of work is suitable for trays, small tables, tops of bracket-shelves, and ornamental objects. You can derive hints from a few designs we give in Fig. 87, a, b, c. A pretty effect is produced by using wood of two or three tints, if you take care to blend them nicely. For other designs and uses we leave to suggest themselves to you. Woods used for carving or inlaid work is sometimes better for being dyed or stained; but with oak and some of the hard woods this is not required, nor is it necessary to varnish either; rubbed up quite smooth, and good rubbing in of linseed-oil is the best thing for it. Ebony, black walnut, and red cedar are good woods for inlaying.
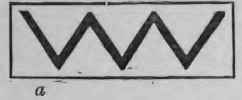
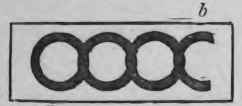
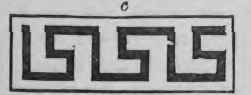
Fig. 87. - Simple inlaid patterns, a, b, c.
Continue to:
My Books

