Hints On Driving Nails
Description
This section is from the book "Things To Make In Your Home Workshop", by Arthur Wakeling. Also available from Amazon: Things to Make in Your Home Workshop.
Hints On Driving Nails
Hammer and nails are in common use in every household. Yet driving nails, the commonest of all mechanical operations, is not often done in such a way as to get the full holding power of the nails. A few plain facts about nails and their uses would, if they were carefully observed by the amateur woodworker, decrease the difficulties encountered and save much effort and subsequent disappointment in the failure of joints.

Fig. 8 (left). - Handling a hammer for straight nailing. Note that it is gripped near the end.

Fig.9. - "Toe-nailing" (at right) calls for more practice.
The proper way to hold a hammer is the first important thing to learn. The amateur has the natural feeling that the less of the handle he uses, the less likely he is to miss the nail. The truth of this is not borne out in practice, however, for after one has become accustomed to holding the hammer handle at the end, as shown in Fig. 8, he will miss the nail if he tries the former method. It is safe to assume that the manufacturers of any-good hammer know something about the best length of handle to use.
The angle of a nail hammer or the "hang" of it will have to be sensed from experience. It will not take long before a person will automatically hold his hammer handle just low enough as the hammer strikes the nail.
Sometimes an otherwise good hammer seems to slide off the nail. At such a time it will be a good thing to rub the face of it on a piece of fine sandpaper, for it has probably become greasy.
For ordinary use, a bell-faced hammer (one with a convex driving surface) will prove the most satisfactory; it will not mar the surface when the nail is "driven home." The weight of the hammer is partly a matter of choice, although the tendency of the amateur is to try to use a hammer that is too light. From 12 to 16 oz. is the common range, depending upon the required use.
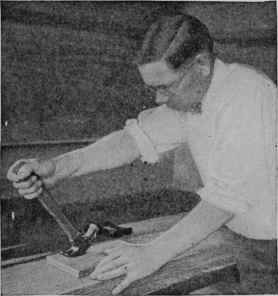
Fig. 10. - The proper way to use a hammer when drawing a nail.
Sharp, decisive blows will produce best results, and confidence on the part of the driver will keep nails from bending.
"Toe-nailing," as shown in Fig. 9, is somewhat more difficult than straight driving. For this it is better whenever possible to start the nails before the pieces are in the final position. Care must be taken not to slant the nails too much or they will not reach the second member properly. This is a common error of the amateur. After some practice one can drive the nails very close in a corner without scarring the wood.
Pulling a nail requires just as much care as driving one. The extra large supply of hammer handles at the hardware store is kept principally for those who have not learned how to pull nails. The main thing to bear in mind is the necessity of keeping the fulcrum near the nail. This is taken care of by the shape of the hammer when the head of the nail is close to the wood as in Fig. 10. In this way great pulling power is applied by only a few pounds of pull, and the handle is safe.
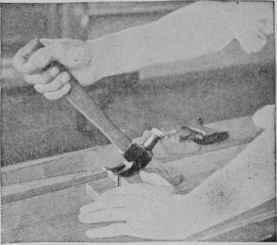
Fig. 11. - A block under the claws of the hammer is necessary in drawing long nails.
It is after the nail comes up a distance and the fulcrum shifts toward the face of the hammer that the handle is in danger, both from less mechanical advantage and from the fact that the pull ceases to be vertical. At such a time the wise operator will take time to find a block to put under the hammer as shown in Fig. 11.
There is a trick in "setting" nails that it takes a little time to develop. Most amateurs make a big ugly hole around the head. Figure 12 shows the proper way to hold the nail set. Steady it with the fingers against the wood so that it will not slip; then make a decisive blow so that the nail goes down below the surface. After that it is easy to drive it as deep as desired without trouble.
In Fig. 13 is shown how to draw pieces into position by the use of nails. The nail is started at an angle from the higher piece, with a crevice left open between the two until the nail has caught the second member. When the nail is driven in, the joint is closed and the lower piece is drawn up into position. It is well to bore a hole in the end of the hammer handle with a ½'-in. auger bit and fill it with soap. After dipping the tip of nails into the soap, the driving becomes much easier.
Fig. 12 (left). - How the nail Bet should be used. The fingers of the left hand prevent it from slipping.


Fig. 13 (right). - Skillful nailing will draw uneven parts into place.
Continue to:
My Books

