How To Make A Dressing Table
Description
This section is from the book "Furniture A Girl Can Make", by William W. Klenke. Also available from Amazon: Furniture A Girl Can Make.
How To Make A Dressing Table
An old discarded packing case that is made of lumber about 7/8" thickness will be satisfactory for this model. Of course, if you prefer, use new lumber. The size you will make this dressing table will depend largely upon the size case you can conveniently obtain. The height from the floor to the top should be about 30". Besides the packing case, you will require one good piece of wood for the top; this you will have to purchase new, since the top must be nice and smooth.
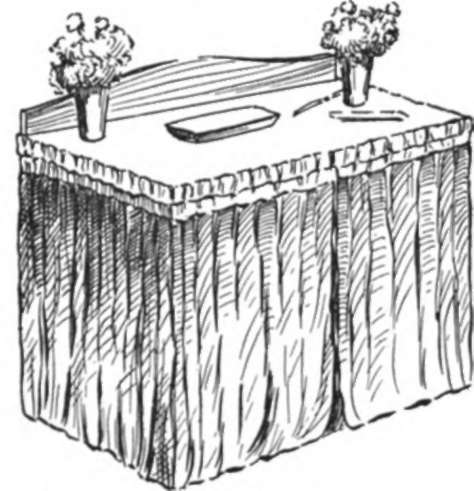
For the material to cover the sides and front, you will know best what to purchase so that the dressing table will harmonize with the room in which you wish to place it and you will also know best how to handle the sewing etc. for that part of the project. I have indicated a ruffle to run around the top edge, and you should allow for an opening in the center of the front so that the two parts of the "skirt" will spread apart for your knees, as you sit in front of your table.
Method Of Procedure
Step No. 1: Carefully remove the part of the case you intend having for the bottom of the dressing table. An old flat bar of some kind will help you to pry up the boards; then pull out the nails by placing a block of wood under the hammer head so as to give better leverage and also to prevent breaking the hammer handle.
Step No. 2: Cut away enough of the front so that your knees and legs will pass through this space as you sit in front of the table. Before doing the actual sawing however, it will be well to nail two narrow pieces about 2" wide across the inside of the front pieces to hold the two side pieces of the front together after cutting away the center portion.
Step No. 3: See that all boards are securely nailed in place and that no nails project above the surfaces. Also make sure that all boards are free from loose pieces hanging off the edges.
Step No. 4: Nail a sheet of plywood on the top. Use 1/4" thick 3 ply laminated wood for this purpose. (This is inexpensive and can be purchased from any local lumber dealer). Use brads (nails with very small heads) for this work and set the nails below the surface so that the nail holes can be puttied. Before you nail the top piece down, cut a head piece (shaped as shown) out of wood, about 5/8" thick and nail this to the top from the under side of the panel; now you are ready to fasten the top in place. You may prefer to have the top plain in that event, leave off the head piece.
Step No. 5: Carefully sandpaper the top and curved head piece and finish with paint or lacquer in the color you prefer. Directions for applying the paint or lacquer are given on the can.
Step No. 6: The draped material is tacked in place at the top. Drive the nails where they will not be seen, between the folds of the ruffle.
Continue to:
My Books

