


How To Make A Pinhole Camera
Description
This section is from the book "Furniture A Girl Can Make", by William W. Klenke. Also available from Amazon: Furniture A Girl Can Make.
How To Make A Pinhole Camera
You can make this simple pinhole camera out of a discarded cardboard or wooden box that you may have on hand. With this little camera, you can make beautiful pictures of all sorts of objects, such as still life, buildings, landscapes, etc.—in fact any object or scene that does not have motion. In other words, confine your pictures to time exposures.
A simple way to make a pinhole camera, is to construct one box inside of another.
Method Of Procedure
Step No. 1: First make a box with inside measurements 31/4"x41/4"x51/4" This box is made with the one 31,4"x414" end open. The inside of this box must be painted a dead black to prevent reflection of any light; if you prefer, you can line it with black opaque paper. In the front end of this box, exactly in the center, cut a hole 1/4" square. At the opposite end, paste 1/8"x 1/2" strips of cardboard, keeping these strips a full one-sixteenth inch back from the end of the box.
Step No. 2: Now make a box to fit around the outside of the first box and make it in two equal sections. The one section is glued to the front part of the camera (the end with the 14" square hole). The other section is made to fit over the box, but must not be glued in place; this is removed when you put your plate or cut film in the camera and removed again for developing. This removable section must also be painted a dead black on the inside.
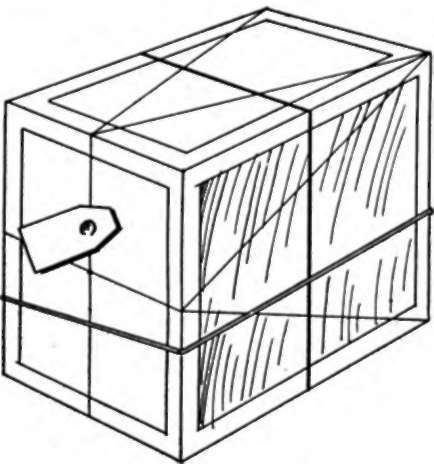
Step No. 3: Paste a piece of black opaque photographic wrapping paper (a piece about 1" square) over the 14" square hole you previously cut in the front of the camera. Find the exact center of the camera front and pierce a fine hole there, using a No. 10 fine steel needle.
Step No. 4: For the shutter, that is something to admit or close off the light when making the exposure, simply fasten a piece of cardboard about l"x2" in size to the box part. A simple way to fasten this in place is to use a common self-piercing brass fastener. This little improvised shutter must be free to swing over the needle hole so as to allow the light to enter or to shut it out.
The secret of making a good pinhole camera is to be sure it is light tight and dead black inside.
A simple way to determine the range of sight taken in by this camera, is to draw pencil lines out from the pin hole, square across the front; then from these lines, draw lines on the top and two sides over to the corners, as shown on the drawing.
It must be remembered that the picture is always taken up-side-down, and left to right, since the rays of light enter the camera through the tiny pin hole in the front of the box; however, the final picture will come out correctly.
Now to take a picture with this camera, first put a plate or cut film that is 31/4"x41/4" in size in the little recess at the back of the camera (inside box); this must be done in a light tight closet or dark room. Then place the outside box in place and hold it tight with a good rubber band that will also hold the shutter over the hole to prevent the light from coming in. Place the camera on some firm support so that it cannot move while taking the picture; open the shutter (keep rubber band on box) and make the exposure; the plate or film must then be developed.
After each exposure, the film or plate must be changed, since only one picture can be taken on the film. This is the greatest disadvantage to a camera of this kind.
The following table of exposures may be of help to you. Use a high speed plate or film. For snow scenes, distant views of landscapes give eight seconds exposure with bright sunlight; for slightly overcast sky, give 16 seconds exposure and for dark clouds, give 32 seconds exposure.
For the general run of landscape scene showing some sky and the center of interest in the foreground, give 16 seconds exposure for bright sunlight. Double it for light overcast sky and give one minute exposure for dark clouds.
For subjects that are closer at hand such as park or garden scenes, give 32 seconds exposure for bright sunlight, double the exposure when the sky is slightly overcast, and give two minutes exposure when there are dark clouds.
For partly shaded close by scenes, as in the path of the woods, give one minute exposure when the sun is shining brightly, double the exposure when slightly overcast and give four minutes when dark clouds prevail.
You can also take all kinds of night pictures, either out doors or indoors, also rainy day scenes. A few trials on your part will soon teach you the correct exposure to make and I know you will obtain a great deal of pleasure from this pin hole camera.
Continue to:


My Books

