Plates and Illustrations
Description
This section is from the book "Modern Carpentry And Building", by W. A. Sylvester. Also available from Amazon: Modern Carpentry And Building.
Plates and Illustrations
Plate 1. Fig. 1. To bisect a given line. - Let ab be the given line. With a radius somewhat more than half of the length of this line, and using the points a and b for centres, describe arcs intersecting above and below the given line, through which points of intersection draw the line cd.
Plate 1. Fig. 2. To bisect an angle. - Let abc he the given angle. With b as a centre, and with any radius, describe the arc de. Then, using d and e for centres, and with a radius somewhat more than half of the length of de, describe arcs intersecting at f. Then draw a line from b through the intersection at f.
Plate 1. Fig. 3. Given a tangent t a. circle, to find the exact point of contact. - Let b be a tangent to the circle, the centre of which is at c. Draw a line from c to any point on the tangent, as at d. From e, the centre of this line, and with a radius equal to ce, describe an arc. The point where this arc crosses the tangent at f is the exact point of contact.
plate 2. Fig. 4. To describe an ellipse with a cord or thread. - Draw the line ab representing the length of the required ellipse. Bisect this line (see Plate 1, Fig. 1); which gives the line cd, the length of which must be equal to the width of the required ellipse. With a pair of compasses, take the length of ae. Then, with c as a centre, describe arcs intersecting the line a b at f and at g: at each of these three places, f, g, and e, stick in a pin. Now pass a piece of cord or thread around these pins, draw it taut, and tie it. Now remove the pin from e, and, holding a pencil in the bight of the cord, draw it around through c, b, d, and a, keeping the thread at a uniform tension. A notch made in the side of the pencil-lead, near the point, will prevent the thread from slipping off.
A wire thread about the size of No. 40 or 60 linen thread would be better to use, as it will not stretch. It would be a good plan for the workman to keep about twenty-five or thirty feet of it in his chest, rolled up on a spool, the same as a chalk-line. It would also be very convenient to use in describing a circle of great radius.
Plate 1.
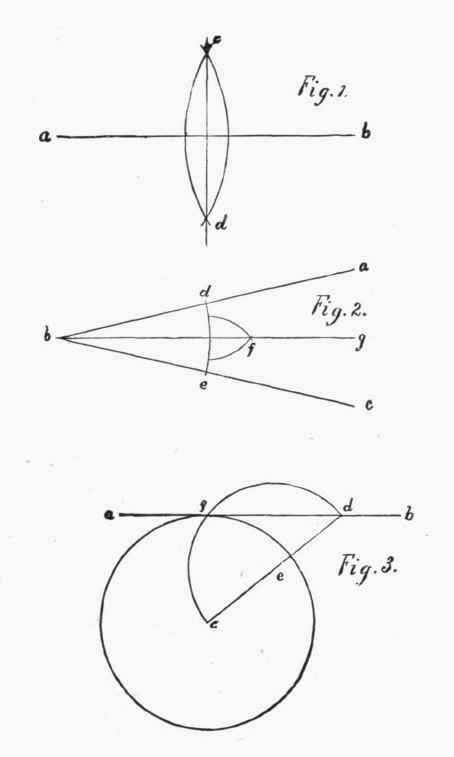
Plate 2. Fig. 5. To describe an ellipse with the compasses. - Draw the line a b, which represents the length of the required ellipse. Bisect this line (see Plate 1, Fig. 1), which gives ce. Make the length of ed equal to half the width of the required ellipse. ' Divide c d into three equal parts, the points of division being at f and g. Measure off from a, and also from b, the length of two of these parts; which gives the points i and i 2. Join i and g. Bisect this line, continuing the bisecting line until it intersects with the line ce. At e is the centre from which to describe the side of the ellipse, and the points i and i 2 are the centres from which to describe the ends. A line drawn from e, through the points i and i 2, will show where the curve of the sides and the curve of the ends meet, as seen at j and k.
Plate 2. Fig. 6. To describe an ellipse with a two-foot square. - Draw a line ab in the direction of the length of the required ellipse. Bay the square on the line so that the inside edge of the blade will be on the line, and the inside corner e will be in the centre of the ellipse. Then, with any strip of board, form a trammel as follows: an inch or so from one end drive a brad through at f, letting it project through about an eighth or an inch. From this point, measure off one-half the width of the ellipse. At this point, bore a small hole, and insert a piece of pencil, g, which must project down far enough to mark when the trammel is laid down on the square. Then, from this point, measure off one-half the length of the ellipse, and drive through a brad, h, letting it project below the same, as at f. Then, by sliding down on h, and letting f move to the left, all the while keeping h and f hard up against the edge of the square, the pencil g will describe one-quarter of an ellipse. Then turn the square over so that the end a will be in the direction of b, keeping the inside corner of the square on the point e, and describe the other quarter in the same manner, thus forming half of an ellipse, the other half of which may be described in the same manner, by reversing the end i.
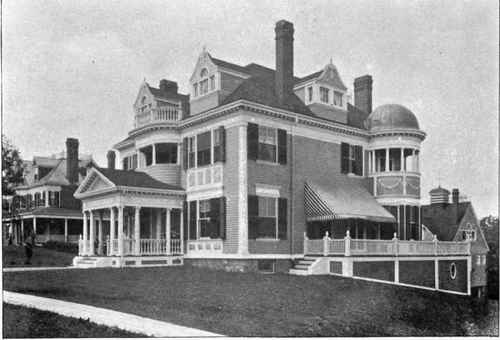
A FINE MODERN RESIDENCE. (For Hour plans of similar houses, see back part of this book.)
Plate 2.

This rule applies when the sum of half the length and half the width of the ellipse does not exceed the length of the tongue of the square. For larger ellipses, two straight-edged pieces of board might be used, one being a e and the other e i, which could be fastened to the work at right angles with each other.
Plate 3. . Fig. 7. To describe an elliptic arch by finding points through which to spring a lath. - Let a b be the span or chord of the required arch, and c d be the rise. At a and at b, draw perpendicular lines, a e and b f, to the height of c d. Also draw a line joining e and f. Divide d f and f b each into any number of equal parts, as 1, 2, 3, 4, and 5, 6, 7, 8. Draw lines joining d and 5, 1 and 6, 2 and 7, 3 and 8, and 4 and b. Then through the points of intersection, d, g, h, i,j, and b, spring a thin strip of board, and mark around it. Repeat the operation on the other side.
This method is very much used by builders, but we prefer the method described in Plate 2, Fig. 4.
Plate 3. Fig. 8. To describe a curve of great radius. It is sometimes desired to describe a curve of great radius. The usual method is to use a line (for a radius to strike the curve), but a line stretches so as to give an irregular curve; and then, again, there is not always room to use a sufficiently long radius. The method described in Fig. 8 is the best way in such cases, when the rise and span are known, it being very quickly done, and giving a true curve.
Continue to:
My Books

