Plates and Illustrations. Part 2
Description
This section is from the book "Modern Carpentry And Building", by W. A. Sylvester. Also available from Amazon: Modern Carpentry And Building.
Plates and Illustrations. Part 2
Let ab be the span, and c be the rise.* Tack in a nail at a and at b. Take two strips of board four or five inches wide, and six or eight inches longer than the span of the required curve. Joint straight one edge of each. Lay one piece with the straight edge in against a c, and lay the other piece with the straight edge in against b c, letting the ends lap at c, and drive in a nail. Also fasten a stay across, so that when the sides are against the nails at a and b, the corner of the frame will be at c. Then, keeping this frame against the nails at a and b, slide the frame around, holding a pencil at c: the pencil will describe a true curve, as shown in the dotted line. A piece of one-eighth inch round wire, two or three inches long, would be better than nails to tack in at a and b.
* When the rise is not known, and only the radius is given, see p. 124 to find rise.
Plate 3. Fig. 9. Given a segment of a circle, to find the centre. - Mark off any three points on the segment, as a, b, c. With a and also with b for a centre, and a radius somewhat more than half of a c, describe the arcs d e and f g. Then, with c for a centre, describe arcs intersecting these, as shown in the cut. Through the points of intersection at d e and f g, draw lines, continuing them until they intersect at A, which point is the centre from which the segment a b was described.
When the segment is very large, or when it is desired to be very exact, the quickest and best way is to figure out the centre, which may be done as follows: Square half of the span; to this add the square of the rise, which sum divide by the rise: the quotient is the diameter of the circle, of which the given segment is a part. Thus, suppose the span a b is 60 inches, the rise, 10 inches:
Plate 3
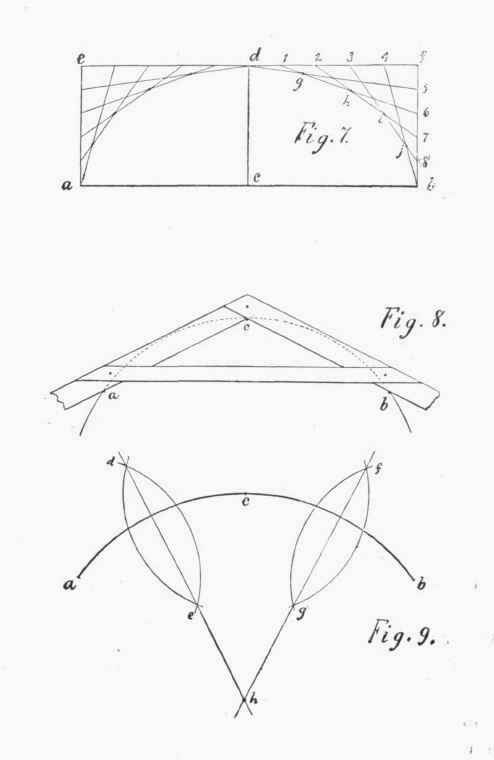
then half of the span is 30 inches, the square of which is 30 x 30 = 900. The square of the rise,. 10 inches, is 10 x 10 = 100, which, added to 900, the square of half the span, makes 1,000; which, divided by the rise, 10, gives 100 inches - that is 8 feet, 4 inches - as the diameter.1
Plate 4. Fig. 10. To find how far apart to saw kerfs to spring a board or moulding. - Let a b be the curve, around which it is desired to spring a piece of stock. Take a piece of stock d g of the thickness which is to be used; lay it down so that the edge shall pass through the centre c, and mark from c to g, and also at e. Now, with the saw which is to be used, make a kerf nearly through the piece of stock at c. Now, keeping this piece on the line eg, spring down the end d until the kerf is closed, then mark the point: e f will be the distance apart to saw kerfs.
Plate 4. Fig. 11. To describe a spiral. - Draw a line a b, on which, near the centre, locate two [joints, d and e, which must be placed just half as far apart as it is desired to have the lines of the spiral. Midway between these two points is c, the centre of the circle from which the spiral begins.
Place one point of the compasses in e, and with a radius of e 1, describe the semicircle 1, 2,
1 When the diameter is given, to find the rise for any chord or span, see p.124.
Plate 4.

Then, using d for a centre, and with a radius of d 2, describe the semicircle 2, 3. Then, again, with e for a centre, and. with a radius of e 3, describe the semicircle 3, 4, and so on.
This rule does not give a true spiral, although it answers in most cases. To describe a perfect spiral, turn out a piece of wood, an inch long, of such size that the circumference of this piece shall be equal to the length of space between the Hues of the spiral; that is, the diameter of this piece shall be about one-third of the distance between the lines of the spiral.
Fasten this turned piece in the centre of the intended spiral, and fasten one end of a piece of thread to this piece. Wind the thread around this piece, and make a loop in the last end of the thread. Now, holding a pencil plumb in this loop, swing the pencil around so as to unwind the thread, letting the pencil mark as the thread unwinds. The pencil will describe a true spiral Plate 4. Fig. 12. Given one side to construct an equilateral triangle. - Let a b be the given side. First with a, and then with b, for centres, and with a radius equal to a b, describe arcs intersecting at c. Join a c and b c, which forms the required triangle. The arcs thus described, which are shown in dotted lines, also form a Gothic arch.
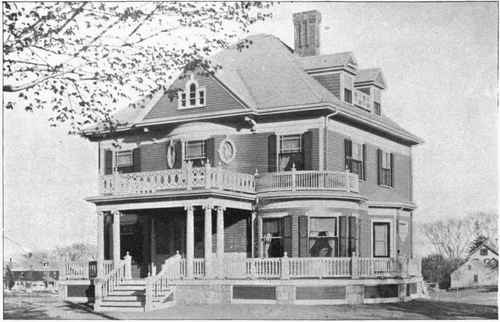
AN ATTRACTIVE MODERN RESIDENCE. (For floor plans of similar houses see back part of this book.)
Plate 5

Plate 5. Fig. 13. Given one side to construct a polygon of any number of sides. - Let a b represent one side of a five-sided polygon (pentagon). Continue a b indefinitely toward c. With a for a cen-tre, and a radius equal to a b, describe a semicircle, which divide into as many parts as there are sides in the required polygon. From a draw a line to the division 2. With these three points, a, b. and 2, find the centre of a circle, the circumference of which will pass through them. (See Plate 3, Fig. 9.) Then space off this circle, making the spaces the length of the given side a b, which gives the points a, b, e, d. and 2. Join these points, and we have the required polygon.
Plate 5. Fig. 14. Given the distance across, to construct a six or eight sided polygon (hexagon or octagon). - Draw a circle, the diameter of which equals the distance across the required polygon, through the centre of which draw the line A B. Space the circle into six or eight parts, as may be required, and draw lines from the centre through the points of division. Join f and d. With a pair of compasses take the distance which the centre, b. of this line falls short of the point a, and lay off the same from f to c; also from d to c. Now draw a line joining c and e, continuing the line to the point A. Then with g for a centre, and a radius of g A, describe a circle. Join the points where the radial lines cross this circle: and the result is the required polygon.
Continue to:
My Books

