


Seventh Exercise
Description
This section is from the book "A Laboratory Course In Wood-Turning", by Michael Joseph Golden. Also available from Amazon: A Laboratory Course In Wood-Turning.
Seventh Exercise
Material
Gum or cherry disk, 5 1/2" diameter, 1" thick.
Exercise
To turn the disk to the form and dimensions shown in Fig. 7?

Fig. 73.
Fasten the disk to a face-plate with 3/4 - inch screws, placing the centre of the plate over the centre of the disk, and selecting such a face-plate that the holes left in the disk by the screws will be cut away in the subsequent turning - that is, the holes made by the screws must come in some place where a recess will be turned in the disk. Screw the face-plate easily on the spindle of the headstock; if screwed on tightly it will "jam," and be difficult of removal. Adjust the driving-belt so that the proper speed will be gotten, and with the 1-inch skew chisel used as shown in Fig. 74 - that is, as a scraping instead of a cutting tool - turn the edge of the revolving disk true, making the diameter to be 5 inches. Next "face" the disk by holding the same chisel in the position shown by the views of Fig. 75, one corner of the chisel having contact with the work, and make the face flat and smooth by advancing the chisel across the work in the direction of the corner having contact. The chisel must be sharp, or the work will not be smooth.
Next make two pencil-marks around the edge of the disk - one 1/2 inch back from the face, and the other 1/8 inch back from the face. Make another on the face 1/2 inch in from the edge. These marks are shown by the dotted lines in Fig. 76. Now, with the chisel held as shown in Fig. 74, and using the pencil-marks as guides, cut a recess around the edge, as shown in Fig. 74. On this recess, and 1/8 inch back from the face of the disk, make another pencil-mark, and with this mark and the one made on the face as guides, cut the edge of the disk to the form shown in Fig. 77. Round the fillet left on the corner with the 1/2-inch skew chisel, held as shown in Fig. 77; and then, after varnishing and polishing, remove the work from the face-plate.
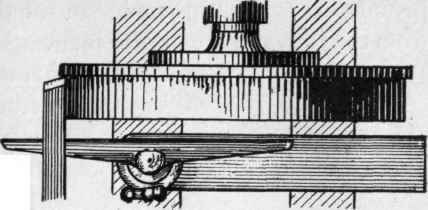
Fig. 74 - Top.

Fig. 75 - Front.

Fig 75 - Top.
Instead of the disk just removed from the face-plate, fasten to it one of pine, 1 inch thick and 6 inches in diameter. True the edge of this disk, and then face it in the same way that similar operations have been already performed. Next mark a circle that will be a very little less than 4 inches in diameter on the face of the disk, and, using this circle as a guide, cut a recess 1/8 inch in depth in the face.

Fig. 76.
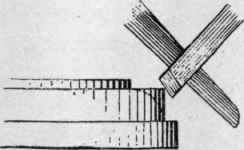
Fig. 77.
This is done with the skew chisel held and used as when cutting the edge of the first disk. This recess is now to be very carefully enlarged in diameter until the projection that was turned on the first disk will fit tightly into it, when on pressing the disks together they will have the appearance shown in Fig. 78. The first disk is said to be "chucked," the second being the chuck.

Fig. 78.
Next mark on the face of the outer disk a circle 4 inches in diameter and another 3/4 inch in diameter, and cut a recess 1/8 inch in depth between these marks with the skew chisel. On the bottom of this recess, 1/8 inch from the sides, make two more circles, and with these as guides cut another recess, of the form shown in Fig. 79, into the disk. As the sides of this recess are rounded, use the round-nose chisel to cut it. The round-nose chisel is used as a scraping tool, as the skew chisel was during this exercise, and its position when in use is shown in Fig. 79.

Fig. 79 - Top section.
Varnish and polish this face also, and then remove it from the chuck.
Continue to:


My Books

