


Third Exercise
Description
This section is from the book "A Laboratory Course In Wood-Turning", by Michael Joseph Golden. Also available from Amazon: A Laboratory Course In Wood-Turning.
Third Exercise
Material
Poplar or pine, 3" x 3"x 8".
Exercise
To cut the beads and fillets shown in Fig. 44, on a cylinder.
Turn a smooth cylinder 2 1/2 inches in diameter, and mark it off to the dimensions shown in Fig. 44.

Fig. 44.
It will be found better to first cut grooves at the points of division, as shown in Fig. 45, as this helps to define the beads and keeps the size more nearly right. These grooves are cut in the same manner that the recesses in the second exercise were cut - with the acute corner of the chisel, the obtuse corner being held clear of the surface being cut. Use the obtuse corner in cutting the convex curves. Place the chisel in the position for smoothing the work used in the previous exercise, except that the obtuse corner is now to be used instead of the edge between the corners. Cut the curve by passing the chisel from the position for cutting across, shown in Fig. 46, to that 'for cutting in, shown in Fig. 49, passing it through the positions shown in Fig. 47 and Fig. 48. The movement must be smooth and continuous, and must not be hurried, the tendency being to hurry the latter part of it.

Fig. 45.
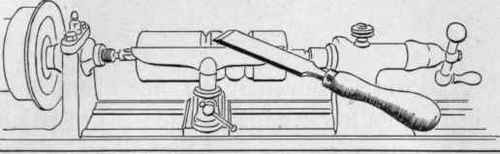
Fig. 46.

Fig. 47.
Take care that the handle is swung around and at the same time raised slightly, as shown in the figures. This keeps all of the edge but the cutting corner free of the work, and keeps it from cutting into and tearing the surface. The chisel passes from the position shown in plan at [a], Fig. 50, to that shown at [b] ; the blade at the time being rolled on its lower edge, as from [c] to [d] in same sketch. The cut is started near the centre of the space, and is terminated at the bottom of the groove already cut.
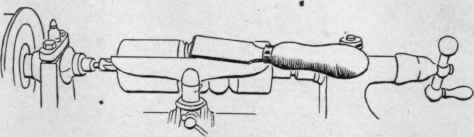
Fig. 48.
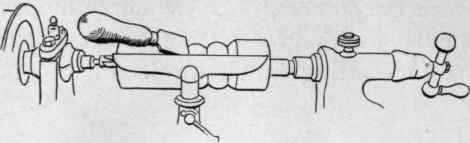
Fig. 49.
When cutting the other side of the curve, start the chisel as when cutting to the tail-stock end. Use the movements just described, only from left to right instead of from right to left.
In cutting curves of this description the chisel must be well ground, the edge straight, and the bevel flat, or the necessary support and guidance cannot be given to it. If any part of the edge but the corner used in cutting be allowed to come into contact with the wood, it will be likely to catch into and to tear the surface.


Fig. 50.
Fig. 51.
The aim should be to so combine the features shown that the cut will be a smooth and continuous one.
The curve at the centre is greater than the others, so the grooves at the sides of it are deeper. In forming large beads several cuts should be taken, as shown in Fig. 51.
Continue to:


My Books

