


A Scrap-Basket. Part 4
Description
This section is from the book "Design and Construction in Wood", by William Noyes. Also available from Amazon: Design And Construction In Wood.
A Scrap-Basket. Part 4
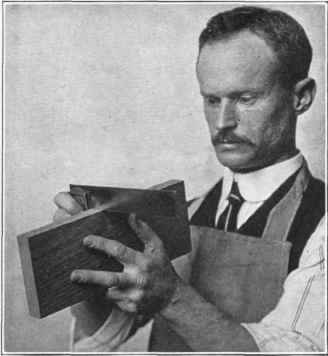
Fig. 24. Testing an edge for squareness.

Fig-. 25. Holding the plane so as to square up a beveled edge with the beam resting on one arris, Fig. 29, and the head sliding along the edge of the board (as in Fig. 214, Handwork in Wood).
Now little by little roll the beam toward you until the spur just begins to scratch. By practicing in this way for a little while, you will soon learn to gage a line parallel with the edge. The difficulty that most beginners experience comes from trying to scratch a deep line at once, and in not getting the pressure behind the spur. The finest line that is visible is best. As the distance between the spur and the head of the gage increases, so does the difficulty of holding the gage steadily. If you are not succeeding well, practice on only one board, and if the result is too bad, plane off the scratched surface, and try again and again until you can use the gage well.
(See p. 48 for broad surface planing.) It is better to lose one board than two.
Now gage this 3/16" line on both broad surfaces from the same edge. Then others on both broad surfaces from the other edge, and then others on the other 16" board in the same way. Now add ¼" setting the gage at 7/16" and gage again the eight lines. Then add another 3/16", making ⅝ and gage again. Add another J4", and so on, until you have 28 3/16" spaces, counting from both edges of both boards.

Fig.. 26. Arris chiseled off to prevent splintering in planing end wood.

Fig. 27. Testing squareness of end.
IV. Ripping off the slats.
When the two boards are properly gaged, they are next to be rip-sawed up into slats. The saw kerfs are to be down the middle of the ¼" spaces. To be sure of making no mistake, it is well to draw a pencil line where the kerfs are to be.
To saw proceed as follows:
Fasten one board in the vise as in Fig 30, i. e., with the jaws of the vise pressing the edges of the board, and the board inclined back from the perpendicular. Rest the left hand on the top end of the board with the thumb so held that it acts as a guide in starting the saw. The saw to be used is the rip-saw (see Handwork in Wood, p. 63). Hold it in the right hand so that the line of the teeth and the surface of the board make quite an acute angle; that is, drop the right hand down as low as possible. Put the saw in proper position for making the cut, and be careful to hold up the saw so that the teeth will rest on the arris as lightly as possible. If these directions are followed, it will not be necessary to make a false start by drawing the saw toward you, but the first stroke will be a push and will cut properly.
Now saw away the pencil line in the middle of the back to see if the kerf is in the middle of the space. If the saw tends to "run" to one side of the line, say the right side, pull it back nearly to its point, twist the handle a little to the left, and take a few short . strokes until the kerf is in the proper place again. If the cut is going badly on the back, it may be necessary to turn the board back side front, until the kerf is right there.
¼" space, watch ing the line closely and also looking on the

Continue to:


My Books

