


Chapter XIII. Lanterns
Description
This section is from the book "Design and Construction in Wood", by William Noyes. Also available from Amazon: Design And Construction In Wood.
Chapter XIII. Lanterns
This project consists essentially of a frame covered with translucent paper or cloth. Fig. 196. It may be worked out in two different ways, either as a hanging lantern, Fig. 197, suspended by chains, or a lantern supported on the wall by a suitable hook, or on a bracket, Fig. 196, Nos. 1 and 4.
Either form may be so designed as to be lit either by a candle or by an electric light. The electric light is, of course, safer. In case a candle is used, a suitable socket and pan for the caudle are essential, and the lantern must be large enough so that the flame of the candle cannot set fire to it. In the case of the wall lantern, the wall may be protected by a metal screen. Aside from these considerations, considerable latitude is possible.
The wood chosen for this project is yellow poplar because it is not likely to be split by the fastenings used. It has, besides, a smooth even texture that finishes well.
In a project as nearly rectangular as this, the chief consideration is to have a satisfying relation of height to width; that is, the faces are to be pleasing rectangles rather than squares.
The embellishments may take various forms. In Figs. 197 and 198, both the hanging lantern and wall lantern have the simplest possible frame with the interest centering in the stencils cut on the paper. In Fig. 196, Nos. 2 and 3, the pattern is made by the slats cross-lapped. The chain instead of being simple, as in Fig. 197, may have links of varying lengths.
Since in Fig. 196, Nos. 1 and 4, the lantern consists of a screen set on a bracket which also holds the candle, the design of the bracket should harmonize with the screen. (See Handwork in Wood, page 185).
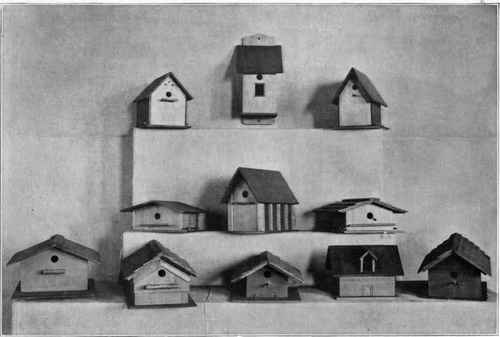
Fig. 195. Wren houses: entrance for birds must be ¾" in diameter, so that nothing larger than a wren can enter.
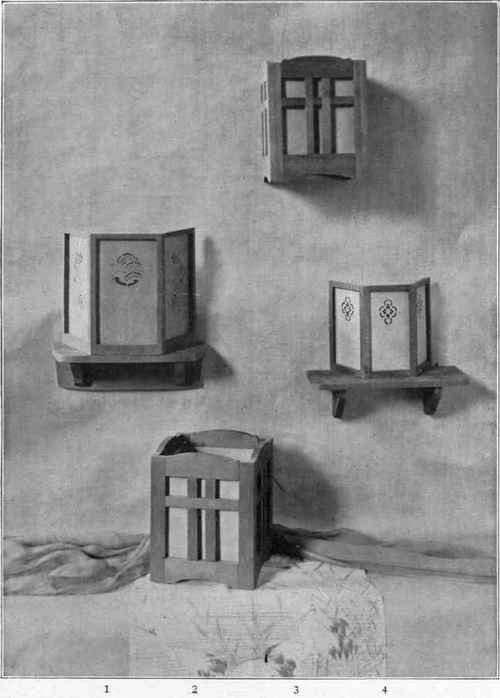
Fig. 196. Lanterns.
I. The suspended lantern with the wood fret, Fig. 196, No. 2.
The wood selected for this is yellow poplar, 5/16" thick. The following sizes are required:
For the corners, which may be called stiles,
4 pieces, 5/16"x¾"x8",
4 pieces, 5/i6"x7/i6"x8". For the cross-pieces, which may be called rails,
4 pieces, 5/16"x1½"x4½" (upper rails), 4 pieces, 5/16"x1¾"x4½" (lower rails). All to be of exactly the same length and properly shaped before assembling.
For the horizontal cross slats,
4 pieces 5/16"x⅝"x4½". For the muntins (vertical slats),
8 pieces 5/16"x⅝"x5½".
Prepare all these pieces, remembering that it is easier to work with as long pieces as it is convenient to plane and then to cut these up to the proper lengths afterward. Since there is a considerable number to be cut to the same length, fasten a stop at the proper place in the miter-box and saw off the pieces, measuring mechanically by that means. See Fig. 131.
If these are carefullv cut it will not be necessarv to dress the ends of the rails or slats. The ends of the stiles should be carefully smoothed. Shape the rails with chisel and spokeshave.
Next lay out and cut and fit the cross-lap joints of the slats. (Directions for making this joint are given on p. 155 of Handwork in Wood). Glue these together.
Next make up the corner posts by gluing together, as in Fig. 199.
When dry, dress off the outer surfaces of the joints so that they will be quite flush. The whole may now be assembled.
On a flat board, leaving a space about 1" wider than the entire width of the lantern, nail strips of wood about 9" long parallel to each other, as A, A, Fig. 200. Prepare two wedges, B, B, 8" long, 5/16" thick, and tapering from ⅝" wide to a point, and a buffer strip, C.
Continue to:


My Books

