


Small Boxes. Part 3
Description
This section is from the book "Design and Construction in Wood", by William Noyes. Also available from Amazon: Design And Construction In Wood.
Small Boxes. Part 3
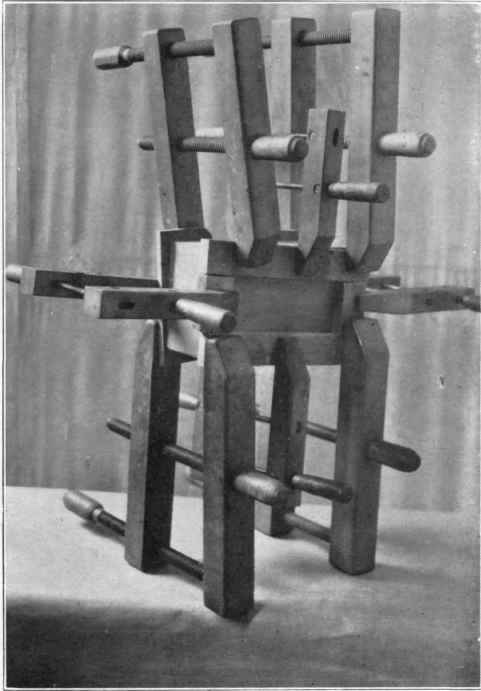
Fig. 192. Gluing the top on to the box.
Fasten the top without brads using only glue, hot glue, if possible. Since it has not yet been dressed to exact size, take care that the edges overlap all around.
In gluing on the top protect both it and the bottom by placing between the box and the hand screws other boards, otherwise the pressure of the handscrews may bend and even crack the top and bottom. Use plenty of handscrews. (See Fig. 192.)
When dry, say in six hours, dress off, sawing, if necessary, the projecting ends and edges. Take care not to splinter the corners.
Next, cut the box in two thus: With the marking-gage, gage two parallel lines, ¾" and ⅞" respectively, from the upper surface of the top. Between these two lines saw the box apart with the back-saw, Fig. 193. For a larger box, the rip- aw would be used.
Now plane each set of edges separately, first to the gaged line, and then test on a face plate, (flat surface) to see that they are in a plane. Finally test the cover thus: Lay it in place and tap each corner with the finger to see if it rests firm there. Examine the crack all around and correct any errors. Round the external arrises if desired (See Fig. 194) but in any case do not leave them sharp, except where the box and its lid meet. Clean up and sandpaper.
Setting the hinges. (See Handwork in Wood, pp. 131-133.) The hinges should be set about the length of the hinge from the ends of the box. Mark with the knife the length of the hinge on the edge of the back of the box, taking the length of the hinge from the hinge itself, by superposition. (Handwork in Wood, p. 204). Square across the •edge with the try-square and knife. Do this for both hinges. Hold the lid of the box in its proper place on the box as it will rest when shut, and mark the places for the hinges on the edge of the back of the lid, and square across for both hinges. Between these lines on both the inside and outside of the box and of the lid, gage the proper depth of the notch, i. e., one half the thickness of the knuckle of the hinge.
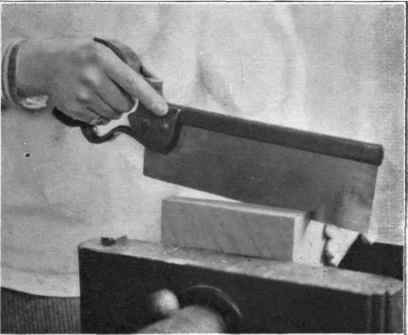
Fig. 193. Sawing the box apart.
Chisel out the notches, set the hinges in place, drill or brad-awl the holes for a tight fit and drive the screws. Lubricate them with soap before driving; otherwise they may break. If rightly done the lid should shut tight all around with no springing back. If it does spring back, the hinges are set too deep, and it is necessary to loosen the screws and set in a shaving under the hinge. If there is a gap between the box and the lid at the back, the hinges need to be set in a little more deeply. If the sides of the lid do not lie flush with the sides of the box, one hinge is set further toward the outside side of the box than the other. If this difference is very slight, it may be corrected by loosening the screws a little and gently but firmly twisting the lid around in the right direction. If the discrepancy is great, notice carefully where the error is, take out the screws that are wrongly placed, cut little plugs of wood, dip in glue, drive into the screw holes, and bore new holes for the screws.
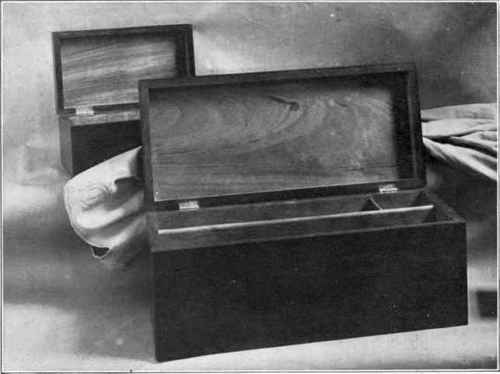
Fig 194. A stationery box, external arrises slightly rounded.
If a lock is needed for the box, see Handwork in Wood, p. 134, for directions for inserting it.
If the box has been made of mahogany it may now be stained in the same way as the candle-stick. See p. 92.
It looks well to stain only the outside including the edges where the lid meets the box, and to leave the inside unstained, as in Fig. 194.
When the stain is thoroly dry, and the surface well rubbed down with steel wool, give the outside a coat of Wheeler's Patent Paste Wood Filler, No. 7, (see Handwork in Wood, p. 213). Mix this filler with enough turpentine to make it the consistency of thin paste, apply with a brush with the grain, and as it dries, but before it sets hard, rub off the surplus carefully across the grain. The object of the filler is to till up the pores of the wood and give a smooth even surface. The filler should dry for twenty-four hours. Then apply successive coats of shellac, rubbed down with steel wool, and, if desired, French polish it. (See Handwork in Wood, p. 217.)
If the box is of walnut, no stain is needed. A black filler (Wheeler No. 10) will darken it a little.
If the design of the box calls for a projecting bottom and top, as in Fig. 185, No. 3, several parts of the construction are different. The sides and ends are not rabbeted to receive either bottom or top, which are glued and nailed directly on their edges.
In gluing on a top which has been finished to size, and perhaps made with molded edges, pains must be taken not to let it slip when the pressure of the handscrews is applied. One method of preventing this is as follows: drive four brads into the upper edges of the sides, bite off the heads with the nippers and sharpen the projecting points. Set the top exactly in place and press it down so that the brads will penetrate. When the glue is applied see that the brads enter the same holes, and the top will remain true in place.
If the box frame is not to be cut in two, but the cover consists of only a top board suitably molded or otherwise decorated, care must of course be taken to select a well seasoned piece without any inclination to warp. The hinges in this case should be set entirely into the edges of the back.
Instead of the rabbet joint described, which has the disadvantage of the brad holes showing, several others are feasible as described in Handwork in Wood, page 187.
Box construction of a more simple form may be made use of in making bird-houses, as shown in Fig. 195. The necessity for making opposite sides of exactly the same size holds here as in all rectangular boxes.
Continue to:


My Books

