


Small Boxes. Part 2
Description
This section is from the book "Design and Construction in Wood", by William Noyes. Also available from Amazon: Design And Construction In Wood.
Small Boxes. Part 2

Fig. 186. Methods of affixing top of box.

Fig. 187. Rabbetted side of box.
The reasons for this careful location are: at the double dotted line ⅛" apart, the box is to be cut in two, the upper part making the lid and the lower the box proper, and hence no brads must be in the way of the saw; and, second, the lower brad cannot safely be ]ess than ½" from the lower edge on account of the inserted bottom. Start the brads so that they will be driven slightly outward, as in Fig. 189. Drive the brads until the points just prick thru. Put a little liquid glue on the joints, put the parts together accurately, draw the sides up to the ends with a handscrew, being careful to place them so as not to buckle the sides, drive the brads home and set them carefully with a nailset. Test the inside angles to see that they are exactly square. If instead of liquid glue, hot glue is used, everything must be in readiness beforehand, so that the work may proceed as fast as possible, before the glue sets. Set aside to dry.
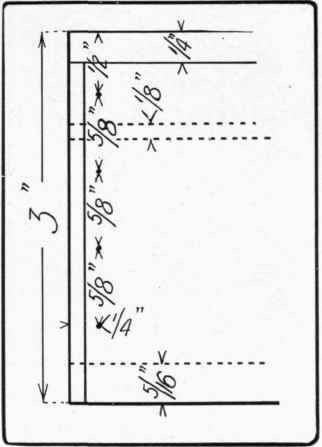
Fig. 188. Location of brads in end of box.
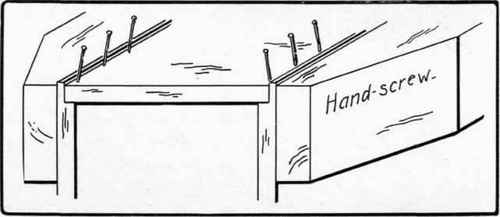
Fig. 189. Method of driving brads in box.
The neatest way to conceal the holes made by the brads is this:
Sharpen the end of a splinter of the same kind of wood as the box itself, so that it just fits a brad hole, dip the end in glue, tap it lightly into the hole with the hammer, cut it off with a sharp knife or chisel, sharpen the splinter again and so proceed till all the holes are plugged up. While the frame is drying the top and bottom may be worked up according to the directions given below.
When the frame of the box is dry, test the upper and lower edges on a face plate, or some perfectly flat surface. If it rocks at all, note where and carefully plane it flat. In doing so, take care not to bump the toe or the heel of the plane into the inner arrises of the sides or ends, as at A and B, Fig. 190.
Another way to bring the edges into plane, is to lay a sheet of sandpaper (No. 1) on a perfectly flat surface and rub the box back and forth on it. The danger here is of rounding over the corners, as at A and B, Fig. 191. Next plane up the top and the bottom of the box, remembering to choose the better looking piece for the top.
If the top is to be affixed with a butt joint, as in Fig. 186 A, it may well be thinned to ¼" or even 3/16", because if thin, it is more easily kept from warping by the boxed part of the lid. Do not try to fit the butt jointed top to the exact size of the box, but plane only the two faces. It can be dressed off after it is glued on.
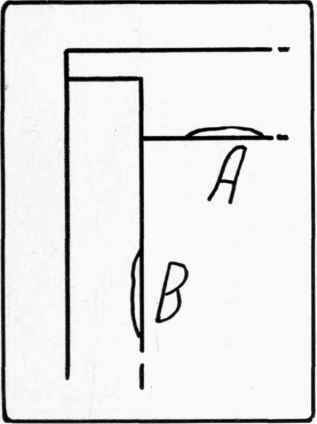
Fig. 190. Take care not to bump the plane into the inner arrises of the box, as at A, B.
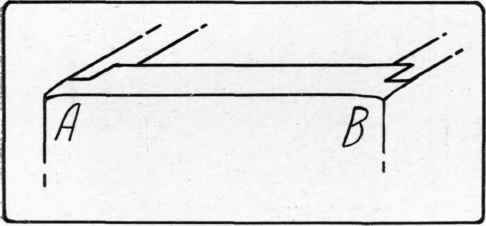
Fig. 191. Danger of rounding the corners, as at A, B.
If the top is to be rabbeted into the sides and ends, as in Fig. 186, B, these rabbets in the top may now be plowed. Plane up the top square, but slightly larger than it will be when the box is finished. Plow out the rabbets 3/16" deep, and wide enough, just over ⅛", so that the top will fit easily into its place. The bottom is to be 5/16" thick, and to be fitted exactly into the space rabbeted for it. (Mean out any dried glue that there may be in the corners, apply a thin film of glue to the joints, brad the bottom firmly into place, driving the brads thru the bottom up into the sides, and then set their heads.
Continue to:


My Books

