Trays. Part 2
Description
This section is from the book "Design and Construction in Wood", by William Noyes. Also available from Amazon: Design And Construction In Wood.
Trays. Part 2
Next gouge out the trough of the tray with a large (1") outside bevel gouge. Work both with the grain and across it, noting carefully any dips in the grain, and taking particular pains at those places. Do not attempt to work within ⅛" of the margin of the trough, until the main part is well gouged out. That is, leave the finest work till later, because with every added stroke greater control of the hand is gained. For use of gouge on ordinary cuts, see Handwork in Wood, p. 60.
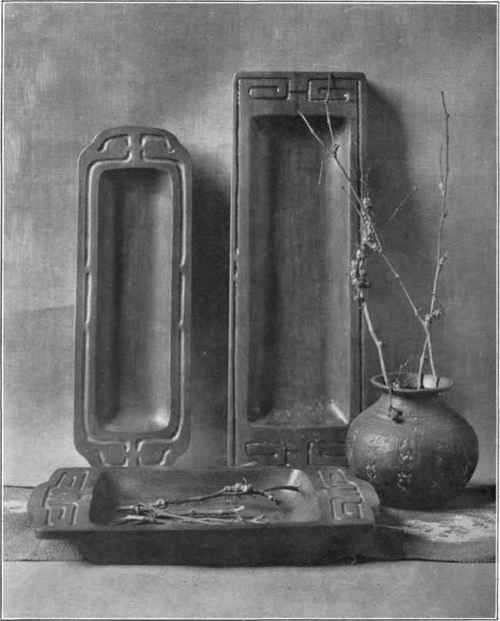
Fig-. 169. Trays with line grooving-.
For delicate cuts learn to use the twisting motion i. e., while pushing the handle with the right hand, gently twist the gouge on its axis. This motion is particularly useful when approaching an outline, as of the trough. Twist away from the outline, then if the tool slips no harm is done.
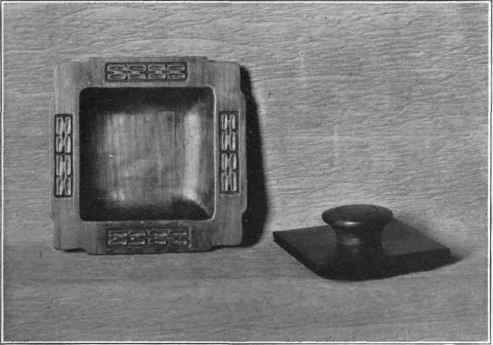
Fig. 170. Tray and blotter-holder with pattern of rosettes.
Particular pains must be taken with the corners of the trough if there are any. In general they look better rounded. The arc of the round should not be greater than the arc of the gouge which you have to use. The sharper the corner, the harder it is to cut it out well. For very accurate work, and where the cross-section of the tray is uniform for some distance, as in Fig. 172, it is well to make a templet of thin wood with which the work can be gaged as one proceeds.
But in many trays (as in Fig. 170) all that is necessary is to have a depth-gage. For this purpose a nail driven into a strip of wood having a straight edge will suffice, Fig. 173. With this it is easy to detect variations which make the work look slovenly. The curve of the edges of the trough may be often be determined by the curve of the gouge in use. Be sure to keep the gouge sharp at all times. For the method of whetting the gouge, see Handwork in Wood, p. 60.
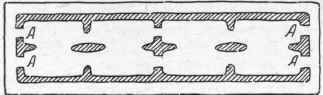
Fig. 171. Stencil, showing bridges at A, A.
In some designs (see Fig. 174) the piece is finished with the tool marks frankly shown. This is, on the whole, better suited to large pieces made of coarse textured wood. For the sort of designs shown herewith, a smooth perfect finish is recommended.
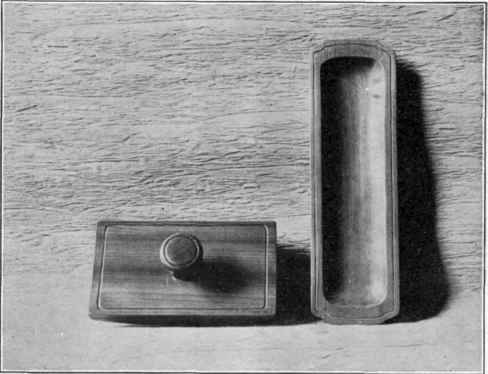
Fig. 172. Tray and blotter: simple outline decoration.
After chiseling with the gouge as accurately as possible, scrape the surface of the trough with a cabinet scraper. No. 2 and No. 7 are the most useful. First see that the scraper is well sharpened. The method of sharpening is described on page 92, of Handwork in Wood.
By tilting and turning the scraper in various directions, the curve can be made to fit the triangle.
It is often possible to detest unevennesses on the surface which are not visible to the eve, by means of the touch. If nec-essary, shut your eyes while you feel. Make the surface as perfect as possible with the scraper. Preserve the edges of the trough sharp.
Next sandpaper the trough of the tray, using the tip of the thumb as a cushion for the sandpaper. It frequently happens that in sandpapering, irregularities in the surface undetected before will appear. If so, go back to the scraper, or even the gouge. But remember that the fine particles of sand rubbed into wood, will quickly dull edge tools. Next cut out whatever decoration there is in the design. If this is a mere line design, as in Fig. 165, Nos. 2, 6 and 11, one tool is sufficient to cut it all out. This tool must be sharp, so sharp that it will cut soft wood across the grain clean without any tearing. Ordinarily no scraping or sandpapering will follow line decoration.
Continue to:
My Books

