Lesson I. Use Of Hammer. - Nail-Driving
Description
This section is from the book "Elementary Woodwork", by George B. Kilbon. Also available from Amazon: Elementary woodwork.
Lesson I. Use Of Hammer. - Nail-Driving
The hammer consists of two parts, the head and the handle.

Fig. 7.
The head has three divisions. First, the ball, which is the end that strikes a blow. Second, the eye, or the hole which receives the handle; and third, the claw of the nail-hammer, or peen of the brad-hammer.
Problem I. Driving Steel - Wire Nails
Take for each pupil a block of pine or other soft wood, 8 in. X 1 7/8 in. X 1 7/8 in. On one side draw three pencil lines, as in Fig. 8, and place points 1 in. apart on each line. Supply each pupil with 1 1/2 dozen 6d. steel-wire nails.
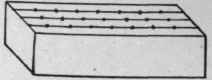
Fig. 8.
Hold the hand as in Fig. 9, with the thumb on the upper side of the handle, or as in Fig. 10, with the hand turned so as to bring the thumb partially to one side. Fig. 9 is the scientific position, as the thumb is the stronger digit, while Fig. 10 is more convenient in practice. The forefinger should not rest on the top of the handle, as many amateurs are tempted to do. The end of the handle should project about an inch beyond the hand.
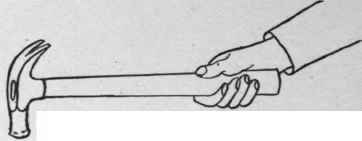
Fig. 9.
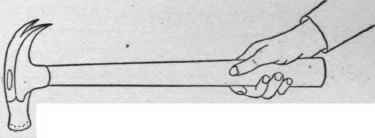
Fig. 10.
At each of the extreme points on one of the lines in Fig. 8 hold a nail vertical and strike it once. If the blow has caused it to incline, push it back a little past a vertical position, and, holding it there, strike it again. If it continues to incline, it must be loosened in order to press it to a vertical position. Drive each nail until only 5/8 in. of it projects above the block, as in Fig. 11. At each of the intervening points on the same line drive nails, sighting with the eye to see that the heads are all in line, as in Fig. 12.
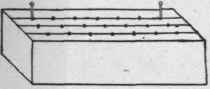
Fig.11.
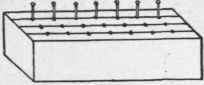
Fig. 12.
Rapid workmen may drive a second row. If it is deemed desirable to mark the work, mark 10 off from 100, for every nail which inclines 1/8 in. from perpendicular, or whose head is 1/16 in. above or below the line of 5/8 in. in height.
Problem II. Drawing Steel-Wire Nails
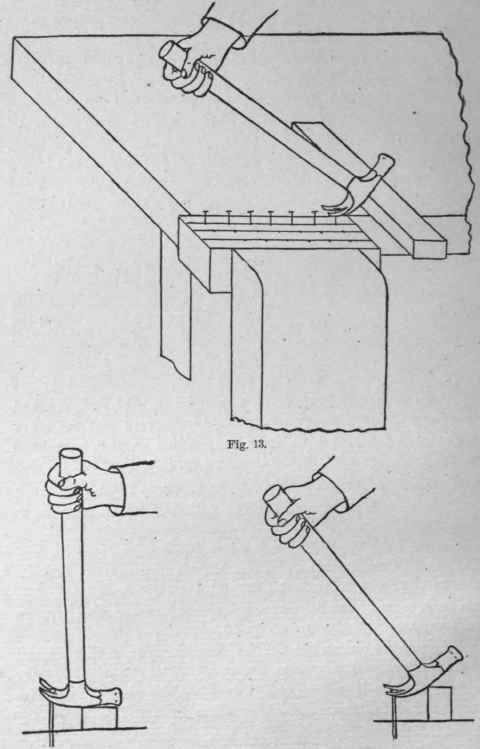
Place the work in the vise, with its top level with the bench top, as in Fig. 13.
Supply each pupil with a fulcrum block 8 in. X 1 1/2 in. X 7/8 in. Hold the hammer as in Fig. 13, supporting its eye on the thickness of the fulcrum block, and draw the nail about 5/8 of an inch, moving the hand through about 1/8 of a circle; that is, to a vertical position, as in Fig. 14.
Support the eye on the width of the block, as in Fig. 15, and draw the nail entirely from the wood. The eye of a hammer should always be supported thus when drawing nails. The support should be a little higher than the nail head when any partial drawing commences, and each partial drawing should be about 1/2 in. to 5/8 in. in amount, in order not to bend the nail, or strain the hammer handle. I have seen workmen break hammer handles and nails resist drawing when neither would have occurred had the above simple direction been followed. Mark 10 off from 100 for every bent nail.
Continue to:
My Books

