How To Make A Umbrella Stand
Description
This section is from the book "Carpentry For Beginners - Things To Make", by John D. Adams. Also available from Amazon: Make Magazine.
How To Make A Umbrella Stand
As soon as one decides to make an umbrella stand he should be on the outlook for a shallow round pan about six inches in diameter, to place in the bottom to catch the drippings from the wet umbrellas. While a tin pan may be made to answer by enameling it, a brass or copper one will look better and be more durable.
The construction should begin with the two side boards, which should be smooth, free from knots, and about three-eighths of an inch thick. First plane the edges off until each piece is exactly eight inches wide, and then mark out the outline in accordance with the working drawing, in which each square represents one square inch. It will be understood, of course, that it is not necessary to cover the entire board with squares, although enough should be drawn at each end to enable one to readily locate all necessary points. Use the compasses to get the curves, and be sure that the three square openings are all exactly the same size. Saw these out neatly with the fret saw, which should also be used for the circular opening near the top. The long, narrow slot may be worked out with the knife, although sawing will be the safer way. See that all edges and corners are finished sharp and true, and then shape up the top and the two feet at the bottom.
A square board for the bottom is next in order, and a large hole should be sawn in the center of this to let the drip pan set in. The two cross-pieces at the top remain to be prepared and should be exactly as long as the bottom board and perfectly square and flat on the ends. Mark off on the inner surface of each side board just where the other pieces are to be fastened. Fasten one of the sides to the bottom, and then nail on the cross pieces, after which turn over and put on the other side.
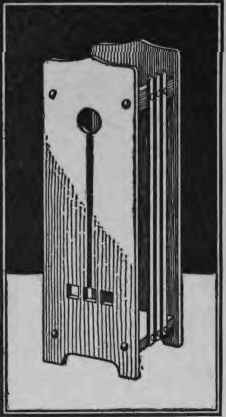
Stain to match the surrounding furniture. Apply a coat of thin shellac, rub with steel wool when dry, and then wax. To cover up the nail holes, drive in close to each nail a nail with a large fancy head, or glue on a small round block over each one before staining, taking due care that they are evenly set.
Continue to:
My Books

