Other Varieties
Description
This section is from the book "Woodwork Joints", by William Fairham. Also available from Amazon: Woodwork joints.
Other Varieties
At Fig. 292 we have an everyday method of jointing circular-fronted cabinet door frames. Great care must be taken in setting out and making, or a twisted frame will result.
 Fig. 292. - Bow-fronted Door Dovetailed Edgeways.
Then at Fig. 293 are shown two familiar examples of dovetailing the bearer to the carcase end of a dressing table or washstand.
Fig. 294. - Lap-dovetailing the top of a wardrobe to the carcase end. Other examples, such as the top of a bookcase to the sides, will suggest themselves.
Fig. 295. - Side view of a jewel drawer with a moulded drawer front as used on dressing tables, etc. This shows the necessity of bevelled dovetailing in order that the drawer front may be kept as thin and light as possible.
 Fig. 293. - Carcase Work, showing Bearer Rails Dovetailed.
Fig. 296. - Bevelled dovetailing when pins are at right angles to the end cut.
Fig. 297. - Bevelled dovetailing when the centre line of the pins is parallel to the edges of the work, used for making "hoppers," food troughs, knife boxes, etc. One corner of the box shows the joint separated.
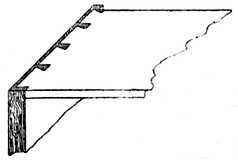
Fig. 294. - Lap-Dovetailing.

Fig. 295. - Jewel Drawer Side.

Fig. 296. - Bevelled Dovetailing.
 Fig. 297. - Bevelled and Dovetailed Box, showing the Jointing of One Corner Separated.
Fig. 298. - An example of oblique dovetailing, as used on "hoppers" when one piece is vertical and the other piece is inclined.
Fig. 299. - Method of dovetailing small boxes. The box is dovetailed in one width and the top and bottom glued on; the sides and ends are then cut along the dotted line, thus forming the lid. It will be noticed that a specially wide dovetail pin must be left so as to form part of the lid and part of the lower portion.
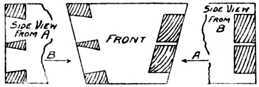 Fig. 298. - Oblique Dovetailing.
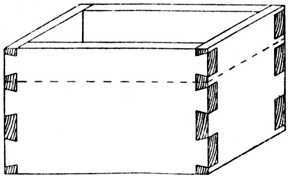 Fig. 299. - Dovetailing for Small Box.
Setting Out The Joint
For constructing a dovetail joint at the corner of a frame, as Fig. 300 , it is necessary at the outset to trim up the ends of the timber square and true. This may be accomplished by neatly sawing to the line and paring the end of the wood witha sharp chisel, or by bringing the wood to a finish with a finely-set plane, such as an iron-faced smoothing plane. The ends of the wood must be perfectly square when tested from either the face side or from the marked edge.

Fig. 300. - Corner Dovetail.

Fig. 301. - Squaring.
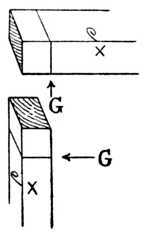
Fig. 302. - Gauging.
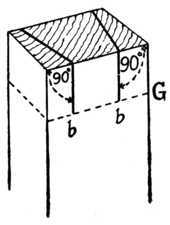
Fig. 303. - Marking the Pins.
Take a cutting gauge and set it to equal the thickness of the timber, and, holding it as already shown at Fig. 273 , strike the gauge lines on the wood as illustrated at Fig. 302 , G. Proceed to mark out the dovetail pins, as at Fig. 303 ; in this illustration G again shows the gauge line. The inclination of the lines across the end of the wood should not be too great, or the joint will be a weak one, and the edges of the dovetails will be liable to crumble away when the work is knocked together.
Continue to:
My Books

