A New Era In Beekeeping
Description
This section is from the book "How To Succeed With Bees", by E. W. Atkins and K. Hawkins. Also available from Amazon: How To Succeed With Bees: More Than 190 Successful Plans To Produce Big Crops Of Honey.
A New Era In Beekeeping
New Year's Day, but not January 1.
Under the new era in beekeeping, the honey producer's New Year begins sometime in August instead of January 1. The past season is then history, and more than you may realize, your efforts the eight weeks previous to the first frost probably govern the honey production of your bees during the next 12 months more than anything you may do for them next spring.
By properly caring for your bees in fall, looking to young queens, adequate stores, and the measure of protection necessary for your climate, the old time bugaboo of spring dwindling and spring management which so worried our forefathers in beekeeping, need no longer worry you.
Therefore in presenting the following chapters we have taken the liberty to start in with the beekeeper's "New Year." We realize how much more successful you can be if we can persuade you that the new era of beekeeping hinges upon your preparations for the coming season, beginning not less than eight weeks before the first frost in your locality each season.
Because in most localities the principal honey flows are over by August, we have chosen this month arbitrarily. If an important honey flow occurs in your locality later than August, you can simply adjust the beginning of your beekeeping New Year at any daite which marks the end of surplus honey storage by your bees, and thus adopt this entire system of management, no matter in what climate or latitude you reside.
In beginning this little book, we wish to emphasize that as a producer of honey, your "New Year" begins not in January, but at the close of your last important surplus honey flow. Your work from that time on practically controls your next honey crop, so far as the bees are concerned.
E. W. ATKINS. K. HAWKINS.
Watertown, Wisconsin, U. S. A. AUTHORS AND PUBLISHERS.
July, 1937
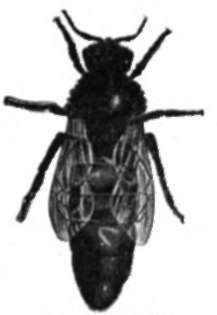
Fig. 1-QUEEN (Female).

Fig. 2- Drone (Male).
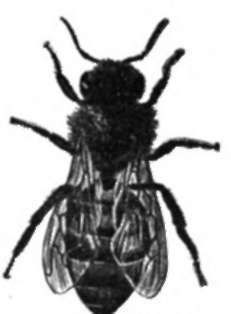
Fig. 3- Worker (Undeveloped Female).
The occupants of a colony of bees-one queen, some drones and thousands of workers.
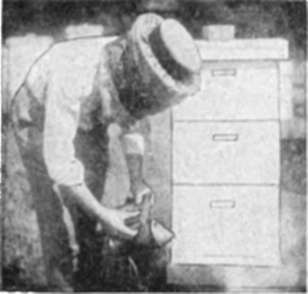
Fig. 4-The first step-a puff or two of smoke in the entrance.
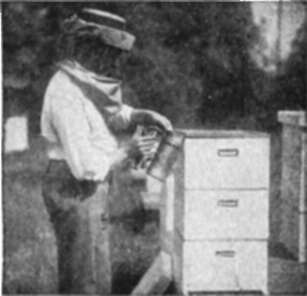
Fig. 5-inner cover raised to permit puffs of smoke to be blown in.
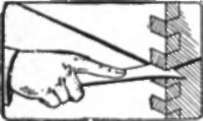
Fig. 6-A hive tool to gently pry loose hive parts.
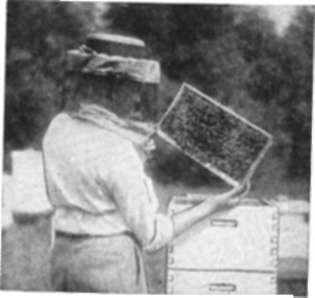
Fig. 7-How frames are handled.
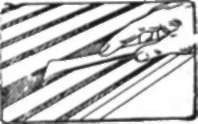
Fig. 8-A hive tool is handy to clean the tops of the frames in a hive.
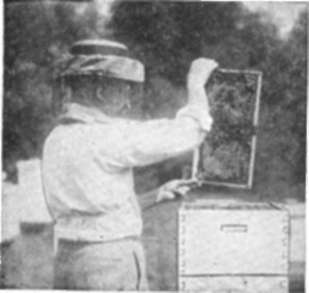
Fig. 9-Comb turned from side shown in Fig. 7.
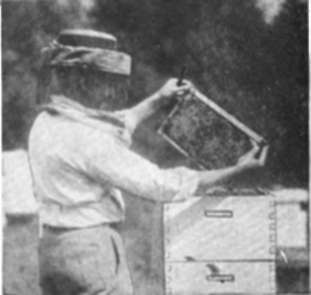
Fig. 10-Looking at opposite side of the comb shown in Fig. 7.
Care Bees Need Eight Weeks Before Frost
1. Requeen.
a. See that every colony has a good queen.
b. Where the queen shows signs of failure unite unless the colony is in exceptionally good condition.
c. In uniting pick out a queenright colony not in prime condition and unite queenless colonies with it.
d. Where it is advisable to requeen, purchase untested Italian queens from any reliable breeder at once.
2. Reduce hive to winter proportions.
e. For outdoor wintering use two bodies per colony.
f. For indoor wintering use one body per colony and store another containing honey for spring use.
g. Remove excluders, reduce entrances to prevent robbing and see that all hive parts are bee tight.
3. Feed all colonies light in stores.
h. Feed only pure granulated sugar-water syrup.
i. Use only feeders that feed above the cluster.
j. Outdoor wintering requires at least 50 pounds of stores per colony; indoor wintering 30 pounds.
k. Feed to stimulate some fall brood rearing, but see that it does not exhaust winter stores.
4. Prepare form of protection you will adopt.
1. Wind protection should be afforded.
m. Protect with packing according to winter temperatures in your locality.
n. Bees and packing must be kept dry.
5. Do your spring work in fall as much as possible.
Continue to:
My Books

