Rembrandt Lighting. Part 3
Description
This section is from the book "Complete Self-Instructing Library Of Practical Photography", by J. B. Schriever. Also available from Amazon: Complete Self-Instructing Library Of Practical Photography.
Rembrandt Lighting. Part 3
239. Proper Lighting
Proper Lighting. The strongest light should fall on the forehead, following down the bridge of the nose, and tipping the lips and chin. The nose should be the dividing line of light on the face, yet the light must not be too sharp and decisive. It should spread slightly across the nose and rest in a diffused form on the opposite cheek, directly beneath the eye, on the shadow side of the face. This will supply illumination to that eye, the iris of which should catch a slight ray of light as it flows across the face-sufficient to produce a delicate catch-light.
240. Diffusing Screen
Diffusing Screen. Note the position of the diffusing screen in Illustration No. 14; also in the diagram of the floor plan, No. 15. The screen is placed between the light and the subject. The curtains of the lower portion are closed entirely; the curtains on the top row are open just enough to admit a small amount of direct light on the side of the face; the remaining curtains, being drawn over the screen prohibit the direct light from crossing to the other side of the subject. Shutting off the light with these curtains will soften and diffuse the light on the drapery, which, if not restrained, would photograph more quickly than the face and hair. When developed, this would either make the face much darker than the drapery, or - should you develop for the flesh - would result in dense drapery, requiring considerable doctoring to make a well-balanced negative. Therefore, to avoid unnecessary labor, light the subject as you wish the finished negative to appear, and do not depend upon after manipulation to correct any oversight, or error, made in the lighting. With little experience the production of the proper result will be easy of accomplishment.
241. A good plan is to first draw all the curtains on the diffusing screen, thus softening the light as it falls upon the subject; then separate the curtains on the top row sufficiently to supply the necessary catch- or high-lights. Do not be led to believe that because the strong lights have been diffused with the curtains, the exposure must be prolonged, as such is not the case. On the contrary, the exposure is thus shortened, because should an open light be used without the diffusing screen, the shadows would be very deep, requiring quite a long exposure to fully time them. While timing for the deep shadows the high-lights would be over-timed and choked, whereas, by diffusing or equalizing the light you illuminate the shadows, and as you time for these (after diffusing, they are not so dense), less time is required for the exposure.
242. Reflecting Screen
Reflecting Screen. It is extremely important that the reflecting screen be placed at the correct angle. A common error in making portraits in Rembrandt Lighting is that the ear and back of the head, on the shadow side, is as fully illuminated as the front of the face. This is caused by the reflecting screen being placed at an angle that reflects light as strong on the back of the head as on the front portion, resulting in the production of very flat effects. The nearer the reflecting screen is to the source of light, the stronger will be the reflected light; the greater the distance from the light, the less reflected illumination will be obtained. For this reason, place the screen as near the light as is found to be necessary to supply the required amount of illumination to the front of the shadow side of the face; then gradually turn the end of the screen, nearest the subject, from the light. In this way softer diffusion will be secured while the shadows will not be too strongly illuminated.

Illustration No. 18. Example of Rembrandt Profile Lighting.
See Paragraph No. 237.
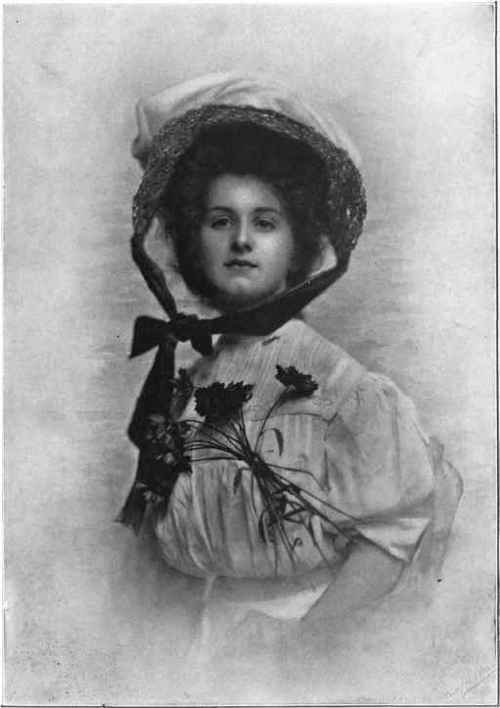
PORTRAIT STUDY Study No. 14-See Page 577, Vol. VIII Knaffl & Bro..
243. If the rear of the head, or the dense portions of a Rembrandt Lighting, are illuminated as much as is the front of the face, blocked, clogged shadows, which will not be transparent, will spoil the results. Notice in diagram of floor plan, that the reflecting screen is not placed parallel with the side-light, but at an angle of about 45°. The strength of the light determines the correct angle of the reflecting screen. Practice moving the screen, placing it at various angles, thus reflecting light at varying degrees upon the subject. This will soon enable you to see and obtain the proper effect to produce detail in the shadows, and yet have a gradual blending from the highest points of light into total shadow.
244. Remember, the reflector is used only as an assistant to the diffusing screen, and although it serves to illuminate dense shadows, it must not be placed too near the subject, nor should it be used to a greater extent than is absolutely necessary.
Continue to:
My Books

