Clay Modelling And Pottery. Part 5
Description
This section is from the book "Arts And Crafts In The Elementary School", by Joan Dean. Also available from Amazon: Arts And Crafts In The Elementary School.
Clay Modelling And Pottery. Part 5
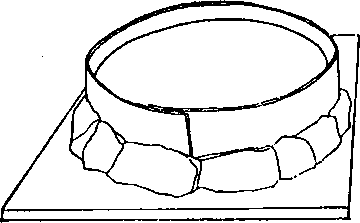
4. Slab pots. These, as one would guess, are pots made from slabs of clay. There are several ways of making the slabs, but I think the simplest is to roll out the clay with a rolling-pin. Each child is given a piece of clay, which he rolls out until it is about a third of an inch in thickness. From this he cuts pieces of clay to build up a pot, sticking each piece to those adjoining with slip. Once again, it is important to press the pieces firmly together.
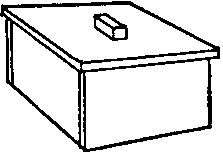
Slab pot
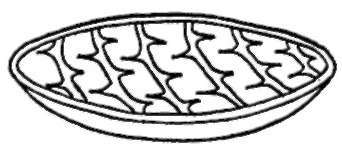
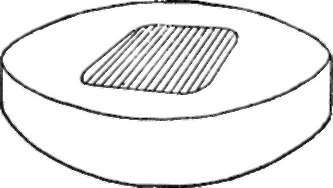
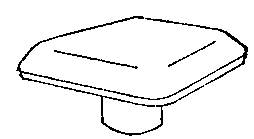
Moulded dish
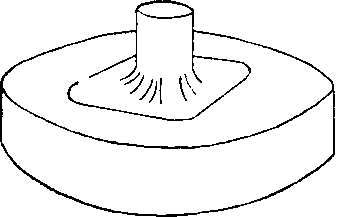
5. Moulded dishes. These, too, are made from slabs of clay. The slab is laid on a saucer or plate and the clay gently pressed into position. The edges are trimmed with a knife. The surface of the clay which is not against the mould may be smoothed by pressure with a piece of wood, by sponging, or by using a special kidney-shaped piece of rubber obtainable from pottery suppliers. The clay should be allowed to dry until it easily comes away from the mould, but not left on the mould too long. It is, of course, very much better if you can use proper plaster moulds for this kind of work. Then there is no danger of work sticking, and the plaster ensures that work dries quickly. They are rather troublesome to make, however, and definitely a job for the teacher, although children can do a lot to help. They are made as follows:
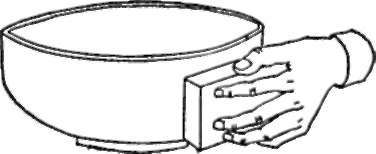
Smoothing a pot with a piece of wood.
On a piece of board make a clay mound of the shape you wish your final dishes to be. Smooth this until it is as perfect as you can make it.

Take a strip of old lino or stout corrugated card, and erect a wall all round the mould, about three inches away from it. Fix the wall to the board with plenty of clay, making sure there are no loop-holes through which plaster can seep.
Mix sufficient plaster to cover the mould, so that the plaster is about an inch and a half thick at the highest point of the mould. Pour this in and let it set, stopping up any holes which appear in the wall with clay.
When the plaster is set and cool, remove it from the board, turn it upside down and carefully take out the clay from the centre. Coat the inside of this depression with slip.
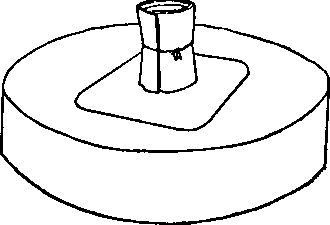
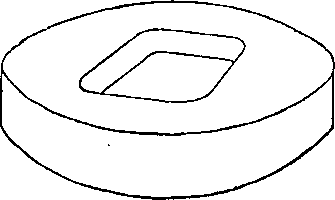
Prepare a tube of card, fixed with string, to make a "handle" for the mould. The tube can be two or three inches in diameter. Now mix sufficient plaster to fill the depression and a little besides. Pour the plaster in, and while it is setting push the cardboard tube into the centre of it and fill it with the remaining plaster, which by this time should be nearly set. Smooth the top of the mould while the plaster is still warm, and as soon as possible remove the card from the handle. Flatten the top of the handle so that the mould can stand on it, and generally make the mould look as tidy as possible. When it is really dry and completely cold and hard, place it under a running tap and allow water to run on to it for a little while. Clear away any plaster which is covering the clay seam between the two moulds. Eventually the water will soften the clay which separates them and they will come apart, but this may take time, during which water should be kept running and the centre mould gently agitated. When they finally separate, the centre mould should be carefully finished. The edges of the mould should be chamfered with a knife, and any further finishing to the underneath carried out. Both parts of the mould can be used for making dishes. The centre mould makes it easier to finish the edges well, but the other mould is easier for children to use for many kinds of decoration.
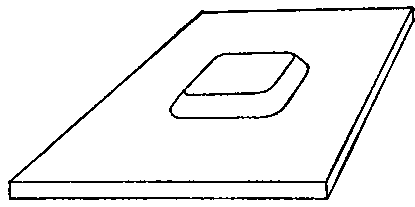
The completed mould.
6. Handles. A number of children will at various times make pots which need handles. These can be simply made from coils of clay, or they can be cut as strips from a slab of clay. Both are stuck to the pot with slip. One of the best-known traditional methods of making handles is to pull them. This produces an attractively shaped handle and is a satisfying skill in itself. To pull a handle, you will need a lump of clay, about the size of an orange. It must be well wedged (see p. 70). Hold it firmly in one handthe left if you are right-handed. Ease it with your hand so that it becomes the shape of a pear. Wet your free hand and stroke the clay with the palm, curling your fingers round it as you do so. Continue this gentle stroking movement, wetting your hand continually and gradually easing the clay into a roll. When it is long enough for your handle, and of a suitable thickness, stick the loose end on to the lump of clay with which you have been working, so that the handle is standing in roughly the shape which it will finally have. Leave it to dry until it can be handled without losing shape too easily. The handle and pot should be at the same stage of dampness. Decide where the handle is to go on the pot, and scratch the surface slightly. Put some slip on the pot. Cut the handle from its lump of clay. Trim it as necessary, and press it firmly on to the pot. Never pick up an unfired pot by the handle.
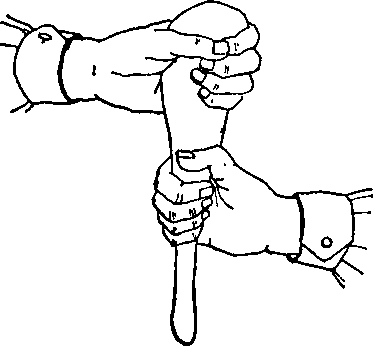
Easing the handle into shape with a wet hand
The handle left to dry. Pulling a handle.
7. Tiles. If you want to experiment with decoration, it may be a good idea to make and decorate some pottery tiles. These can be made by rolling the clay into slabs and by cutting them into shape. They can be decorated in one of the ways suggested below.
Continue to:
My Books

