V. Envelope Problems. Part 3
Description
This section is from the book "Paper and Cardboard Construction", by G. F. Buxton, F. L. Curran. Also available from Amazon: Paper and cardboard construction.
V. Envelope Problems. Part 3

Steps In Making Paper Bag With Folds e. When the paste is sufficiently dry move the lap joint to the right 1 1/4" and crease edges in this position. This is shown in B, and in end view "y".
f. Note now that the opening is in rectangular form as at C which is an end view.
g. Fold in sides as shown at D and press flat. h. Fold up bottom about 1" as at E.
i. Cut away the unnecessary material in this fold and paste as shown in F. Only one thickness of paper should be left to paste.
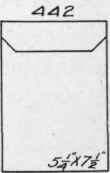
442. Flat Envelope File.
Medium tag board, 4 pieces, 9"x 12".
Cloth board, 1 piece, 9"x 12". These may be cut to sizes required. Binders' cloth, 1 piece, 6"x 18". Marble paper, 1 piece, 9"x 12". Paste, glue. Rule, pencil, scissors. Directions: a. Lay out four envelopes from tag board according to dimensions in drawing.
b. Fold on light lines with part A folded first. This brings the visible edge of the joint in the center of the envelope as shown in drawing at B.
c. Fold up bottom lap.
d. Glue each joint carefully and place under a weight until dry.
e. Lay out curve at top end of envelope and cut to line as shown at B.
f. Cut binders' cloth to size for the folded hinge at bottom ends of envelopes. At F and G are shown two methods of hinging. At F the file is used without the cover boards, while at G the folded hinge is fastened into a cloth covered case. Another form of this case is shown at H with a lap around one end, this being the form for which material is included in foregoing list. If hinge is to be made as at F, cut the binders' cloth as shown at C, 5"x 7" and make folds 1/2' apart alternating up and down; if as at G, cut as shown at E, 5"x 9" and fold in same manner.
g. Apply glue to envelopes and set into folds of binders' cloth. See illustrations at F and G.
Note: - If a cover is desired it may be made as shown at G by fastening two pieces of cloth board or marble board together with a piece of binders' cloth 4"x 5" D, and gluing the hinges on the inside of the board covers. Another form of cover is shown at H. Here binders' cloth may be used for the hinges only or the whole cover may be covered with it. Corners may also be made as an additional problem. Covers should be lined with marble paper.

Three Steps In Making Flat Envelope File Envelope Problems.
If much filing is to be done a filing case as shown in the drawing below will be found convenient. This case is made as follows: a. Cut soft wood base 1/4"x 5 1/8"x 11 1/2".
b. Cut two soft wood ends 1/4"x 5 1/8"x 8 5/8".
c. Cut two cloth board sides each 8 5/8"x 12". Use No. 15, 20 or 25 stock.
d. Fasten the ends of the base with 1 1/4" brads.
e. Fasten the sides to ends and base with 3/4" flat heads, thin.
f. Cover corners with stay tape or 1 1/4" strips of binders' cloth.
g. Cover sides and ends with marble paper or cover paper.
It may seem desirable to line the case with marble paper or cover paper to make a better inside appearance. In this case, either the outer or inner paper should be carried over the top edge.

Desk Filing Case For 5"x 7 3/4" Envelopes.
Book Envelope File.
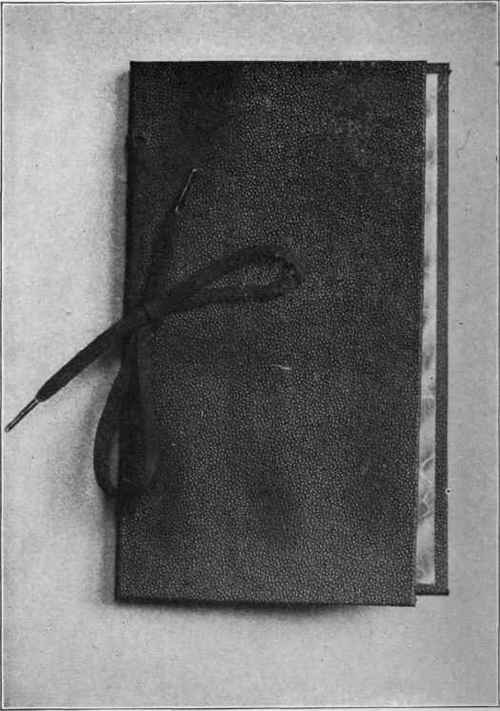
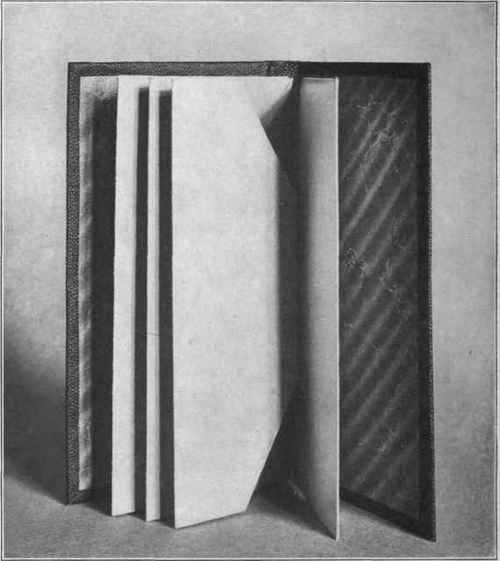
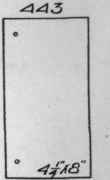
443. Book Envelope File.
Medium weight tag board, 4 pieces, 9"x 12". Cloth board, 2 pieces, 3 3/4"x 8" (cut from 9"3x 12"). Binders' cloth, 1 piece, 9"x 12". Marble paper, 1 piece, 9"x 12". Paste, glue, eyelets, string. Rule, pencil, scissors, eyelet punch.

Envelope And Case For Book Envelope File.
Directions: a. Lay out four envelopes from tag board according to dimensions given in drawing. For order of operations in laying out envelopes see number 242, on page 102.
b. Fold and glue. Fasten bottom lap over end laps as illustrated above.
c. Punch holes and set eyelets in envelopes. Locate holes near bottom corners.
d. Cut binders' cloth to 9"x 10 1/4". Save remaining strip for "i" on page 129.
127 9 e. Place the two pieces of cloth board on the binders' cloth and make pencil lines around them. Make sure that the distance between the boards is the same (1 1/4") at both top and bottom.
Book Envelope File f. Cut the corners away as shown. Enough cloth should be left at the corners so that when it is folded it will completely cover the cloth board.
g. Apply glue to the cloth board and press into place. Glue must be spread thinly and evenly.
Envelope Problems h. Fold the cloth over edges of boards, and glue.
i. From remaining strip of binders' cloth, cut a piece l 3/4x7 3/4". This is to be glued down the center of the back, inside, to make the hinge stronger and more durable.
j. Cut two pieces of marble paper 3 1/2"x 7 3/4".
k. Paste marble paper inside of covers 1/8" from edges.
1. Punch holes in cover in such positions as will coincide with the holes in the envelopes, and set eyelets. There should be a margin between the outer edges of the envelopes and the edges of the cover of about J".
m. A shoe lace or piece of strong black cord may be used to hold envelopes in place in the cover.
Note: - The envelope problems suggested on the preceding pages represent some variety in an important line of paper construction. Other styles and shapes will suggest themselves.
On the next page the full sequence of envelope problems is arranged for comparative study.
Envelope Poller.
Square Envelope.
Pocket For Clippings.
Paper Sack.

Mailing Envelope long mainling envelope.
Photo Filing Envelope.
Long Piling Envelope.
Large Filing Envelope.
Sack With Folds.
Plat Envelope Em.
Book Envelope Pile Envelope Problems Arranged By Grades.
Continue to:
My Books

