Rod Connections
Description
This section is from the book "Do It Yourself With Aluminum. 125 Projects For The Home Craftsman", by G. W. Birdsall. Also available from Amazon: Do It Yourself With Aluminum.
Rod Connections
Machine Screws
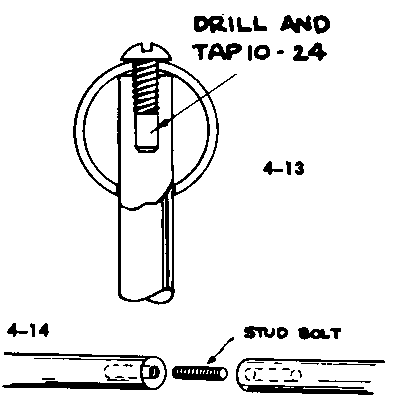
Figure 4-12 shows rod "A" T-connected to another rod "B." Drill "A" to pass 10-24 machine screw. Drill and tap "B" to take 10-24 aluminum screw. This same T-joint can also be used with sheet, bar, or angle at "A." The rod-to-tube connection (Fig. 4-13) is also made the same way. Note that one tube wall has a 3/8" hole, the opposite hole being just large enough to pass the 10-24 machine screw.

Fig. 4-10.
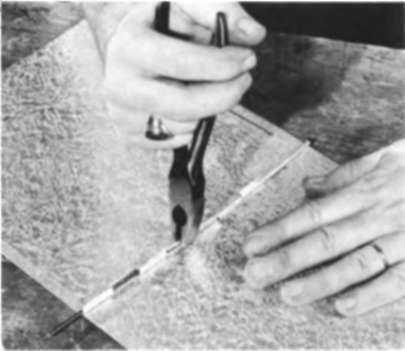
Fig. 4-11.

In all these connections, set up screw tightly, file off top portion of head down to bottom of screw slot, and peen edge of screwhead down over "A."
A rod-to-rod end connection (Fig. 4-14) uses a length of stud bolt obtained by cutting off the head of a 1/4" -20 machine screw, with rod ends drilled and tapped to fit.
Bolted Swivel (Fig. 4-15) provides a movable joint where motion of the two members is involved. Peen end of bolt over nut to lock it in place. A rivet may be substituted for the bolt if desired.
Reducing Rod End
Where a rod end is to be threaded for a connection or fitted through a hole for upsetting to make a rivet-type end connection as shown below, it is necessary to reduce the end of the rod to a smaller diameter. An easy, quick method is illustrated in Fig. 4-16. Use a C-clamp to hold the miter gauge of bench saw so that the rod is positioned directly over saw blade which is adjusted to provide a 1/16" cut. Rotate rod over blade, and move lengthwise to obtain length of cut desired. The 1/16" cut will reduce rod to 1/4" diameter for making 1/4" x 20 threads. Use a cut to reduce the rod to ;diameter for riveted joints.

Threaded Connections
When rod end is reduced as detailed above and threaded with 14" x 20 threads, the rod can be screwed directly into x 1" bar which has been drilled and tapped to fit (Fig. 4-17). Let end extend through slightly, and peen over to lock joint. Sections of 1/4" bar can be made into ornamental nuts easily.
For 1/8" x 3/4" bar and for sheet and angle, use a nut and washer to make the T-connection as shown in Fig. 4-18. This same connection can be used with tube by drilling one wall 3/8" diameter and bolting through opposite wall similar to Fig. 4-18. The riveted connection (Fig.4-21) makes a stronger joint with tube and is recommended over the threaded joint.


End-Riveted Connections
The simplest method of connecting rod to sheet is the end-riveted T-joint (Fig. 4-19). Here a 1/8" length on the end of the rod has been reduced to 1/4i" diameter by the method of Fig. 4-16, inserted through a hole in sheet, and riveted by peening the extended portion of rod. The same joint is also suitable for connecting to 1/8"x 3/4" bar cr to 1/16" x 1" x 1" or 1/8" x 3/4" x 3/4" angle.
The connection can be made "invisible" when end-riveting rod to rod or to 1/4" x 1" bar by countersinking top member of the T-joint and upsetting end of rod into this area (Fig. 4-20), filing off excess metal, and polishing with steel wool.
To end-rivet rod to tube, drill 3/8" hole in near side of tube and 3/16" hole in far side. Then reduce about length on end of rod to 3/16" diameter (per Fig. 4-16), insert it, and upset extended portion as indicated in Fig. 4-21.

Riveted Joints
Figure 4-22 shows how to join rods end to end by halving and overlapping. Countersink holes in rod, and work rivetheads over to make flush with surface. To accommodate rod curvature, nip off excess material in formed rivethead before driving rivet.
For securing rods that cross each other, notch and rivet as shown in Fig. 4-23. The side-by-side joint (Fig. 4-24) uses a 3/4" x 1/8" rivet with head cut off lengthwise to retain full length. Insert in 1/8" holes, and hammer opposite ends alternately to upset both evenly. File away excess metal, and polish area with emery cloth or steel wool to produce an invisible joint.
Follow these same instructions to make invisible joints to connect rod to bar and bar to bar.

Sheet To Rod
Use self-tapping sheet-metal screws to attach sheet to rod. Always hem edge of sheet (per Fig. 3-5) before attaching. Screws can be on underneath sheet surface, or on top of sheet and rod, as in Fig. 425.
Continue to:
My Books

