Beginning The Basket
Description
This section is from the book "Sewing - Handicraft For Girls", by Idabelle McGlauflin. Also available from Amazon: Sewing Handicraft For Girls.
Beginning The Basket
Baskets may be classified as round or oval.
A. The Round Basket.
Draw the sharpened end of the pliable reed between the thumb and finger into the smallest possible coil. Lay the end of the raffia to the point and along the sharpened end of the reed and hold it in place with the left hand. By a sharp turn in the thread begin winding over the reed and raffia to the point. Then shape into the coil by sewing through the center, thus forming the "button" as in the illustration.
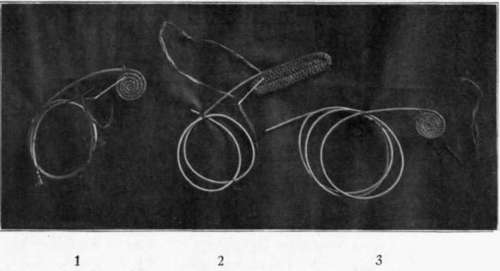
Baskets Begun In Three Different Weaves.
1 - Round basket in the Navajo weave.
2 - Oval basket in the Lazy Squaw weave. 3 - Round basket in the Mariposa weave.
B. The Oval Basket.
The end of the reed is not sharpened, and must be very soft and pliable, or it cannot be bent together at the desired length, two, three, four, five or more inches from the end, without breaking. It will do no special harm if it splits, however, as it is to be covered with the raffia. Lay the end of the raffia to the end of the reed, along the reed and around the bend, and by a sharp turn in the thread wind four or five times over the raffia, covering the bend in the reed. The two reeds may then be caught together by the stitch selected for the basket, or the "Navajo" or "figure eight stitch'" may be used and the other stitch introduced on the second round.
Splicing The Reed
As the reed naturally coils somewhat, take care to splice it so that the coil in the two pieces remains the same; otherwise it would draw apart. Sharpen the top side of one reed and the underside of the other to a long flat point and slip one past the other until the two together form the uniform size of the reed. It is sometimes advisable for a novice to wind the spliced reeds with fine thread, but experience will teach one to do the splicing with the sewing of the basket.
Splicing The Thread
When a new thread is needed lay the end of the old thread along the reed and place the new thread over it, and by a sharp turn in the thread, wind once or twice over both, and continue the stitch as before. When the ends are firmly fastened clip them off.
Shaping The Basket
Coiled basketry admits of the greatest variety in shape and size, from the simple table mat to the exquisitely beautiful jar and vase forms, while the stitches lend themselves to an endless variety of design ranging from the simplest to the most intricate patterns.
It is well to have in mind the shape and design before beginning the basket, as haphazard work is not apt to be satisfactory. Baskets can be easily shaped to any desired form, as this depends entirely upon the position of each succeeding reed upon the one below it.
Introduction Of Color
All reeds in the coiled basket are wound twice with the raffia. It is important to keep this in mind when putting in designs. The colored raffia is introduced in the same manner that the thread is spliced, by laying it along the reed and sewing over it. When working out designs in color do not cut the thread when changing from one to another, but lay the thread not in use along the reed and sew over it, bringing it out when ready to use it again.
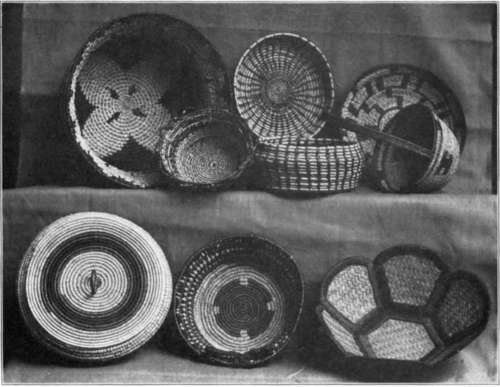
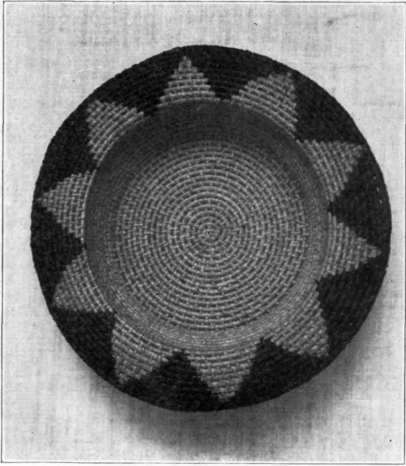
Group Of Baskets Showing Variety In Size, Shape And Design.
As an aid in dividing the space tor a design a piece or paper may be cut and folded into the desired number of sections, and these marked on the basket. These spaces are then filled in without regard to the exact number of stitches required to cover the reeds.
Beginners should make a study of Indian baskets and their designs.
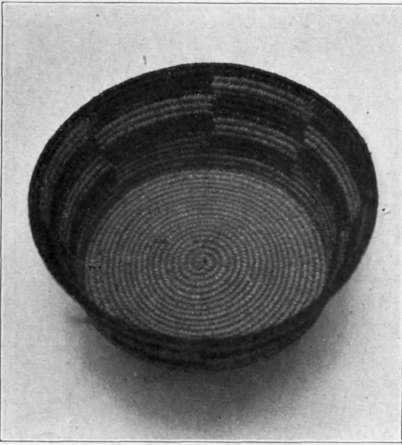
Basket Showing The Navajo Weave.
Finishing The Basket
Cut the end of the reed to a flat point two inches in length, and gradually taper the stitching off so that it shows where it ends as little as possible. The last two rows of the basket might be stitched with colored raffia unless it detracts from the design.
Description Of Basket Stitches
The stitching proceeds along a continuous coil, so that each stitch is passed beneath the stitches of the coil beneath.
For convenience in analyzing these stitches the two reeds may be designated as the loose reed and the fastened reed.
The Navajo Stitch (Figure Eight)
Hold the commenced coil in the left hand which will cause the work to proceed from the right toward the left.
(a) Pass the thread between the two reeds toward you, (b) over the loose reed from you, (c) between the two reeds toward you, (d) down between the stitches of the fastened reed from you, and beginning again at (a) pass the thread between the two reeds toward you completing the figure eight. Draw the two reeds firmly together.
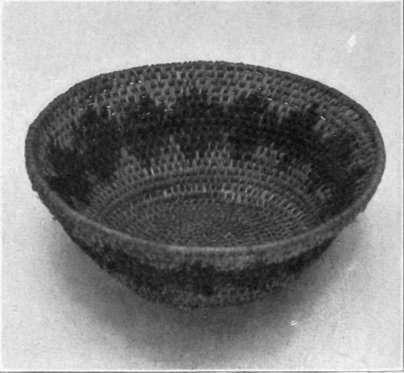
Basket Showing The Lazy-Squaw Weave.
This is the stitch used by the Indians in making the baskets which they ornamented with feathers, wampum, shells and beads.
The Lazy-Squaw Stitch
This stitch is made up of two parts, a long and a short stitch.
Hold the commenced coil in the left hand and work from right to left. (a) Wrap the thread toward you over and around the loose reed once, (b) then over the loose reed again, (c) and down from you between the stitches of the fastened reed and back to (a). This completes the long-and-short stitch.
Basket Showing The Mariposa Weave.
The story of the origin of the name "Lazy-Squaw" stitch is interesting. If the squaw was inclined to slight her work she would wrap the loose reed several times before taking the long and more difficult stitch which bound the two reeds together. She would then receive from her companions the ignominious title of "lazy-squaw."
As a modification of this stitch the wrapping of the loose reed is omitted, and the long stitch only is used. This passes each time between the stitches of the coil beneath.
The Mariposa Stitch (Knotted)
In analyzing this stitch we find that it is made up of three parts. It is the same as the Lazy Squaw Stitch with the addition of the knotted effect obtained by passing the thread around the long stitch.
Hold the commenced coil in the left hand and work from right to left, (a) Wrap the thread toward you over and around the loose reed once, (b) then over the loose reed again, (c) and down from you between the stitches of the fastened reed, thus binding the two reeds together, (d) bring the needle up between the two reeds at the left side of the long stitch, (e) cross over this stitch, going down between the two reeds at the right of the long stitch. Bring the thread over the loose reed and begin wrapping again as at (a).
The Samoan Stitch (Lace Effect)
Baskets that are to be lined are very pretty made of this stitch. It is also very effective combined with other stitches, or as the finishing coil of a basket.
The Samoan Stitch is a modification of the Mariposa Stitch, the only difference being in the space between the reeds and the passing of the thread around the long stitch two, three or more times, which gives the lace effect. The reeds must be held firmly, however, and the thread passed around the long stitch times enough to make the basket firm.
Sewing Kits for Sewing Classes
Superintendents of Schools
Are you giving to the girls the training in the Home Arts that modern education demands? Investigate the McGlauflin Sewing Kits arranged in five numbers for a five-years' course with materials and directions in each Kit.
Continue to:
My Books

