Chapter VI. Outdoor Buildings And Structures
Description
This section is from the book "How To Make Common Things. For Boys", by John A. Bower. Also available from Amazon: How to Make Common Things.
Chapter VI. Outdoor Buildings And Structures
In giving instructions in wood-work, the objects upon which you can exercise your skill and ingenuity seem to increase rather than decrease. We must therefore make this a chapter of general instructions rather than confine it to one or two objects.
In our last chapter we described the method of making a "lean-to" summer-house, but all spots are not suitable for such a structure. It seems therefore desirable to describe another form, and while so describing it, ask you to remember that in making the frame-work, the same mode of proceeding will do for a shed or a wooden house of any description.
In making the frame-work, the uprights can always be sunk in the ground, the holes being well rammed with bits of brick, stone, or other material; or a frame-work may be made so that it can be taken down and removed easily, the uprights being fixed to a wooden foundation instead of being let into the ground. The foundation-frames foten rest on a course of bricks sunk just below the surface, and are best made by cutting off the lengths of wood and joining them with the half-lap joint (Fig. 19). This is a simple joint, but often badly made. Remember there are three surfaces to be made for close contact; there is not only the overlapping portions, but the end of each lap; these, accurately fitted, is a type of good workmanship. Do all the cutting across the grain with a tenonsaw (Fig. 18), and do not go a fraction beyond half the thickness of the wood. As these pieces when joined together will be on the ground, and subject to damp, it will not do to use glue, but they can be joined together by wooden pegs called "dowels," put in perfectly dry. Let the dowels be cut 1/8 inch shorter than is needed for the united thickness of the wood, and dried before the fire for an hour or so before putting them in so that they may get their maximum shrinkage.
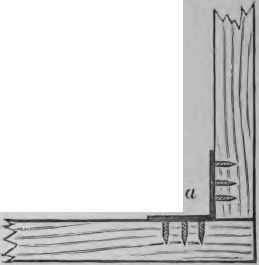
Fig. 52. - Spars joined by angle iron.
The frame-work may be square, oblong, hexagonal, or octagonal - the two latter are favourite shapes for summer-houses standing in snug corners. The uprights are put at each corner, and may be secured by angle irons, as in Fig. 52, a, if you do not use the halving joint; the upper part of the frame-work being made according to the directions given in the last chapter.
If in the case of a summer-house you want a pinnacle roof, you form it with 1½ to 2 inch stuff, according to the size of the house; the upper end of each spar must be carefully cut so that they meet together as one piece. Such a house may be covered in with thatch, heather, or a plain wooden roof, or Willesden paper, and if you want to give a rustic appearance to it, and have only light wood for the purpose, split the wood down and nail it with the flat side next the wood-work. The whole may be then stained and varnished according to our former directions. You will thus have a structure that is durable and strong, and one that can be removed from one place to another without any great amount of trouble.
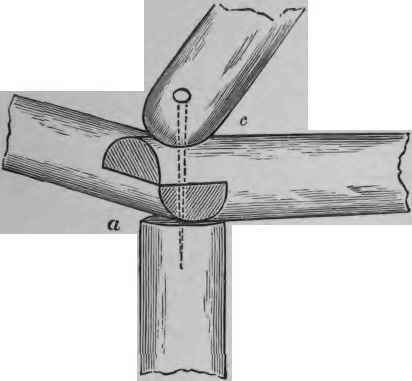
Fig. 53.
For a summer-house built with unplaned wood, select wood that has been cut down in the winter with the bark on - suitable brandies can be selected from the common fir, the silver fir, and spruce. For the uprights you must select good straight poles, and almost 4 to 5 inches in diameter. For the smaller work you can use crooked oak branches, or branches from the apple-tree. Inside work may be done with hazel, and sticks from the maple.

Fig. 54.
Supposing you want a house of such dimensions as the following - 8 feet long by 4 feet wide, and 6 feet high to the eaves, the collar or end posts must be set into the ground at least 2 feet, having the bark stripped off this portion and well tarred to preserve them. The cross-pieces at the top are halved and joined to the top of the collar-posts, as shown at Fig. 53. This is done after the tops of the corner-posts are cut flat. At the top and bottom inside the house, pieces are nailed to corner-posts, to which the wood forming the sides and ends of the house are to be nailed. Saw the ends of the rafters as shown at c, and fasten the whole together at each corner by large nail-spikes. The frame-work of the roof should be as shown in Fig. 54. The walls of the house are formed by split poles, as shown at Fig. 55. These want to be ripped by the circular saw if you can have them so done; the cost will not be much. The inside may be done in the same way to half its height, and the upper half to the eaves with smaller wood, nailed diagonally. This gives it a nice appearance. To roof it in - thatch may be employed if you like to try your hand at this method of roofing - it is quite in character with such a rustic structure. The rafters are crossed and connected by rough rods nailed at about 5 inches from each other. For thatching purposes, heather or furze, fastened by small twig buckles, is best. Lacking this you must do it with straw - of which wheat-straw is the best - which will, it is said, last for twenty years if well done. We are afraid we can give no very good directions for thatching; but in districts where it is likely you will get good material for rustic work, there it is likely you will be able to get instructions from a thatcher, who is kept on a farm for this class of work; for all stacks are covered in with thatch. In thriving agricultural districts prizes arc frequently given for the best and neatest thatching, and a man capable of doing this work well will only be too pleased to render assistance to an amateur.
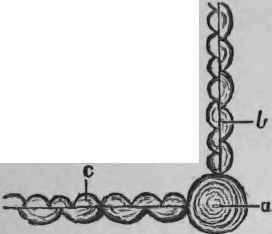
Fig. 55. - Showing plan of corner of Rustic-house. a. corner post; b. split wood for outside; c. split wood of thinner wood for inside.

Fig. 56. - Frame-work of Out-bouse.
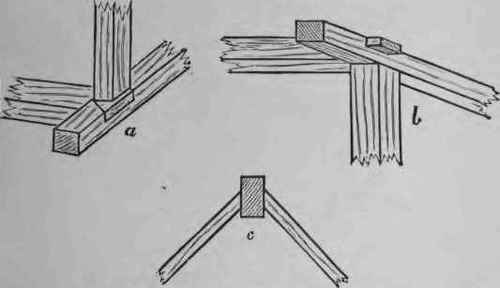
Fig. 57. - Joints employed in Out-house.
With ordinary trouble and a good use of the tools we have described, you can make several articles useful for out-door purposes, such as a tool-shed, hen-house, hen-coops, hutches, kennels, bee-hives, flower-stands, put up ordinary fences, and make plain doors and gates.
For an ordinary house or shed we will give you a few general directions, which, with those already given, will assist you to carry out successfully any work of this kind. The wood required is 3-inch. quartering for the ground-frame and uprights, while 2½ inch will answer exceedingly well for the rafters.
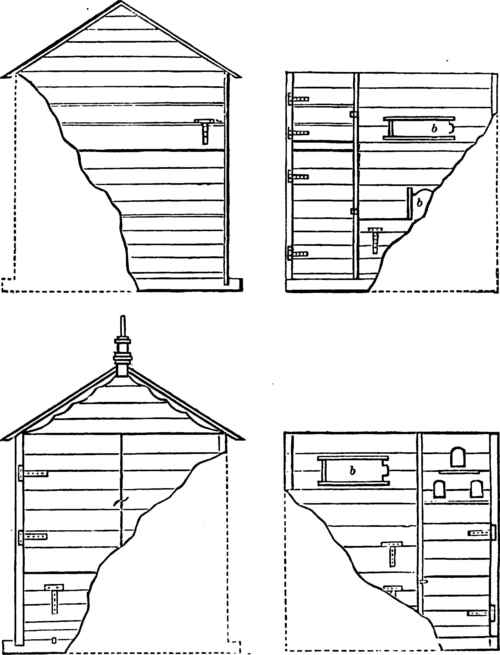
Fig. 58. - To show arrangement of Nest-boxes and Slip-doors.
The skeleton frame-work we sketch in Fig. 56, while the joints employed in putting them together are given respectively in Fig. 57 at a, b, c. These you will observe are simply applications of those given in Chap. IV. The rafters d, in this case, are nailed to a narrow plank /, which acts as a sort of key-board, for if securely nailed the weight of the roof itself will keep it in position.
For roofing purposes we have already said enough. If, however, you make a fowl-house, nothing is so good for the roof as zinc. In such houses it is frequently required to ventilate them, and to make boxes and drawers inside, which require to be got at, by slip doors, as at b in Fig. 58, where the door opens to various parts of the interior, and for this purpose are fixed vertically and horizontally, carried out somewhat as the plan. The nest-boxes are suspended or placed on shelves in the house, and are shown in Fig. 58. Such a house must also be closely boarded to keep out both cold and damp.

Fig. 59. - Hutch.
The size of your fowl-house must regulate the kind of structure you put up. You may buy large boxes or tea-chests, which, with little little alteration, will help you without the elaborate structure we have described.
For making hutches, a large box will frequently suffice. Alter one side into a sloping surface for a roof. The front may be arranged with wooden bars, a portion fitted in a wooden frame to act as door, as in Fig. 59, or it may have a front of wire-netting.
Wire-netting may also be used for enclosing the fowls run, which should extend as far from the fowl-house as your space will allow; the less confined your fowls are the better they will prosper.
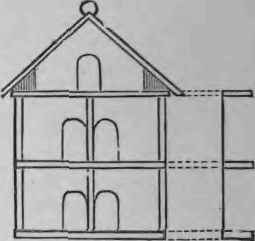
Fig. 60. - Pigeon House.
A Pigeon-loft is also easily made out of a box. Give it a pitch roof, as in Fig. 60, and it may be nailed to a wall attached to your fowl-house or mounted on a pole. A house for five pairs of pigeons may be made of a box 2 feet long and 1 foot 8 inches wide and 12 inches deep. Let the box be stood on an end, and the divisions in it made as shown in Fig. 60. Then fit a front of ½ inch or ¾ inch stuff, cutting each so that a stage of 3 inches wide is left in front of each.
A Hen-coop is made of a ground frame of 2 inch stuff, and rail 1 inch by ¾ inch, enclose it as shown in Fig. 61. Let a little sliding-frame be attached to one side, that can be raised so that the bird can be allowed to get out and in without lifting the whole thing off the ground. An improved form is shown, made like a rabbit-hutch, in Fig. 59.
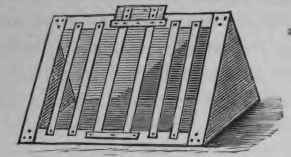
Fig. 61. - Hen-coop.
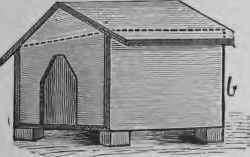
Fig. 62. - Dog Kennel.
A Dog-kennel can be made out of a box, unless you want a very large one. Suppose you require one 2 feet long, 1 foot 6 inches wide, and 2 feet high; a box of this size is frequently to be bought cheap at a tradesman's - Fig. 62, a. At one end cot out the entrance through which the dog can pass easily. Then trace above it the lines showing the pitch of the roof, and cut the ends into shape, A strip or two may be required to be taken off the sides; if so, they will come in for roofing; which when complete must be painted; green or black is best Then put it on to four square blocks, so that it does not stand close to the ground - Fig. 62, 6. The inside does not require painting, but may be kept sweet and clean by a coat of lime frequently.
Continue to:
My Books

