Hanging Bookshelves
Description
This section is from the book "Things To Make In Your Home Workshop", by Arthur Wakeling. Also available from Amazon: Things to Make in Your Home Workshop.
Hanging Bookshelves
The curved outlines of the attractive hanging bookshelves shown in Figs. 27 and 28 make an ideal problem for a more detailed study of the use of the motor-driven jig saw. The bookshelves will prove an addition to the living room or den, or, indeed, may be placed in the breakfast room to hold artistic pieces of china or pottery.
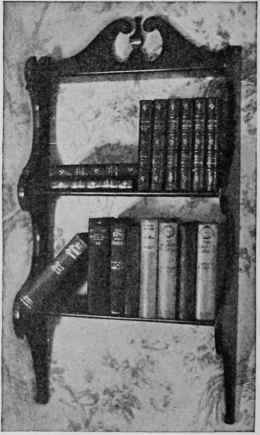
Fig. 27. - These bookshelves form an ideal object lesson in the use of the jig saw.
In choosing the type of wood to be used, much depends on the finish. One good choice would be a cheerful color of lacquer, agreeing with the color scheme of the room in which the shelves are to hang. Whitewood, or even wood taken from packing cases, may be used, if close grain.
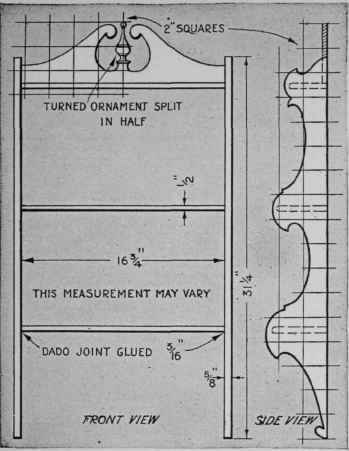
Fig. 28. - Assembly drawing of the shelves with the curved outlines, which are to be enlarged by laying them out in 2-in. squares.
Step No. 1 -Making the Patterns. On a sheet of heavy cardboard 5 by 31 ¼ in., lay off 2-in. squares, and from the working drawing (Fig. 28) plot the curves. Cut along the outline with scissors. In like manner lay out and cut the headpiece on a sheet of cardboard 5 by 16 ¾ in.
Step No. 2 - Getting Out the Stock. On the jointer, join all edges of the various pieces - the two sides, the headpiece, and the three shelves.
Step No. 8 - Using the Circular Saw. On the circular saw, rip the pieces to the correct width and again join these edges on the jointer. Cut the ends off square, making all the shelves the same length. If you have a shaper (shaping machine), use it for putting any desired molded edge on the front of all shelves. Of course, you can easily round these edges, as shown, with a hand plane.
Step No. 4 - Using the Jig Saw. Jig saws are constructed on two different principles. The one type works on a cam or eccentric, with a little handle or crank on the side of the wheel connected with the saw; and as this wheel revolves, the handle pushes the saw frame up and down (Fig. 29). The second type (Fig. 30) is constructed with a horizontal sliding block or crosshead, which moves the saw frame up and down by means of a crank mechanism.
The table of the jig saw is set to an angle of 90 degrees in order to make a square cut. Insert a rather coarse blade in the frame, seeing that the teeth point down. Now adjust the finger for holding down the work to the proper thickness.
You will have to work in from both ends on account of the length of the sides; it may even be necessary to do a little handwork if your machine will not reach to the center from both ends. It will pay you to do the jigsawing with the greatest possible care, as it will eliminate a great deal of handwork.
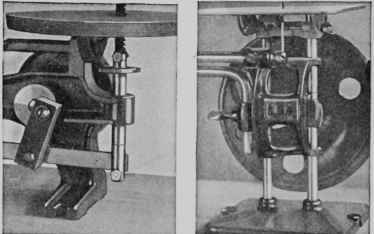
Figs. 29 and 30. - Two types of jig saw mechanisms. At the left is the crank motion and at the right the horizontal motion mechanism.
Step No. 5 - Smoothing Up the Edges. Use a drum sander on all possible curves. Curves that are too abrupt for the sander must be smoothed with a cabinet file, followed with sandpaper. For some of the curves, a small spokeshave will help a great deal; and on the convex curves and flat pieces, a sharp chisel is the best tool to use. A good, careful cabinetmaker tries to use the file as little as possible.
Step No. 6 - Cutting the Dado Joints. Place the two sides together, being sure to have a right and left side. With a try-square, mark the location of the three shelves. Use a groover of the proper size and fasten this in the circular saw, 3/16 in. above the saw table. Groove out both sides. Note that the grooves do not run to the front edge; this means that you must raise the stock up so as to start cutting at the right mark. A little handwork will be necessary at this point. The end can best be cleaned out by boring a ½- in. hole with a Forstner type bit; make the holes 3/16 in. deep. The rounded front edge of the shelf will fit the hole perfectly. A simpler method, though not so good, for fastening the sides to the shelves, is to make butt joints and screw the job together with round-headed screws.
Step No. 7 - Turning the Ornament. Glue two pieces of stock together with a sheet of paper between, making a piece 1 ½ in. square, and turn the ornament in the lathe. The purpose of the paper is to allow the splitting apart of the two pieces after the turning operation is completed.
Step No. 8 - Sandpapering. Using No. ½. sandpaper, thoroughly sand all parts. Repeat with No. 0 sandpaper.
Step No. 9 - Assembling. Make a trial fitting between clamps to make sure that all joints fit. Mark the companion pieces as they are to go together. Use plenty of the best glue and clamp the work tightly. Clean off all of the excess glue by throwing fine sawdust over the glue that oozes out of the joints and then scraping it off at once with your chisel.
Step No. 10 - Cleaning Up. After allowing the glue to harden for at least five hours, carefully remove any excess glue that may still remain. Then sandpaper with No. 0 sandpaper, rounding all sharp edges. The piece will then be ready for the finishing operation.
Step No. 11 - Finishing. Apply one coat of thin white shellac to all parts. When this is hard and dry, sandpaper thoroughly with No. 0 sandpaper. Now apply the desired color of lacquer, using a sprayer if available.
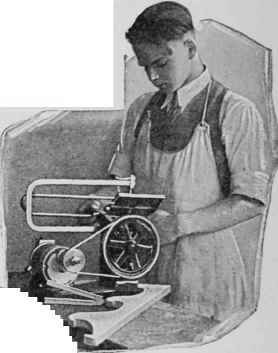
Fig. 31 (above). - The table of the jiff saw can be tilted to any angle, making it easy to cut an accurate bevel.
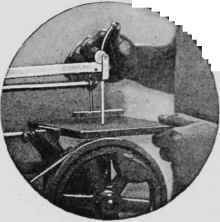
Fig. 32 (in circle). - The tension of the blade of this ma-chine can be adjusted by working a lever at the top.
Continue to:
My Books

