


Two Portable Tool Cases
Description
This section is from the book "Things To Make In Your Home Workshop", by Arthur Wakeling. Also available from Amazon: Things to Make in Your Home Workshop.
Two Portable Tool Cases
The tool case in Fig. 20 holds saws and steel square, and has ample space for planes, level, bit brace, and other large tools, and two drawers for small tools.
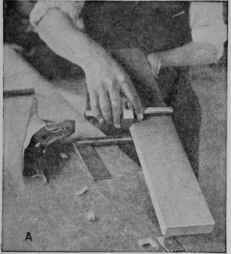
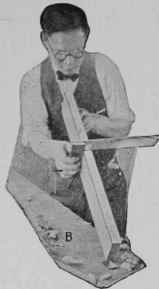
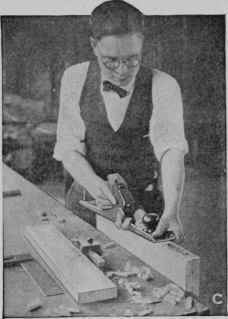
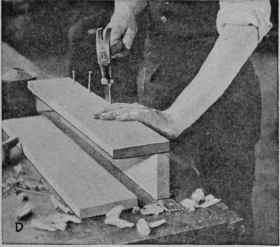
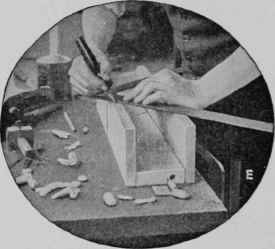
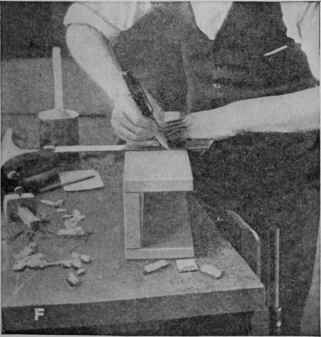
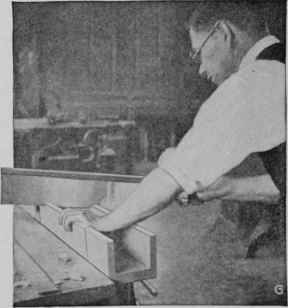
Fig. 19. - Steps in making a miter box of wood. The work must be done with extreme care, and the cuts should be made with the saw which is to be used with the box.
The materials needed are ½- and ¾-in. thick white pine or other soft wood stock, two drawer knobs or pulls, a catch for holding the drawers in place, and a broom handle or other long, round rod of sufficient strength to support the weight.
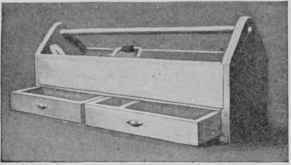
Fig. 20. - This extremely compact and convenient portable tool box has divisions for saws and planes; also two drawers for chisels and small tools.
The bottom piece is set into a rabbet in the ends, and the front and back pieces also are set in rabbets (Fig. 21). This construction is strong enough to withstand hard usage and even abuse.

Fig. 21. - The front and end views of the tool-carrying box shown in Fig. 36, and the drawer.
Most boxes of this sort, not being stained or painted, soon become grimy. If you wish to keep the box the natural color of the wood, by all means give it a thin coat or two of white shellac. The pleasure of having a clean, neat looking tool box will more than repay you for this slight trouble.
The popularity of the type of tool case shown in Figs. 22 and 23 is sufficient proof of its many merits. Although used primarily by the carpenter, it is a fine case for the handy man with his informal set of tools. Its ease of portability makes it useful even to the mechanic who already possesses one or more large chests or cabinets.
The materials needed are: 1 pc. oak ¾ by 8 in. by 8 ft.; 2 pcs. oak (3 ply) % by 16 by 30 in.; 1 pc. white pine 3/8 by 6 in. by 6 ft.; 1 tool box lock, 2 tool box clasps, 8 box corners, 3 hinges, 1 leather sample case handle; 42 No. 5 - ½-in. screws, 40 No. 6 - 1-in. screws and 28 No. 6 - 1¼-in. screws, all of the round-headed type; 2 doz. 1/8 by 1 in. machine screws; 1 package twopenny brads. All hardware should be of solid brass.
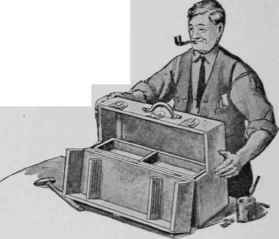
Fig. 22. - Another type of tool case, which can he carried easily from one job to another. It is one of the most popular designs among me chanics.
Cut the 16 in. long end pieces from the ¾ by 8 in. piece of oak and the 31½. in. long top and bottom pieces from the same stock. Rabbet the ends of the top and bottom 3/8 by ¾ in. as shown for the joints. Mark the end pieces and the top for the door and saw out with fine saws very carefully. Plane down the other pieces to make up for the saw kerf.
Rabbet the long edges of the top, bottom and end pieces 3/8 by 3/8 in. to receive the 3/8 in. thick side panels flush. Glue up the top, bottom and end pieces and use three screws from both directions, being sure that the case is square. Square one side and the end of the side panels and cut them to size; then glue and screw them in place. One side, of course, will have to be cut out for the door.
Perhaps it will be best to leave the tray to the ideas and needs of the individual, but it is made to rest on cleats placed on the ends and at the middle of the box so that its upper edge will be flush with the joint of the door. It should be a little narrower than the inside measurements of the box to allow room for the steel square, which will be kept in the back of the box.

Fig. 23. - Front and top views of the tool case shown in Fig. 22 and, at the right, the end view. Oak is the most suitable wood to use.
Cleats should be arranged in the door to carry the saws. Hooks and other cleats can be installed for holding other tools.
Stain or merely oil the case with pure boiled linseed oil, as preferred. When the wood is dry, use two coats of shellac, rubbing each down with fine sandpaper. Follow with two coats of varnish (on the outside only) ; rub the first with fine sandpaper and leave the second as applied or rub it with fine powdered pumice and oil, according to whether a dull or glossy finish is desired. For a finish that can be applied more quickly, use stain, one coat of thin shellac, and two coats of high grade, clear brushing lacquer.
Mark the location of the hardware. Use the½ in. round-headed screws for the hinges and corner clips and the 1/8 by 1 in. brass machine screws for the locks, snaps and handle. Rivet the inside ends to make it impossible to open the box merely by turning out the screws.
Continue to:


My Books

