


Fifth Exercise
Description
This section is from the book "A Laboratory Course In Wood-Turning", by Michael Joseph Golden. Also available from Amazon: A Laboratory Course In Wood-Turning.
Fifth Exercise
Material
Poplar or pine, 3" x 3" x 8".
Exercise
To cut the material to the form and dimensions shown in Fig. 63.
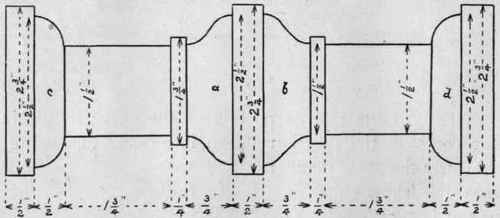
Fig. 63.
First turn the material to the form and dimensions shown in Fig. 64, using the skew chisel. Next cut the part marked [a] with the 1/4 - inch gouge. Start the cut on the right-hand side, holding the gouge in the position shown in Fig. 65, and keep the cutting part of the edge supported on the bevel directly behind it. As the cut proceeds, roll the gouge on its back in such manner that the cutting portion of the edge changes from the right-hand side to the left-hand side, where the cut finishes, as shown in Fig. 65, Fig. 66, and Fig. 67. During this cut each portion of the cutting edge is successively brought into use, as shown. Take care to have the portion of the edge that is being used supported, by having the part of the bevel directly behind it in contact with the revolving stock, and the corresponding part of the back of the chisel in contact with the tee rest, as shown in the sketches. The gouge must be grasped quite firmly, and the handle raised slightly during the cut. The cut is started against the shoulder on the right-hand side and finished against the one on the left-hand side of the curve to be cut.
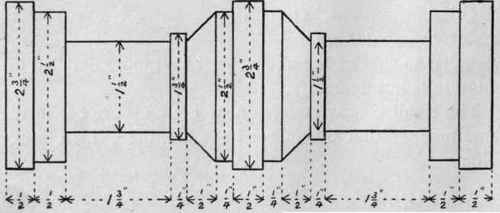
Fig. 64.
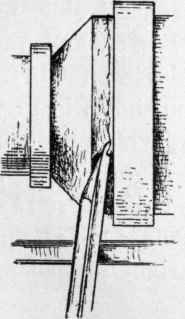
Fig. 65.
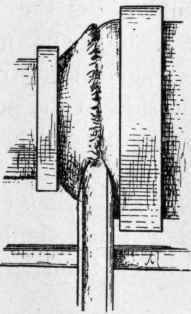
Fig. 66.
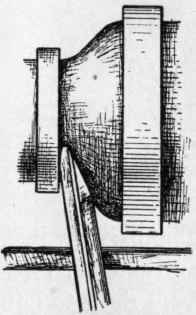
Fig. 67.
The curve marked [b] is cut in a similar manner, the direction of the cut, however, being from left to right instead of from right to left, as here the cut starts against the shoulder on the left-hand side and finishes against the one on the right-hand side.
Cut the curve marked [c] by starting the cutting edge against the shoulder on the right-hand side in the same manner that it was started when cutting [a], and roll the gouge on its support from right to left, as before, carrying it slightly farther in the movement, and drawing it a very little way backward towards the end of the cut. The cut starts against the shoulder on the right-hand side, in the position shown in Fig. 65, and finishes against the cylinder on the left-hand side, in the position shown in Fig. 68. In this cut the handle of the gouge is swung around to a slightly greater extent than when cutting the curve [a]. The part marked [d] is cut in a similar manner to [c], the movements, however, being from left to right instead of from right to left.
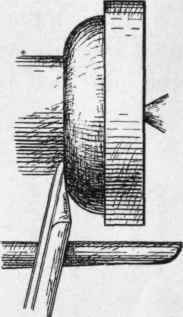
Fig. 68.
Continue to:


My Books

