


Lesson XIV. To Make A Pair Of Scales
Description
This section is from the book "Elementary Woodwork", by George B. Kilbon. Also available from Amazon: Elementary woodwork.
Lesson XIV. To Make A Pair Of Scales
It is both profitable and interesting to close a series of elementary lessons by making some project or article of use. This lesson will describe one such article, and Lesson XV (To Make A Bevelled Box Or Card-Receiver). another. Fig. 168 is a perspective view of a pair of scales which the average pupil can make sufficiently accurate to answer the purpose of weighing letters and papers for mail.
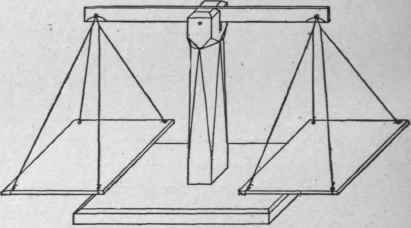
Fig. 168.
Fig. 169 shows three orthographic views of it, one-fifth size. This would make the base a, 8 in. X 4 in. X 1/2 in.; the post b, 7 in. X 7/8 in. X 7/8 in.; the beam c, 10 in. X 1/2 in. X 1/8 in.; and the pans d, each 4 in. X 4 in. X 1/8 in. Fig. 170 is a sectional view of a portion of the base, full size, with the post mortised into it. Fig. 171 is a quarter size elevation and plan of the post, having a tenon on the lower end, a uniform chamfer on the top, and a bevelled chamfer along most of its length, though any other design for ornamentation will answer just as well.

Fig. 169.

Fig. 171.
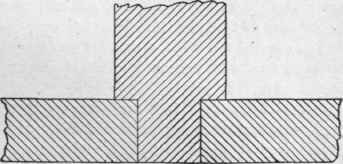
Fig. 170-
Fig. 172 is a full-size plan, front and end elevations of a portion of the beam showing places cut away on each side, to prevent friction of the cords which suspend the pans.
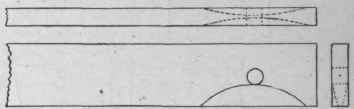
Fig. 172.
Fig. 173 is a full-size view of one corner of a pan, showing the hole in which the cord is tied. This hole may be 1/4 in. from an end of the pan and 1/8 in. from an edge.
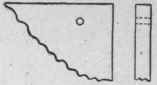
Fig. 173.
When the parts are all made and sand-papered smooth, glue the tenon of the post in the mortise of the base, and then, using a camel-hair brush about 1 1/4 in. wide, put a coat of thin shellac on all of the parts. Let this dry a few hours, sandpaper it sufficiently to smooth all roughness, and apply a second coat of thin shellac. Thin shellac is specified because, if it be applied too thick, a patched surface will be the result. No harm need result from too thin shellac, as, in that third coat may be applied.
Shellac dries very fast, and, in applying it, take a sufficient quantity of it in the brush to cover the wood in any given place at the first stroke, and do not make a second stroke in any given place if possible. Lastly, tie on the cords and put in the nail for the beam to swing on. The hole in the beam for the nail on which it swings, and the groove in the post for the beam to play in, must both be of ample dimensions to guarantee no friction. Care is needed to tie the cords of uniform length. To facilitate this make a fixture, as in Fig. 174.
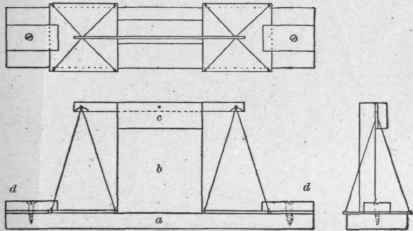
Fig. 174.
This consists of a base a, standard b, cleat c, and two buttons d, all of 7/8 in. pine. By means of this fixture the beam and pans are held in proper relative position while the cords are being tied.
Fig. 175 shows an end view of the beam with a cord whose centre lies in the hole, and whose halves are then tied when the two ends can be attached to corners of a pan. Fig. 176 shows two such cords tied in one hole, leaving four projecting ends.
Care must be taken to have the holes in the ends of the beam, where the strings are tied, equidistant from the hole in the centre of the beam.
When the work is put together, if one pan proves to be heavier than the other, trim it till they are alike.
For a poise, bind four 10 d. wire nails in a bundle by means of two pieces of No. 19 soft iron wire, each 6 1/2 in. long, as in Fig. 177, and the whole will weigh one ounce. Place this poise in one pan of the scales, and a sealed letter in the other. If the letter rises, the U. S. mail will carry it to its destination for two cents. If it balances, or falls, they will ask more.
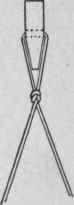
Fig. 175.
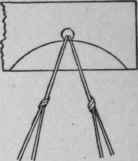
Fig. 176.

Fig. 177.
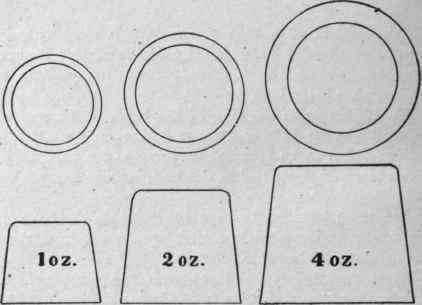
Fig.178.
If desired, a neat set of poises can be made of cast-iron. Fig. 178 shows three drawn full size.
These need to be cast a small fraction too heavy, and then filed to exact weight, being tested by accurate sensitive scales, each pupil filing and testing his own.
Continue to:


My Books

