Tools. Part 7
Description
This section is from the book "Elements Of Woodwork", by Charles A. King. Also available from Amazon: Elements Of Woodwork.
Tools. Part 7
(B.) In using the block plane, do not make the cuts from edge to edge, or chips will be broken off at the cor ners; instead, plane from each edge, and stop the stroke be fore the other edge is reached; reverse the plane and work from the other direc tion, as shown at A, B, Fig. 57. An other and workman-like way of using the block plane upon small pieces is shown in Fig. 58. Work from each edge as de scribed above, turn ing the piece over for each stroke. In sharpening the block plane iron, the edge should be made slightly elliptical, and the bevel carefully maintained.
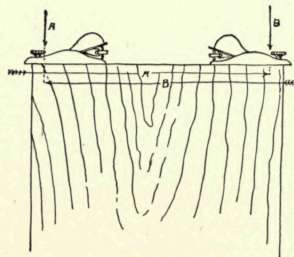
Fig. 57. - Use of the Block Plane. (For explanation, see text.)
45. The correct position. - (A.) In using planes or any edge tools, a position should be taken which will furnish sufficient resistance to the pressure required for making the cut, as the pressure should be applied firmly and steadily. With experience, the correct position will be taken involuntarily, but the beginner should be con tinually upon the watch to overcome his awkwardness.

Fig. 58. - Using Block Plane upon Small Pieces.
(B.) The habit of bending from the hips is acquired easily, and the young workman should learn to work in as nearly an erect position as possible, for if the bending of the shoulders is persisted in, a permanent stoop will re sult. Stand facing the work and clear of the bench in order to prevent unnecessary wear of the clothing.
(C.) Do not allow the plane to drop over the end of the board at either the beginning or the end of the stroke, as indicated at A, B, Fig. 59. To pre vent this, the hand should be kept upon that part of the plane which is upon the board; at the beginning of the stroke, the weight should be upon the front end of the plane, as in Fig. 60, and at the end of the stroke upon the rear end, or upon the handle, as in Fig. 61. Begin and end each stroke with a lifting motion instead of allowing the plane to drop as it leaves or enters the wood. The plane should be held firmly, not rigidly; do not allow it to jump; this is caused generally by an attempt to take a shaving heavier than the plane should cut, or, if the cap iron is fitted and adjusted properly, by a dull iron. A cutter will jump or chatter if it does not fit solidly against the frog. In drawing the plane back after making a stroke, carry it upon the toe, or upon one corner; do not drag it flat upon its face, as the iron is thereby dulled as much as when it is cutting, or possibly more.
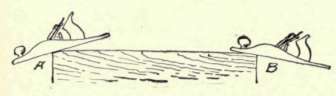
Fig. 59. - Incorrect Use of Jack Plane.
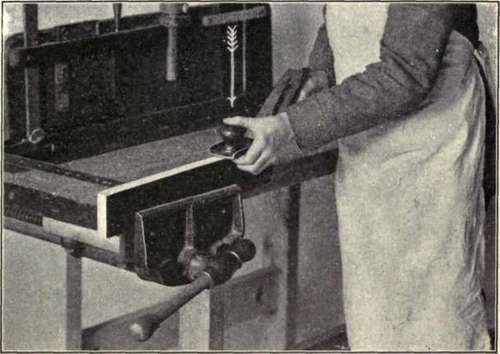
Fig. 60. - Beginning the Stroke with a Jack Plane.
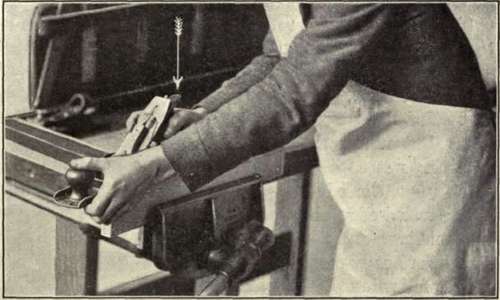
Fig. 61. - -Ending the Stroke with a Jack Plane.
(D.) Carry the plane parallel with the grain when it is possible, and take no more shavings off than is necessary to attain the desired results. The young workman should make a study of the grain and the peculiarities of the different kinds of lumber upon which he works, losing no opportunity to experiment upon and compare the qualities of every available wood.
(E.) In using edge tools of every kind, little is gained, and much is often lost, by working with dull tools; tools should be sharpened often and thoroughly. This is of the utmost importance, for even with the tools in the best possible order, it will require much care and skill to do good work.
46. Chisels. - (A.) Carpenters' chisels are used for paring and mortising; the paring chisel should be light, smoothly finished, and ground with a sharper bevel than that used for mortising, for which the heaviest chisel is none too strong.
(B.) Chisels are "tanged" or "socket," according to the method by which the blade and handle is joined. The tanged firmer chisel (Fig. 62, A) is the older form, and is not so strong as the more recently designed socket chisel (B). For light work, the tanged chisel is preferred by many, but more commonly the socket chisel is used, as it is stiffer, not so easily broken, and has no shoulder to catch upon the edge of the wood when the tool is used. The beveled-edge chisel (C) is a favorite tool with pat tern makers; and the mortise, or framing chisel (D), is de signed for heavy use. A set of chisels consists of one each of the following dimensions: 1/8", 1/4", 3/8", 1/2", 5/8", 3/4", 7/8", 1", 11/4", 11/2", 13/4", 2".
(C.) A large, heavy chisel, 31/2|" or 4" in width, called a "slice" or "slick," is used, like a paring chisel, upon heavy work.
(D.) Handles for paring chisels may be of any hard wood and of any convenient shape, as these should not be pounded upon. Although they are occasionally used for cutting small mortises, it is not a good practice unless the tops of the handles are protected by leather or fiber tops. Mortising chisels should have handles of the tough est wood obtainable, preferably hickory, with leather nailed with small brads upon the top to pro tect the wood. If a leather washer is fastened to the handle by a pin or dowel, the wood will in time pound down and the leather be broken out and de stroyed, while if bradded upon the handle, the leather may be renewed as often as neces sary. An iron ring, or ferrule, is used by many to prevent the handle from splitting, but this will bruise the face of the mallet. A hammer should never be used upon any sort of wooden handle, or the handle will be very quickly de stroyed, but a mallet will injure it comparatively little. In fitting the handle to the chisel blade, care should be used that they are in perfect alignment, as otherwise a sharp blow may break the blade.

Fig. 62. - Chisels.
Continue to:
My Books

