Mortise And Tenon Joint
Description
This section is from the book "Workshop Notes & Sketches For Handicraft Classes", by Thomas A. Clark. Also available from Amazon: Workshop notes & sketches for handicraft classes.
Mortise And Tenon Joint
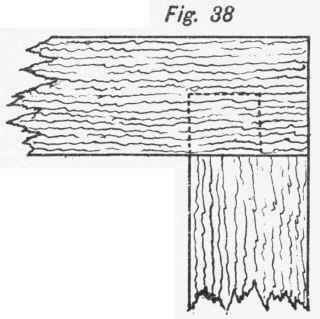
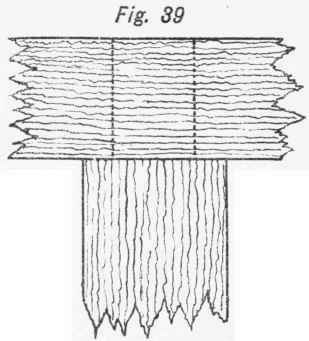
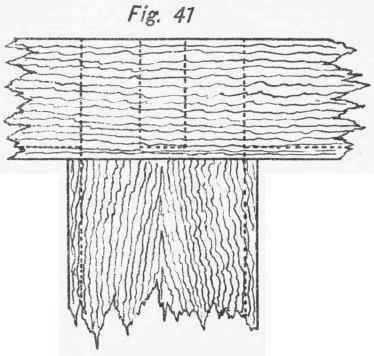
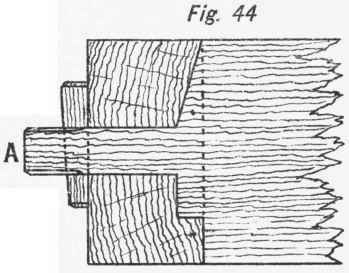
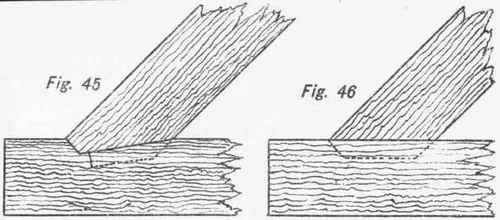
The simplest form of this joint is when two pieces a and b are joined together at right angles, as in Fig. 34. The joint is formed by cutting or mortising out the hole, c, Fig. 35, called the mortise, and on the other piece making a part d, the tenon, of corresponding size, to fit tightly into the mortise. The thickness of the tenon is generally about 1/3 the thickness of the wood, as in Fig. 36, which shows the sort of double tenon used for the bottom rail of a framed door. These joints assume a great diversity of form, because of the variety of timbers to be joined and the way they may be required to meet. Figs. 34-41 show a few joined at right angles. Fig. 42 is a modification so as to show a mitre joint either at one or both sides. Figs. 43 and 44 show the trimmer joint, with the tusk-tenon, a, used in uniting joists and girders or beams together, as in double floors or about a fire place, stair-case, or such like openings in floors. Figs. 45 and 46 show oblique application of the mortise and tenon joint as used between principal rafter and tie beam in a roof truss. The construction of the simple mortise and tenon joint is as follows : - When the position of the mortise has been fixed, and lines drawn, as well as shoulder lines for the tenon, the gauge lines have to be put on for the thickness of the tenon and width of the mortise. This is done by the mortise gauge. All the lines should be gauged from the face or edge, as in the other cases, and on both sides of the wood, if the mortise should have to be cut through. The length of the tenon can only be determined after the most suitable has been selected. If the tenon is to go through, then its length must be a little greater than the depth of the mortise, to allow a chamfer to be taken off all round the point, in order to prevent splitting at the under side of the mortise as it is driven through. This extra piece can be cut off and planed flush when the work is fixed together. A socket chisel should now be selected of suitable width, and, by help of a mallet, the part inside the mortise lines cut out. This is done by starting a little from one end with the first cut and gradually working towards the other. When the end is reached the wood must be turned over, and the same done on the opposite side, after which the loose pieces can be driven out and the mortise finished up to the lines. In making the tenon, a shoulder should be formed with the chisel, as in the halving and rebate joints, before sawing down to the gauge lines. The tenon saw would be the most suitable to form the tenon, as the name implies, and the more accurately this is done the less will be left for the chisel afterwards. For heavy work the rending saw is taken for cutting down the cheeks. Those joints are fixed in many instances, as indicated in Fig. 49, by wedges, a a, the mortise having been made wider at the outside to admit of this. When the tenon does not go through, the joint may either be pinned as at b, or fox-wedged as in Fig. 50. Mortise and tenon joints are widely employed for most articles requiring to be strongly and neatly-framed together. Doors, windows, roof-trusses, many pieces of household furniture, and the majority of framed structures give examples of their use.


Continue to:
My Books

